


Originally, I was going to do this about night photography in general, with a subset of photographing the moon itself, then realized that the moon alone had enough for a full post. So other kinds of night photography will be along in a later post, perhaps next week. No promises though.
As a bare minimum for chasing moon photos, I have to recommend a firm tripod and a remote shutter release, because motion blur is easily a big factor at high magnifications. If your camera has a ‘Mirror Lock-Up’ option, use it – just remember to turn it off afterwards so you don’t miss any shots later on from that unwanted delay. The longest focal length you can manage of course.
[This is simply a variation of the old ‘Sunny 16’ rule, the guide to estimating exposure for any photo in bright sunlight – the one above is occasionally referred to as ‘Moony 11’ instead. Sunny 16 would actually apply just fine, but the moon itself really is a medium-grey tone, yet most people don’t want it to look that way in photos since it doesn’t appear that way to us at night with our dark-adjusted eyes, so using f11 brightens it a bit.]
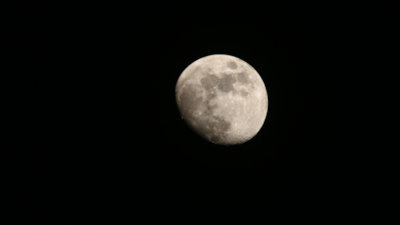
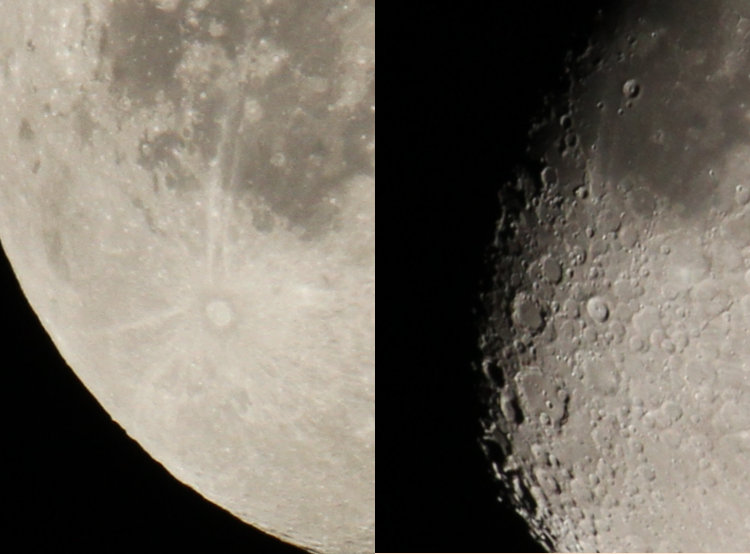
This is, however, only for a full moon, and I’ve said it before, the full moon is boring – no shadows, no definition of the craters and ridges and hoohah. Once you get away from the full phase, however, the light is becoming more oblique, reflecting less directly towards us. This means that, for a half moon (first- or third-quarter, if you want to use the astronomical terms,) the amount of light reaching us is only 1/4 what it was for a full moon, or two stops less, so to compensate, we’d change the aperture to f5.6. You can try out this guide, but I’ll admit that I haven’t hashed it out myself (since I’m writing this far too close to the deadline,) and I’ve seen a lot of guides online that are way inaccurate. My initial examination has found no problems with it though.
Yet, there are no firm guidelines, since the atmosphere isn’t consistent. Getting closer to the horizon increases not just the thickness of the air (shooting at an oblique angle through the shell of the atmosphere,) but the humidity as well, the reason we get such nice colors at sunset so often, and can even look directly at the sun. High altitude smoke and dust can easily be present as well, especially with major fires in the direction of the prevailing winds. These can change the necessary exposure significantly, so the best bet is to shoot several exposures at small variations to capture what you’re after.
Also, remember that the earth rotates so the moon is constantly moving across the sky, roughly its own width in 180 seconds. Don’t let your shutter speed get too slow, or the moon will be blurred from motion – this varies greatly depending on your focal length, but if it’s less than a second, you’re toying with motion blur even with a firm tripod (and virtually guaranteed without one.) Adjust aperture and/or ISO to compensate accordingly.
Using the LCD preview to judge proper exposure. Don’t. Not only do many such LCDs lack the dynamic range to be useful in this context, the brightness can be adjusted too easily, and at night, our eyes are already adjusted for the darkness, so the preview will likely look hugely different from what you’ll see on your computer monitor later.
White balance. Full sunlight, which is the same as “Off.”
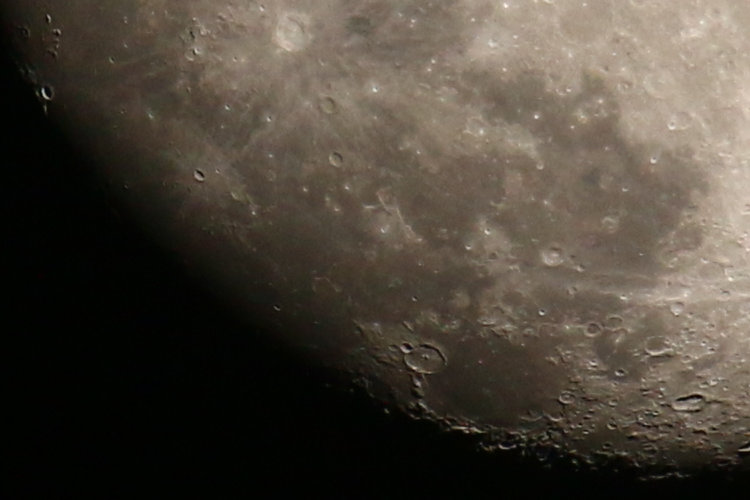
Autofocus. Also “Off,” and here’s why. The moon being so small in the sky means autofocus can have small variations in what it considers “sharp,” and since we’re probably after the best detail, these variations can soften things too much when the image is enlarged. So, go manual, shoot a test, and look at the resulting preview image in the LCD on the camera, zoomed in tightly – most especially, look at the terminator, the line between light and shadow (which is where all the details will show anyway.) If it’s not perfectly sharp, tweak the focus and try again. Once you get that tack-sharp image, don’t touch the focus ring again.
[Caveat: if you’ve been out longer than ten minutes, or the temperature is changing significantly, touch that focus ring again, meaning do the focus routine all over. The changing temperature will twitch the lens elements and barrel and actually affect focus, so you’ll have to correct for this.]
Foreground Elements and Creating a Scene. There are only very narrow circumstances where you can achieve such things – most times, the difference between an exposure that will give moon detail and one that will show earthly elements is so drastic you’ll never do it ‘in camera,’ and would have to resort to compositing the image. The main exception is, soon after sunset (or before sunrise) when the sky has a little light and is thus throwing some of it around onto your foreground. This window is narrow, a few minutes long depending on just what you’re after, so be ready. The other circumstance that can work occasionally is a layer of high, thin, and even clouds that filter out some of the glare from the moon (and occasionally throw optical effects,) lessening that exposure difference.
The day of the full moon in summer means that the moon will rise and set while the sky has a decent amount of daylight – less so the closer it gets towards winter because of the shorter days. However, orbital mechanics dictates that the moon rises close to an hour later each night, so if you’re after a rising or setting full moon without that sky glow, you’ll need to be a day ahead (setting) or a day behind (rising) the actual date of the ‘full’ moon; it will usually be full enough to count for photos.
Earthshine, that glow visible on the dark portion of a crescent moon that comes from sunlight still hitting a large portion of the Earth and reflecting up to the moon. Once again, the difference between an exposure to get Earthshine, and to get detail from the crescent, is still drastically different even with the reduced light from the crescent phase. Basically, pick one or the other for detail, but you won’t get both without compositing (and you’d probably still have to edit out residual glare.) By the way, if you’re attempting exposures that will blow out the brighter areas, try to center the moon in the viewfinder as much as possible, because this reduces lens flare by a small amount.

Ultra-thin crescents. Because of the very nature of crescents, mostly lit on the side away from us, very thin crescent moons can only be seen in twilight conditions, just before sunrise or just after sunset. I have a goal to get one less than 1% illuminated, which is a tall order: such crescents only occur twice a month at best, usually fewer because of orbital mechanics, and the sky has to be perfectly clear. I’ve caught several at less than 3%, but not yet less than 1.

Lunar Eclipses. Fun to watch, interesting to capture especially during totality. There is no useful guideline towards a proper exposure because it varies so much approaching and receding from totality, and even totality depends on where it falls in Earth’s shadow and atmospheric conditions. The best advice is to bracket exposures wildly – and pin down focus tightly before totality hits, because you won’t be doing it afterward (sometimes it’s hard enough to even locate that ‘blood moon’ in the viewfinder.)

Locating the moon and knowing the phases. There are numerous smutphone apps to keep you apprised of the phases, and many of them give altitude and azimuth at any given time. Of course, Stellarium always gets my recommendation because of its accuracy and versatility, especially when chasing those ultra-thin crescents. Something passing in front of the moon (or sun)? This site seems to be working pretty accurately now, despite my first experience with it.
There’s plenty to play with, but plenty of things to keep in mind as well. Experiment freely on those nights that have the right conditions, take notes as necessary, and above all have fun!
