Our next topic in the series is reptiles – you can also refer back to the posts about insects and birds if you like.
Reptiles (and amphibians, which I’ll also refer to here but will use the same term for each just for convenience) are perhaps the most misunderstood of animal classes, which is unfortunate because they’re actually pretty cool. They become more prevalent with warmer climates mostly because they’re ectothermic, or “cold-blooded,” meaning they gain body temperature for higher levels of activity from outside sources. As such, you can find frogs, snakes, and lizards in virtually all of the US, but more of them in the southern states, and for longer periods of the year.
Now, a word about venomous snakes, up front. They do exist, and their venom is in varying degrees of potency, but the risk from such is shamelessly overstated. Snakes cannot eat people, so they have no reason to pursue us or attack us – aggression is simply not a trait of snakes. Biting is used only in defense, and generally requires some serious provocation. While it’s true that we can do this by accident, for instance by stepping on a snake, the circumstances where this can happen are rare. A little knowledge and attention is enough to render any area with venomous snakes completely safe, even for those actively seeking out reptiles.
So, what do I need? Really, very little is needed to pursue reptiles as a subject of interest, and you can do without any of these, but they might help at times.
Proper clothing. All of the snake guides recommend higher boots, thick socks, and long trousers, so I won’t go against this, even though they’re a pain in hot weather and I personally have never run into the faintest situation that would merit them. Does one story mean more than collected knowledge? It shouldn’t. Bear in mind that if you’re looking for ground dwellers, you’re going to spend a lot of time crouched and kneeling and crawling, so dress appropriately for that, and I’ll reiterate the kneepad advice from the insect post. Also think about rough rocky areas, briars, and poison ivy. Then again, when considering frogs and aquatic species, you’ll want to be able to wade, and get into the muddy and marshy areas. I’m very fond of waterproof hiking sandals myself, but be sure they can stay firmly on your feet in sucking mud. In other words, flip-flops aren’t appropriate. For anything, really…
 A little trailblazing knowledge. I was remiss in not mentioning this earlier, but it is easier than nearly everyone believes to get lost in the woods. A compass does you no good at all if you don’t know how to use one, so doing a bit of research (right now, actually) and learning some basic directional tips is time well spent. A good handheld GPS unit is invaluable, properly used, but not necessary if you use good habits. Trails that are obvious in daytime can vanish entirely at dusk, so be prepared.
A small set of binoculars or a monocular. Something handy and able to focus closely. Believe it or not, they’re very helpful in identifying species from a short distance away, letting you stay far enough not to spook them. Many small lizards will be out in the open to bask in sunlight, but will scamper into hiding as soon as you get close, so this makes it possible to confirm that you’re seeing a lizard and not a knot on the tree. Most people never consider binoculars for reptiles, but they’re remarkably useful.
A good flashlight or head-mounted light. Many reptile species are primarily nocturnal, especially most snakes and treefrogs, so having the ability to spot them at night is paramount. It’s even easier when you have both hands free, thus the head-mounted light. As always, extra batteries are important too, especially if you wander even a short distance from known territory.
Observational Journal. As mentioned in the other posts, it doesn’t matter what you choose, whether it’s a pocketable notebook or an audio recorder or whatever; just keep track of what you’re noticing. Most important is getting down all of the details while they’re fresh in your mind. Also important is to refer back to it from time to time, to refresh your memory and compare observations, and help yourself build a pattern of information.
Identification guide. Good versions of these are rarely something that you can carry with you, and it’s more useful to have a complete one than a convenient one. Ones that identify the species within your region, rather than, say, all of North America, are more likely to correctly identify something that you spot. Finding a perfect match and discovering that it lives a few thousand miles away happens more often than you might think, or at least it does for me.
Snake stick. The folklore usually refers to a forked stick, but that’s not as useful as a pole with a short right-angle bend at the end – an old golfing putter even works, but the bend being made from 6mm (1/4″) rod or something similar is better. What you want to be able to do is pin one down for capture, or alternately slip the bend underneath to pick it up by the middle of the body, which doesn’t trigger the defensive behavior in snakes as often as pinning or grasping does. There are dedicated snake tongs, but they are of limited use in some terrains, and without the bend they cannot be used to pin a snake down. The other use, for more than just snakes, is for poking around under things and overturning rocks and logs without putting your hands anyplace close. Anyone’s comfort level with such pursuits is likely to be different from mine, but if it’s a known non-venomous snake species and smaller than my wrist, i simply grab it, but then again, I shrug off snake bites…
Collecting bag. I don’t recommend collecting reptiles at all – it’s better simply to observe them, but you may want to house them temporarily for photos or some such. A fine cloth bag without any tears or even tiny holes is fine – I’ve used a zippered pillowcase. It remains much cooler in hot weather than canvas, and easy to soak to keep aquatic and moisture-reliant specimens (such as newts and treefrogs) comfortable.
A thermometer. This is handiest if you’re really into detailed notes, which I recommend. A digital one with a separate probe works the best, able to get air and water temperatures, but even an old-fashioned glass tube style works fine, you just need a little patience. For those, they work better if they’re hanging on a cord at least a little away from your body, so you’re generally reading ambient air temperature rather than being influenced by body heat.
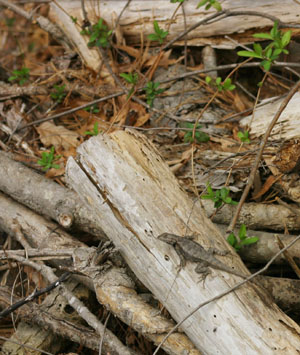 So, what am I looking for? Some basic habits can guide you a lot. First, rock and brush piles are homes to many species, especially if they have an area exposed to early morning sunlight. Most of the ground lizards like walls and fences with plenty of crevices, while frogs and toads usually want some source of water not too far away. A heavy rain, especially in the spring, will bring out more of the amphibians, and treefrogs are primarily nocturnal so this is a great time to start spotting them. Their calls will often give you a good idea where to start looking, though most stop calling when they suspect danger is close.
Watching reptile behavior is a lot harder than birds, at least in part because many things prey on reptiles, so they don’t tend to do a lot in the open. Additionally, many of their food sources are in hiding too. And if they suspect danger is in the area, they usually cease any typical behavior. So more often, you’re likely to stumble onto something interesting rather than specifically going out to observe it. To that end, you’ll want to learn how to walk softly and quietly, since many reptiles gain as much information from vibrations as they do hearing; snakes don’t even have ears. Frequent pauses to simply observe and listen are very helpful, and when you hear even a faint rustle, home in on it visually and wait for signs of movement.
It takes a little practice to pay attention to your peripheral vision (this is one of the places where video-gaming comes in handy, believe it or not.) Another thing that helps is being able to spot patterns, since nearly all animals have some symmetry to their coloration, and distinctive body shapes – I’ve spotted countless snakes from recognizing the body shapes, how they taper steadily and uniformly, unlike branches. And small movements are often indications of reptiles, so when you catch that little flicker, look hard – your quarry might be right there in plain sight, relying on camouflage or simply remaining motionless to avoid attention. This works for you too, by the way – remaining motionless does more for not being noticed than anything else.
Warming patches. Because of their circulatory system, many species need to warm themselves in the sun, especially if the night was cold. Snakes can often be found basking in the early mornings in the spring and fall, since the nights are colder then, and they sometimes need the extra energy to digest the evening’s meals. Very often, this means roads and sidewalks, which warm quickly in the mornings and retain heat in the evenings. Turtles need the same, and adore logs and rocks near the banks that provide good sun yet deeper water alongside for quick escapes. Fully aquatic newts and larval stages, as well as some frogs, will bask submerged in shallow water instead. For the ground lizards, it sometimes takes very sharp eyes to see them in their native cover because they blend in so well. Learn these types of areas well, so that you pause and examine them closely on first sighting, before you approach and scare off whatever was basking thereon.
By the way, snakes do not have eyelids either, so may sometimes be fast asleep while basking and we think they’re looking right at us. They may not notice slow subtle movements, but will almost always wake up when a shadow falls across their eyes. And while I’m on the subject, snakes with cloudy eyes are very close to shedding, and cannot see very well – they will usually be more irritable because of this, and should simply be left alone.
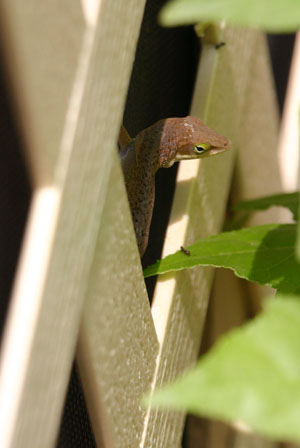
Habitats. Just about anything serves as a reptile habitat, so a complete list is rather difficult. Since we talked about sunlight, think also in terms of places to seek shelter, to cool off when the day’s too hot, and of course, places that provide plenty of food – very often this means insects, for the frogs, lizards, and smaller snakes. Moist earth is another attractor, because it means worms, grubs, and burrowing beetles. Areas with lots of crevices are popular with numerous species – people that don’t like snakes in their yards are advised to keep rock and brush piles from accumulating, so naturally that’s what we’ll be looking for. Meanwhile, anoles like low plants and bushes. Treefrogs usually like the higher tree canopies, but venture down for food (all year) and mating (in the spring), especially when the weather’s nice and wet. Frogs, of course, like fresh water, especially with still areas for egg laying.
Investigating. Naturally enough, turning over logs and rocks will reveal more species than simply waiting for them to pop up, but this is where you expose yourself to the greatest danger as well, especially in areas with venomous snakes, but also where there are stinging and biting insects. First rule is, always assume that whatever is underneath is the most hazardous species in the area, and act accordingly. Never put your hands blindly under a log or rock, even just the edge. Roll the rock or log towards you, so it is between yourself and whatever used to be underneath, rather than away from you and leaving a great opening for it to strike/swarm/spray/hypnotize. Do this while standing with feet firmly planted, so you can leap away as needed. Also don’t leave yourself the opportunity to roll it onto your feet. By the way, most venomous snakes can sense body heat and will aim for the warmer object in the vicinity, so ensure this is not your hand (mostly by keeping it out of the vicinity.)
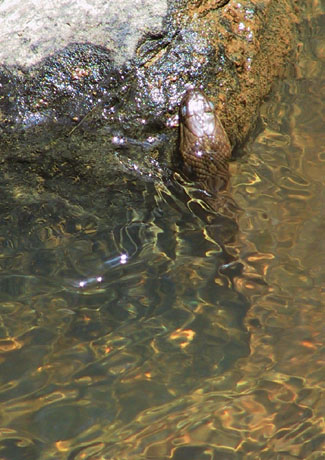 When lifting rocks in a stream, it usually works better to pick an area with a decent current and expose into the water flow, or sideways to it, so disturbed silt will be swept away from the area you’re trying to see rather than into it. The same goes for wading upstream rather than down. Of course, it also helps to be facing a little towards the sun, rather than away, so you’re not trying to see into your own shadow (nor alerting species to your presence with the same.) This may mean choosing your time of day carefully.
Many reptile species, especially the small ground lizards, will freeze and count on their camouflage when danger threatens, but often not for very long. It’s easy enough to wait them out, especially if you caught a glimpse of movement – just remain motionless for a few minutes, and frequently they’ll assume it’s clear and reveal themselves again. When photographing, raise the camera and wait (this is when you find that holding it up to your eye for a while is much more fatiguing than suspected) – when the subject moves again, you won’t spook it back into hiding by having to raise the camera.
Aquatic species. Once you’ve frightened a frog into the water, you can just about forget seeing it again if you’ve lost sight of it initially – they’re remarkably good at seeking cover and waiting out the danger. However, snakes cannot hold their breath half as long and usually haven’t prepared themselves for a sudden dash into the water, so may surface quickly. But they will usually work towards cover of some sort, like border plants or brush, and bring just their nostrils and eyes above the surface to check for danger for several minutes. Turtles can stay down for a long time, but basking is popular and often competitive, so waiting for a bit near the abandoned log may produce investigating heads peeking from the water fairly quickly. Waiting for them to assure themselves that it’s clear enough to climb out takes a lot longer, though – sometimes it’s more useful to remember the spot and move on, to check it on the return trip. Newts and salamanders rarely surface and instead poke around under rocks and submerged leaves for food, so revealing them takes some poking around yourself, usually very gently so they’re not induced to flee.
 Handling. Provided you’re quite assured of species identification, handling of most reptiles isn’t terribly difficult. All species may bite, which is best to be avoided, but I’ve been bitten by so many things that I find it overrated as a danger (squirrels are worse than any reptile that has bitten me, but I’ve never come close to being bitten by a venomous species either.) Far more likely, however, is having something defecate on you, the prime defense of countless species. This is often pungent and hard to wash off, and of course you don’t want it in open wounds, but otherwise the defense is usually harmless – it tastes bad (so I’m told,) which detracts from the primary danger of being eaten. Turtles, and some frog species, also wield claws on the hindlegs which can be painful. Smaller species are of course delicate, and can be hard to restrain without risking injury. Snakes are best grasped gently just behind the head with the rest of their body supported, or occasionally they can be picked up directly in the middle of their body, which remains balanced and doesn’t strain them. Frogs and smaller lizards can usually be scooped or cupped, and this will often require both hands to enclose them fully without gaps – your hands should be perpendicular to each other, the fingers of one hand closing the outside edge of the other, and even then, salamanders will show you every gap that you missed ;-). Virtually no reptiles have any fear of falling and will throw themselves from your grasp at any height, so it’s better to keep them low enough that they’re not injured when this happens.
Always remember, though, to wash hands thoroughly after any and all handling, due to the large number of illnesses that can be transmitted. This means good soap and scrubbing, not rinsing in a stream or splashing on the sanitizer.
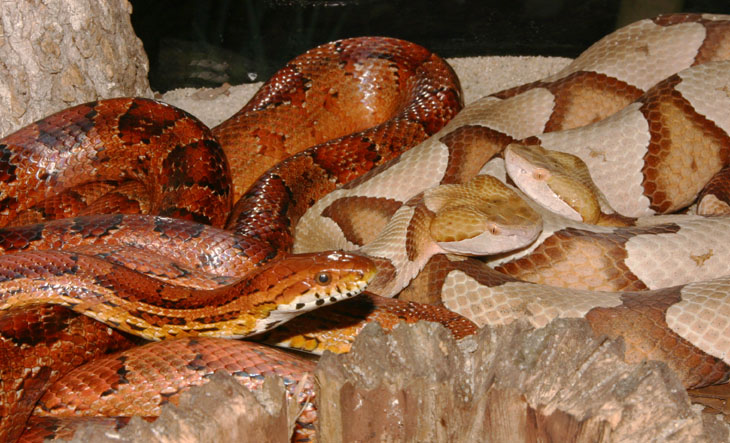
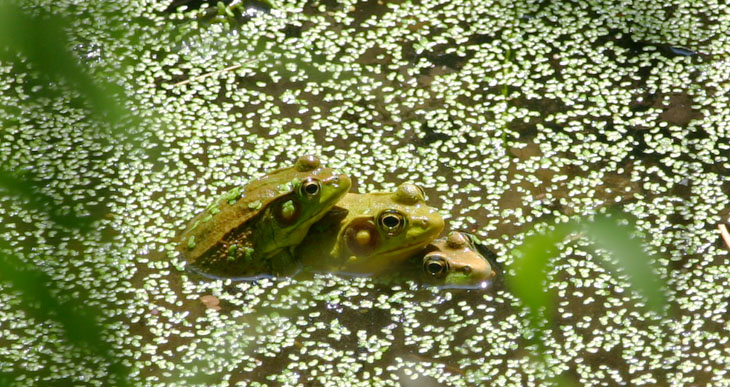
Identification. As always, a good guide is important, but not often very handy to bring with you. Learn the dangerous species first – you can tell the difference between the venomous Copperhead (Agkistrodon contortrix) and the harmless Corn Snake (Pantherophis guttatus) in the photo that opened this post, right? It’s important to know that reptile species are widely variable in color, even among the self-same individual – see a snake immediately before and after shedding and you’ll know what I mean. Instead, what you’ll want to pay attention to is pattern. A camera comes in handy to help identify species, but even then, it might not work. The second frog seen here could not be positively identified because the key traits were the belly coloration and the webbing on the hind feet; with turtle species, it can be the number or shape of the marginals (the edge pieces of the shell, or “carapace”) or the stripes along the eyes. It takes time and practice to even know what you should be paying attention to, so don’t get discouraged.
 Keeping notes. “Be meticulous” is the key here. Dates, times, seasons, temperature, weather conditions – all of these may hold clues as to why you’re seeing certain behaviors, or may indicate patterns. And as I said before, it’s also easy to mistake patterns too, especially if behavior depends on aspects we cannot distinguish ourselves. What you really want to accomplish, however, is knowing what typical behavior is for certain species and classes. Lizards virtually always appear more agitated than snakes – this is normal. But do you know what signs denote territorial anxiety?
Housing species. Once again, I don’t recommend this. The diet of wild animals is often hard to replicate, making it easy to introduce developmental issues and illnesses, and they often depend on both certain temperatures and UV levels as well. Countless reptiles can harbor zoonotic organisms – ones they can transmit to humans, like salmonella. And of course, no matter what the aquarium, it isn’t going to compare to their life in the open. But there isn’t even any reason to keep them; reptiles possess very simple brains, which means that they never bond to people, never learn anything, and really have no ‘personality.’ They’re simply there, requiring care but doing little besides eating and sleeping. I will, on occasion, do temporary housing to gain certain photos, but this lasts no more than a day or two and they are always returned to where I found them. I’m also careful not to do this during mating seasons, after obvious meals or with laying individuals. Better overall not to even consider it, and recognize that the point of naturalism is to let it remain natural.
So once again, with all that said, go out and do some observations! Reptiles display habits and behavior in a class all their own, and are often more abundant than you might think. They are more challenging to pursue as a subject than insects or birds, and may require more effort and patience, but they’re just as interesting and informative. Have fun!
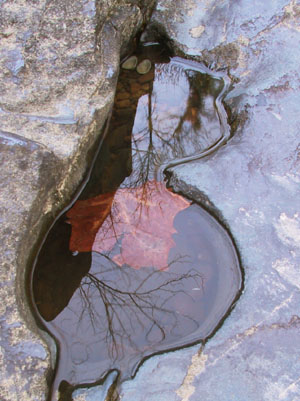 Yet, the photographer can only work with what’s present (we will ignore the studio photographer for the time being, and the select few who do digital composites and crap like that.) They’re handed a collection of elements almost totally out of their control, and they have to portray them in a manner that still produces a strong image. They usually cannot choose a background or foreground, and cannot leave out nonartistic elements except for selectively cropping them from the frame. They may wait for the right light, the right clouds in the sky, the right position or expression of their subject. They might seek a different vantage point that produces the right background or contrast (or reflection,) or use camera technique to purposefully blur or soften elements and draw attention to their subject. And in many cases, a particular aspect of their subject existed for fractions of a second only, and they had to anticipate this and capture it at its ideal time. Good photographers actually have to know something about art in the first place, in order to put all of the above actions to good use.


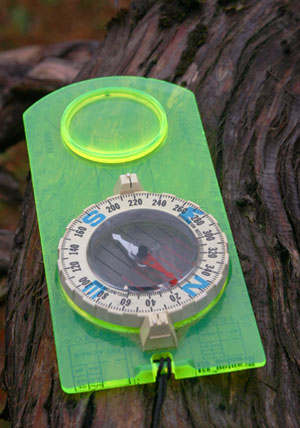 Here’s another fun item to bring along: a halfway decent mapping compass. Know about


 A little trailblazing knowledge. I was remiss in not mentioning this earlier, but it is easier than nearly everyone believes to get lost in the woods. A compass does you no good at all if you don’t know how to use one, so doing a bit of research (right now, actually) and learning some basic directional tips is time well spent. A good handheld GPS unit is invaluable, properly used, but not necessary if you use good habits. Trails that are obvious in daytime can vanish entirely at dusk, so be prepared.
 So, what am I looking for? Some basic habits can guide you a lot. First, rock and brush piles are homes to many species, especially if they have an area exposed to early morning sunlight. Most of the ground lizards like walls and fences with plenty of crevices, while frogs and toads usually want some source of water not too far away. A heavy rain, especially in the spring, will bring out more of the amphibians, and treefrogs are primarily nocturnal so this is a great time to start spotting them. Their calls will often give you a good idea where to start looking, though most stop calling when they suspect danger is close.
 When lifting rocks in a stream, it usually works better to pick an area with a decent current and expose into the water flow, or sideways to it, so disturbed silt will be swept away from the area you’re trying to see rather than into it. The same goes for wading upstream rather than down. Of course, it also helps to be facing a little towards the sun, rather than away, so you’re not trying to see into your own shadow (nor alerting species to your presence with the same.) This may mean choosing your time of day carefully.
 Handling. Provided you’re quite assured of species identification, handling of most reptiles isn’t terribly difficult. All species may bite, which is best to be avoided, but I’ve been bitten by so many things that I find it overrated as a danger (squirrels are worse than any reptile that has bitten me, but I’ve never come close to being bitten by a venomous species either.) Far more likely, however, is having something defecate on you, the prime defense of countless species. This is often pungent and hard to wash off, and of course you don’t want it in open wounds, but otherwise the defense is usually harmless – it tastes bad (so I’m told,) which detracts from the primary danger of being eaten. Turtles, and some frog species, also wield claws on the hindlegs which can be painful. Smaller species are of course delicate, and can be hard to restrain without risking injury. Snakes are best grasped gently just behind the head with the rest of their body supported, or occasionally they can be picked up directly in the middle of their body, which remains balanced and doesn’t strain them. Frogs and smaller lizards can usually be scooped or cupped, and this will often require both hands to enclose them fully without gaps – your hands should be perpendicular to each other, the fingers of one hand closing the outside edge of the other, and even then, salamanders will show you every gap that you missed ;-). Virtually no reptiles have any fear of falling and will throw themselves from your grasp at any height, so it’s better to keep them low enough that they’re not injured when this happens.
 Keeping notes. “Be meticulous” is the key here. Dates, times, seasons, temperature, weather conditions – all of these may hold clues as to why you’re seeing certain behaviors, or may indicate patterns. And as I said before, it’s also easy to mistake patterns too, especially if behavior depends on aspects we cannot distinguish ourselves. What you really want to accomplish, however, is knowing what typical behavior is for certain species and classes. Lizards virtually always appear more agitated than snakes – this is normal. But do you know what signs denote territorial anxiety?

 One of the aspects convincing to her of a god, she admitted, was the behavior of some animals. Mother bears protect their cubs, and salmon swim upstream to spawn, where they die, and their bodies nourish the young (I’m just reporting what she told me – I know the current takes away whatever nutrients they might have contributed long before the eggs hatch.) I hadn’t told her that I was a nature photographer and science enthusiast, so she didn’t realize the opening she left me, but I was happy to fill it anyway, with a brief rundown of natural selection.
 And so, our saga resumes where it left off, with our heroes trapped within the confines of a completely non-treacherous and non-threatening bird park…
 I’ve spoken before about
 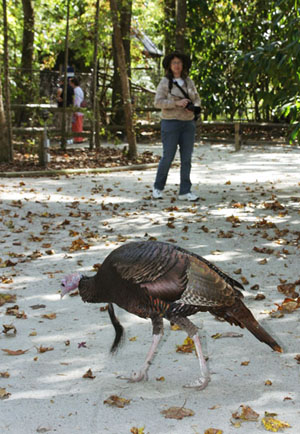 At one point we noticed a local native Wild Turkey (Meleagris gallopavo) hanging out on the outside of the peacock cage, who was only mildly anxious at our approach. A little later we questioned a park worker, who informed us that it was actually a wild fowl, not a park resident, who had taken a shine to the peacocks and turned stalker. I admit to being a little curious over this, since both the peacock and the turkey were males, but I’ve seen territorial disputes between caged and wild birds before, and this situation didn’t have that appearance. (I digress for a brief anecdote: Many years ago while visiting a wildlife refuge in Florida, I saw my first Pileated Woodpeckers, surprisingly large birds, and then checked out the nearby rehabilitation clinic. There, an unreleasable captive who’d had a wing amputation would get apoplectic over a wild visitor, who would periodically sit on the timbers right outside the captive’s fence and beat a territorial drumming, well aware that the resident inside could do nothing about it. And you thought only humans could be sadistic…)
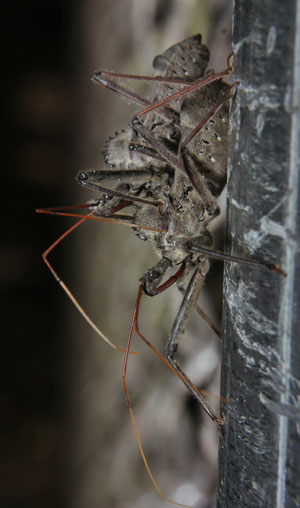 Despite my desire for some different subject matter on this trip, I yielded to temptation when I found a pair of Wheel Bugs (Arilus cristatus,) a variety of assassin bug, mating on a fence post. Their piercing proboscises, for draining the insides from the other insects that make up their food, are plainly visible from this angle. This past year has been almost entirely dedicated to bug shots, without my intentions – I’ve simply been unable to do enough traveling to provide opportunities for other subjects, and have been milking the local area for everything I can. I probably should begin a bobcat or fox portfolio project…
 Exuberant Skepticism is a book that I picked up out of interest in the topic, and the reputation of author Paul Kurtz, who is the founder of the Center for Skeptical Inquiry, the Council of Secular Humanism, a fellow of the American Association for the Advancement of Science, and a longtime contributor to Skeptical Inquirer magazine – seemed like just my cup of tea. Yet, it defeated me, and after numerous attempts over an extended period of time, I could not finish this book; thus the post title. While I have avoided chastising certain publishers of reviewed books regarding their cover art choices (mostly the complete lack thereof,) this one might have held a hint, as Kurtz looks out from the cover in undisguised contempt of those damn kids on his lawn, daring the potential reader to make any connection to the book’s title.