



This one really should have been covered earlier, but it’s not like people have signed up for a course or anything, nor did earlier posts rely on it. So let’s look at stability, or steadiness, or bracing, or reducing camera shake.
From working in a photo lab (you know, back in those film days, before cellphones even,) I can tell you the number one cause of poor photos is motion blur, the majority of that from the camera itself – or more specifically, the photographer. Lighting follows close behind, and the two are often related, but we’re dealing with camera shake right now. The shutter is open as long as it needs to be to let in adequate light for the exposure; sometimes this is extremely brief and camera shake is highly unlikely, and sometimes it’s notably longer and shake is virtually guaranteed without some kind of stabilization, the best choice usually being a tripod.
There used to be a common rule on avoiding camera shake/motion blur when handholding a camera: your shutter speed should match or exceed 1/[focal length] seconds. This means, with a 50mm ‘standard’ lens, your shutter speed should always be 1/50 second or higher, but with a 200mm telephoto lens, it should instead be 1/200 second, or higher. The reason being, the more the magnification, the more the shaking is magnified too. While not as distinct a rule now with electronic lens and camera stabilization, it nonetheless is not a bad rule to follow – it can’t hurt, in other words.
Also note that, below 1/30 second, you’re venturing into the realm of almost always having some motion blur – some people are better than others, but below this point, you need to be aware that you’re now actively attempting to avoid it with, at the very least, conscious efforts to remain still.
[Side note: moving subject matter is going to make things worse of course, and ‘motion blur’ can be caused by either the photographer or the subject, but at the lower shutter speeds, the likelihood of ‘both’ is significant. Not a lot you can do about moving subjects, except either getting the shutter speed higher in various ways, or using that motion to your advantage.]
So first, good stable handling. Right hand firmly on camera, thumb against thumb rest on camera back if it has one, palm down right side of camera body. Left hand underneath camera body, fingers extended forward to operate zoom and/or focus rings on lens as needed. If it’s a longer lens, this hand goes under lens instead, as far out as feasible, still within reach of rings as needed, but the hand can even extend out to the end of the lenshood if no adjustments are needed – just keep your fingers from extending into the frame over the end of the hood. Arms down tighter to body, elbows against ribs (except where the hand on the longer lens prevents this.) Camera up to eye, further bracing against face. Gently press shutter, don’t slam it – this won’t get the photo any faster and can easily jiggle the camera through the tension. When needed, especially when the shutter speed is dropping low, exhale gently and let the camera ‘settle’ in your hands as you lead up to the shutter release. And preferably, do this every time. At the least, it develops good habits and automatic awareness.
One technique that has helped me, with longer lenses, is to aim slightly above the subject/framing and slowly let the lens descend into position, that ‘settling’ above. This seems to relax the muscles better than having them all fighting one another through being too tense – this is also what exhaling does.
Still, this isn’t enough to prevent shaking in many situations, so what else can we do?
Tripod of course. There’s a posed question and answer often used in these regards: How often should I use a tripod? As often as you can. Most especially, the more value you’re placing on your images, or the more you might want to enlarge them, the more you should use a tripod. And, the best one you can afford and reasonably carry (which is not always the most expensive.) Even a cheesy little department-store tripod will help in some situations, but they’re deceptive – they can make you think you have more stability than you really do, and can even vibrate in a stiff breeze.
Sturdier means heavier, unfortunately, and there really aren’t ways around this. That weight is part of what keeps the tripod steady, through mass and inertia and even settling into the soil better, which is why the lightweight options like carbon-fiber can’t replace the heavier versions. Also, carbon-fiber tripod legs almost always have twist leg locks instead of levers, and these are more prone to both slipping and jamming – levers are far superior.
Heads are varied, and must be suited to taste. What they are and what this means:
Pan/Tilt. Typically what you get on those department-store tripods, often with a crank for at least the center column. Each axis is adjusted independently, requiring the loosening of multiple screws/levers to make any adjustments, so the slowest of the options, and usually do not tighten very well. Will almost always ‘settle,’ or shift from the weight of the camera after tightening. Also cannot handle a camera and lens with any decent weight to them at all, most times. Still, usually the lightest option available, often the smallest, so if these matter, it’s still better than going without.
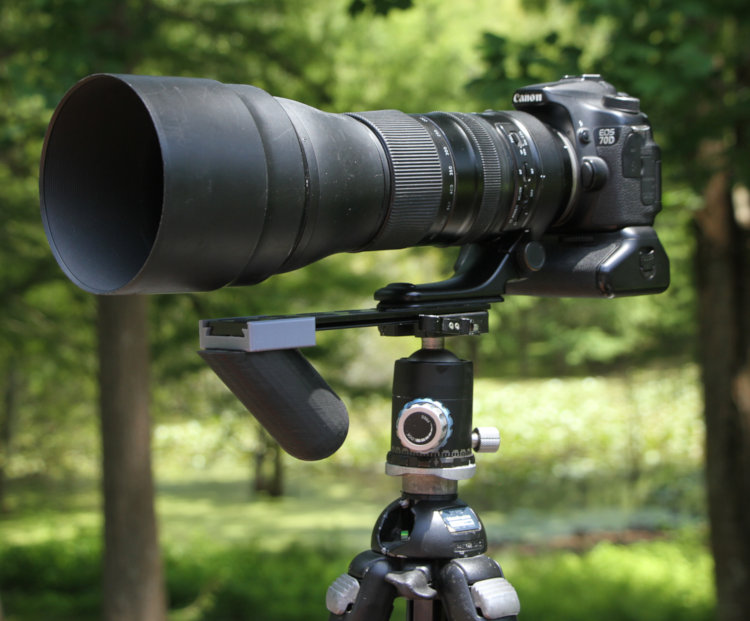
Ballhead. [Seen at top] Often considered the best for overall purposes, and certainly nature photography. One locking lever/knob loosens everything but the center column, allowing movement in all axes; many also have a separate pan lock to just allow rotation around vertical axis for panning. Re-aiming is quick, but a firm grip must be maintained on the camera when doing so. Ballheads come in a variety of sizes and strengths – the more weight they have to carry, the larger they should be. Many suffer from ‘settling’ under weight, especially at odd angles, though not as bad as pan/tilt heads usually are. It’s not quite a heinous as, “You get what you pay for,” but trying to go as cheap as possible will not help. The gold standard is Arca-Swiss, usually the B1 – also among the most expensive. [I have not used one, because I am cheap, and cannot vouch for their value, but I get by with one less than 1/4 the price, so…]
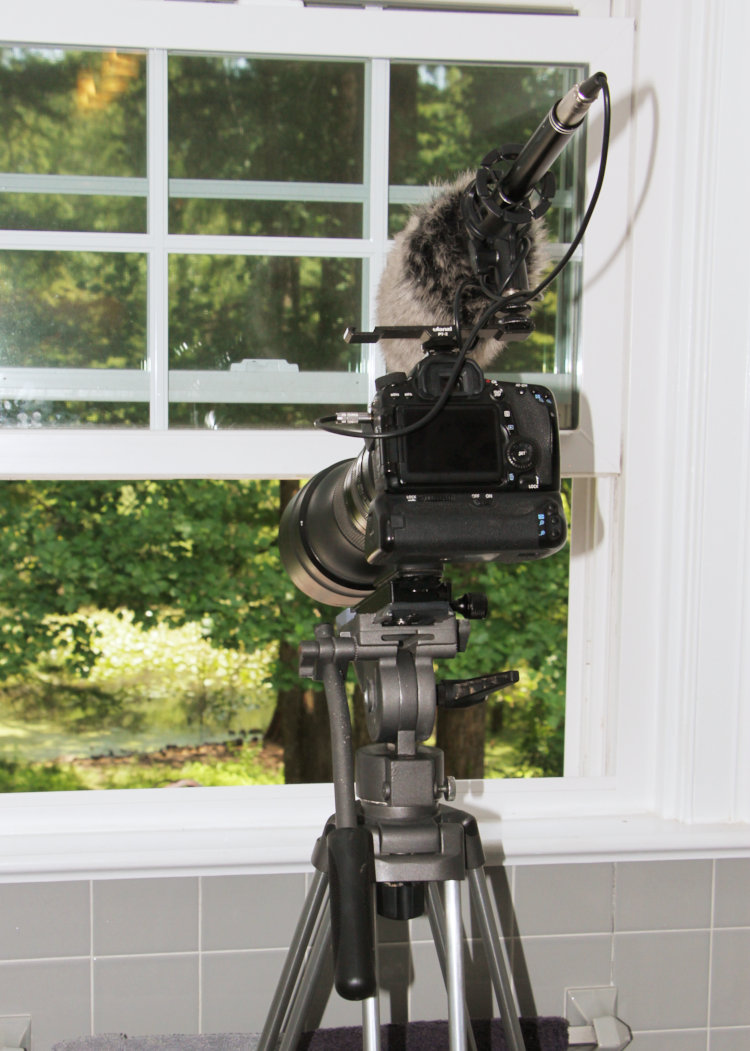
Fluid Head. A variation of pan/tilt, but intended for video, these have dampening to help reduce or prevent sudden movements and jerks. They also have a long arm out the back to help with aiming, though this gets in the way when aiming high enough. A light camera rig can get by with an inexpensive fluid head, but the heavier your camera and lens, the more you’ll want a decent head. There is a careful balance point between the length of the lens and the tension to prevent sudden movements in the video.
Geared head. Used mostly in precision camera work where minor adjustments are crucial, perhaps even measured by degrees. Geared heads are a variation of pan/tilt but all adjustments are made by turning knobs or wheels – very slow, but not intended for quick re-aiming. Chances are, if you need a geared head, you’re well beyond needing my advice here.
Tripod Legs. If you’re looking at the different heads above, you’ll want legs that allow switching them as needed. Your uses will dictate what you’re looking for. Travel and backpacking photography will necessitate a smaller, lighter set, while long telephoto will virtually demand a heavier set. The tripod at full leg extension should bring the camera to eye level without raising the center column, or close to it at least. The center column is the weakest link, allowing the most vibration even when the legs are firmly planted and stable, so extending this is the last resort – you are better off sitting on the ground to aim the camera rather than extending the center column, especially when the shutter speed gets slower. Also, the least leg extension you can use to get the job done, the better, especially with telephoto lenses which magnify those little vibrations. Lever locks on the legs, as mentioned above, are far better than twist locks, also usually allowing tension to be adjusted on ‘full tight’ – you shouldn’t have to crank the levers too hard, but you also don’t want the legs to start slipping, especially as they get colder and contract a little.
More leg sections mean a shorter tripod when collapsed, but also more instability, and more time to extend. A non-geared center column is fastest and easiest to adjust, but again, hand on the camera when loosening.
Independent spread legs (meaning you can open/spread each by whatever amount works best). Yes, get them, especially if you might work anyplace that doesn’t have level, prepared surfaces. Far too versatile for the minimal extra cost, but most decent leg sets offer this anyway. Linked legs that all open together by the same amount are usually found on department-store tripods, video tripods, or telescope tripods, but really, there’s no compelling reason to have them, even if they open slightly easier.
Center columns that pivot or can be removed and mounted sideways. I’ve had these on multiple sets of legs, and use them less than I thought, mostly because the subjects that benefit the most, like macro work, don’t permit the leg spread that keeps the camera stable too often. And mind that leg spread, because using such columns changes the balance hugely – it becomes very easy to bump the tripod and send the whole rig tumbling. A counterweight on the opposite side is never a bad idea. Overall, the option can’t hurt, but may not help nearly as much as imagined; they’re useful for straight-down things like copy work though.
Multiple tripods. Not a bad idea, especially if your uses are varied – I have several, and several different heads. Importantly, if you have any kind of quick-release (which is very useful,) all heads need to be compatible or you’re negating the value of leaving the plate on your camera(s).
Tighten those quick-release plates on the camera(s) periodically, too. I made a mini-screwdriver for my keychain that fits the locking screws better, and is always on hand.
Add-Ons. There are several different things that can be added to tripods, from straps, to weight hooks on the bottom of the center column for added stability, to leg padding (I just use pipe insulation, many times cheaper,) and so on. Only one, that I know of, is aimed at addressing one of the more common issues when using long lenses.
Any decent-sized lens offers a tripod mount that keeps the entire rig more balanced, rather than relying on the camera body to hold it all up – they should always be included in the cost of the lens as a standard accessory, but not every manufacturer does that. The problem is, support at the balance point means any force on the ends, camera or lenshood, sets up vibrations that can soften the shot, especially if the shutter speed is slower – and merely tripping the shutter (with the reflex mirror slapping up suddenly) is enough to do this. Using the mirror lock-up option can help, but it means a delay in every shot as you wait for the vibrations to die down. Manfrotto, however, makes a long lens support (Manfrotto 359,) an additional stabilizing arm that goes between tripod and camera body to dampen those vibrations down significantly.
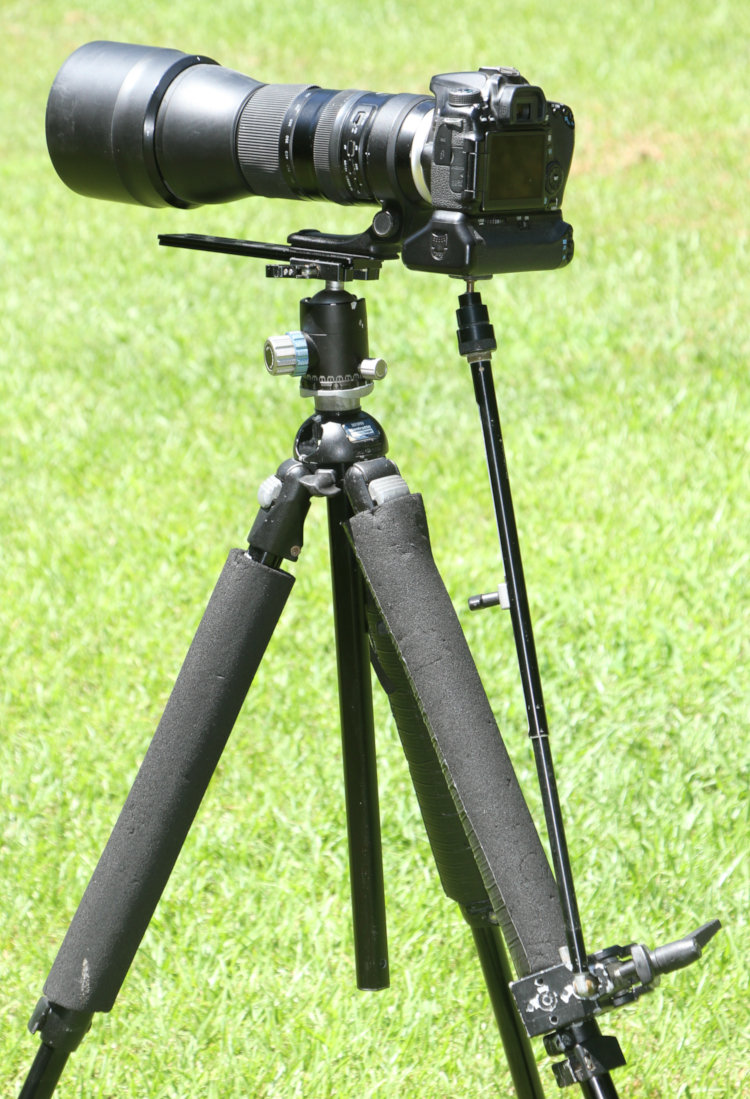
This does help significantly – but generally in pretty narrow circumstances. It has to be tight of course, but there are three things to loosen to adjust it, not counting the tripod head itself. So for tracking wildlife, well, you’re not, not and getting any benefit from the LLS, so it’s pretty much for fixed subjects, and works better for shutter speeds between 1/15 and several seconds – this is more like astrophotography. It’s also a significant addition to the stuff that’s carried, so I usually end up putting it away and the forgetting to get it out when it’s really useful for those moon shots. I’m, again, endeavoring to do better.
Non Tripods.
Monopod. One leg, straight under the camera (more or less.) Obviously not as steady as a tripod, but surprisingly useful and easy to maneuver, handy for sports and occasionally video. While supposedly preventing movement only vertically, they hold the weight of the camera and so a lighter touch is needed to keep it from moving in any other direction. In short, I recommend having a decent one, especially when hiking or when setting up a tripod is detrimental (noise, time, space, terrain, etc.) The number of leg sections is less of an issue here simply because they’re usually vertical, so saving some space is easier. I would recommend one with at least a tilt head, because shooting at anything other than level is problematic without it – you end up leaning the entire monopod and negating a lot of the value. My biggest issue right now is, I have not upgraded to one that has the same quick-releases as my tripods, and so have to remove those plates when I use one. I know, I know, do as I say, not as I do…
Bean bags/sand bags. Just what they say, a loosely-packed bag that can nestle the camera when used on the ground, or a surface at a convenient height. Never used one, can’t see the value (especially when lugging it along.) Good, I suppose, for when you’re crawling through the undergrowth to shoot that shy subject unobtrusively from ground level, but I’ve done that maybe twice – I know I balled my fist under the telephoto lens tripod mount one time…
Step strap. I don’t know what you call these properly, if they even have a name – they’re mostly homemade. A strap or rope that attaches to the camera tripod screw and dangles; step on it, pull camera up to tighten strap, the tension is supposed to help stabilize it. Useful in places that don’t allow tripods or monopods, easy to pack into a bag of course. I’ve made two of these, never used them. Perhaps a help, but they don’t have the weight-carrying ability of a monopod, in fact making it worse since you’re pulling against the tension of the strap too.
The environment. You’ll end up using this from time to time, perhaps often. Just lean against a fence, tree, post, other person (permission is advised) – whatever works. Slightly worse than a monopod, but still helpful in a pinch. With a long lens, bracing the end of the lens works better, helping to prevent pitching, but be careful of how much lateral pressure you put on the lens, since it won’t help the zoom function or the camera mount itself – I usually brace the side of my hand on the tree/post, and then rest the lens on my extended fingertips.
You can also lean against a wall, especially if you’re like me and can’t stand upright without faint swaying (I would have been a big target for drill instructors in the military, had I been stupid enough to enlist.) Sit on the ground and brace on your knees. Prop on your bag or pack. Any little bit can help.
Technology. By this I mean, stabilizing systems in the lens or camera – there are a lot of them now. They work amazingly well – just, not to the extent that they’re usually advertised, unless you’re allowing for a lot of slop from the weasel wording of “up to four stops.” Typically, cut their claims in half and you’re more in line with what they can actually deliver, but this is nothing to sneeze at.
Here are the limitations, though. If you’re on edge or venturing over that guideline I gave first about shutter speeds, you’re probably fine, especially so if you’re maintaining the other advice about keeping the camera steady. So let’s go with the claims of “up to four stops,” which likely means just two. We have a 100mm lens on, which would mean, without accounting for the stabilization, we shouldn’t drop below 1/100 second shutter speed. Halved, and halved again (two stops) would make that 1/25 second – we could probably get away with that with the stabilization. Three stops is 1/13, maybe. Four stops is 1/6, doubtful.
Let me put it this way. I decided once to attempt a moving water shot without a tripod, setting the camera Shutter Priority at 1/5 second shutter speed to get the water blur I wanted. The Canon 18-135 IS USM lens managed it – for one out of four frames, and that was if I didn’t blow it up too far. I was endeavoring to remain steady, and was shooting at 19mm, so by the rule I should have been set for 1/20 second – 1/5 is only two stops below that.
Macro work. Definitely crucial insofar as both magnification and focus distance go, macro should benefit from a tripod every time. But that focus distance throws a wrench in the works, as do most macro subjects not being someplace where a tripod can be set up easily – more often than not, the close distance means the legs will be right at or even underneath the subject, probably disturbing the very branches its on when trying to set the tripod up. Then, you have a useful working distance of perhaps 20cm, likely less, which means fine adjustments of the tripod to get within that narrow range, and worse if you’re doing very high magnification.
Enter the macro slider, a device between camera and tripod head that allows fine adjustments at least forward and back, but also side-to-side for the better ones. Slick, right? Yeah, their actual adjustment distances are usually less than 14cm (mine maxes at 6,) so you’re still having to get the tripod in too close, and at the right height, and at the right side-to-side position – by this time your subject has buggered off. I usually just go freehand and have an adequate flash to keep the shutter speed at 1/200 second, and with high magnification, I’m often weaving gently and firing off the shutter just as focus closes in. It’s hit-or-miss, certainly, but far less involved than using a tripod – I can fire off ten to twenty frames in the time it takes me to try and set up ‘properly,’ and that still means the subject might get disturbed by the very action.
Studio macro is a little better, and can take advantage of a tripod, but that’s slotted in for it own Tip Jar topic later on, so I’ll go into detail then.
So what’s the overall advice? Well, like most of these things, a lot of it is up to you, your shooting style, your subject matter, your willingness to carry extra equipment, and your budget. I’m here to try and help you understand what those decisions might mean without you having to find out through trial-and-error.
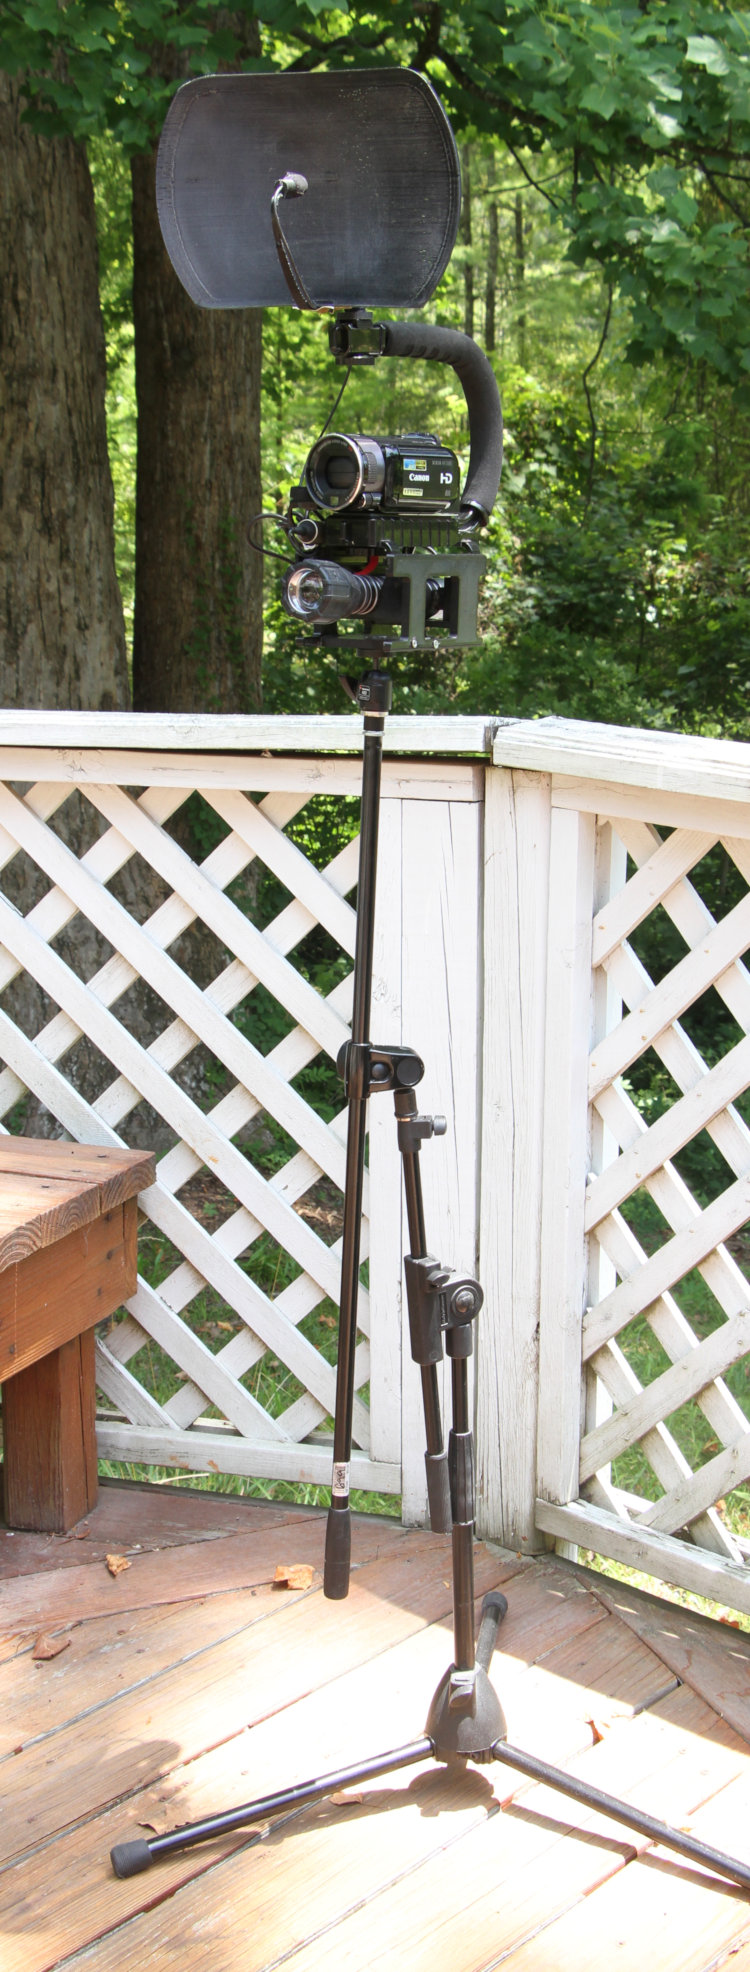
Here’s a silly, perhaps interesting example. After chasing night video of the pond denizens with a handheld camcorder, I switched to a monopod, which greatly increased stability. But it also meant the rig was constantly in my hand, which hampered distributing corn or, really, doing anything else. So at the moment, I’m using a microphone stand, with an adapter to permit the mounting of a small ballhead, one just adequate for the weight of the night video rig. This allows me to simply stand it up out of the way when not immediately in use, but the offset arm also allows me to get lower for macro work, albeit with a bit less stability – I have to support part of the weight by hand, but at least the rig is limited in its movement.
Hope this helps!