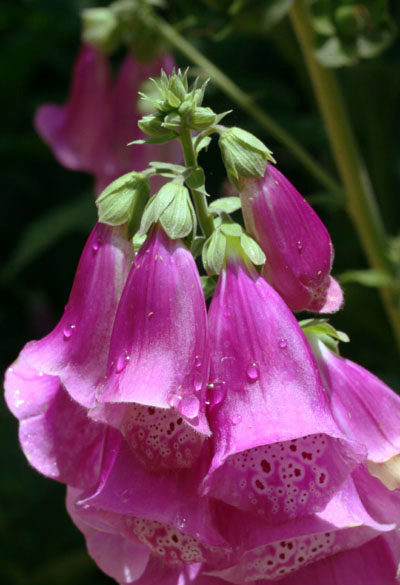
 So, for this Monday color we have an image that’s faintly unsettling to me. Not for any peculiar associations I have with the Digitalis family (though in truth we haven’t gotten along since that incident at the airport,) but because the color seems off, and not able to be corrected in any way. It has the appearance of something that had originally been shot in monochrome, like in the ’40s, and was later colorized – just not quite there, not ringing true. For instance, look at the leaves and stems at the base of the blooms; that hue of green lacks vibrancy and authenticity. In most cases when seeing this, I would tweak the color away from blue, but then that seems to change the color of the blossoms away from an accurate rendition of those. And it’s possible that the greens of this particular plant really were this hue.
This is a typical aspect of any kind of photography, but most especially digital, where the sensors have their own particular color casts and the in-camera processing (in part due to user settings) can produce something far from realistic. For instance, the contrast and saturation settings can be adjusted higher or lower, and the white balance setting might not be the right one for the lighting encountered – even the auto white balance can be fooled by what’s been captured within the frame.
And so, this is as good a place as any to redirect to a page in my Tips Gallery regarding white balance, what it is and how to use it effectively. That one’s been around for a while now, but the next one is new, and it’s about making color corrections, doing some creative monochrome work, and I threw in a sharpening technique for giggles. I had actually avoided this for a while, since every editing program is different and providing instructions for them all not only would be difficult, I don’t have but a handful on my computer anyway. The typical choice is Adobe Photoshop, a ridiculously expensive program that I do not encourage everyone to get (seriously, it’s priced at extortion rates, pointlessly because for the past fifteen years or so all they’ve done is add a couple of fancy filters and algorithms to the existing program for each new update.) However, since it can now be used online free of cost, I can now provide some tips that anyone can take advantage of.
And on top of that, I did up a new page on photographic preparedness – how to plan a photo expedition, what to take with you, and even how to handle rough terrain safely. In fact, this is one to check back on from time to time, since I may add stuff that I’ve forgotten, or any tips that someone sends me – right now it’s almost all based on personal experience. And a quick note, just to drive the point home: in 25+ years of field work, I have damaged virtually none of my equipment, certainly nothing as major as a lens or camera body. Being careful pays off.
I know; there wasn’t much in the way of posts this past week. Be patient – more is on the way.


