After a recent post, someone remarked about the effect I showed in one of the illustrating photos, reminding me that this is one of those photography techniques that’s much easier to implement than to explain – and I know, because it’s the hardest thing I’ve had to teach students. So here goes an attempt within a post, on the subject of exposure compensation.
 One key part of decent photographs is having the proper amount of light reach the film or digital sensor. It’s called exposure, and it’s controlled by three things: the shutter speed, the aperture opening within the lens, and the sensitivity of the film/sensor to light, as indicated by the ISO. Today’s automatic cameras have some pretty sophisticated ways of measuring exposure, but there’s still one consideration the photographer has to make, and this is that the camera has no idea what it’s looking at – it simply measures light coming into the camera. If you break down the majority of photographs, you’ll get an average of light reflectivity from them, which unsurprisingly is a middle tone – we are surrounded by subjects that reflect light in moderate levels rather than extremes. Grass and foliage, clothes and buildings and cars, painted rooms and the various bits of furniture and knickknacks within, all have a tendency to be not too bright and not too dark. Mind you, I did say tendency, and in many cases where there are greater extremes, these can balance one another out. The upshot of all this is, even when the light is very bright (outdoors on a sunny day) or very dim (under streetlights at night,) you still tend to have an average middle tone when properly exposed, so when the light comes in to the meter, the camera sets the exposure to bring this light to a medium level. This is usually referred to as “18% grey,” and you can even get pieces of cardboard colored like this to help set exposure in crucial circumstances. If it helps, picture a grey shirt under direct sunlight and under streetlights. Even though the light levels are drastically different, the shirt is still grey and should appear that way in both photos.
A small side note: most meters don’t read colors and only measure light intensity – it really doesn’t matter what color the light is, only how bright it is. Nikon is one exception, with some of their higher-end models, but I honestly don’t know how significant a difference this makes. Suffice to say that I have heard no one enthusing about the advantages, and I have never cursed not having color sensitivity in the meters of my Canons.
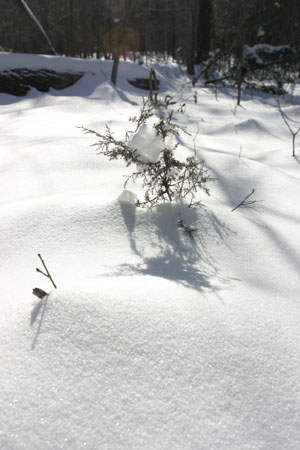
So, when the light comes pouring into your camera before you actually snap the photo, the camera measures it and sets exposure to render it into a nice middle tone. The problems arise when the subject is not a nice middle tone. Such examples are snow, sand and water, surrounding sky, and white walls for the brighter side, and commensurately night skies or background darkness, dark wood paneling, and deep shadow for the darker side. We expect all of these to be either bright or dark, but the camera usually doesn’t know this (some metering systems are fairly clever in comparing the focused point within the frame against the surrounding area and figuring exposure for your focused subject, but they’re still fooled sometimes.) So the camera goes for the mid-tones, and either darkens your snow and sky too much and makes them grey, or brightens your wood paneling and distant unlit backgrounds too much and bleaches out your subject.
I used to work in a photo lab, and the two most common circumstances that virtually always wrecked exposure were kids in the bathtub, and the prom/formal dance shots. Bathrooms are usually pale and reflective, with few items of a darker nature, so the camera rendered these too dark, not knowing they were supposed to be bright. And of course dances, with no light from the background and even the subjects dressed in tuxedos and darker dresses, are supposed to be mostly dark, but the camera tried to make it brighter, generally blowing out the happy couple’s faces into over-exposure. Consider also how bright the sky usually is, so birds (often a tiny subject) against the bright sky usually end up silhouetted against an expanse of grey or deeper blue.
Enter the thinking photographer. “Aha!” says he or she, “this scene is brighter than average, and it should be! So I have to outthink the camera and foil its evil plot!” Or something to that effect, anyway – you may not be as dramatic as I am. Faced with a bright scene, the photographer sets exposure compensation, purposefully telling the camera to over-expose the scene. It’s not really over exposing, it’s actually obtaining the correct exposure, but we’re dealing with a simple microchip here that doesn’t know snow from grass. So you correct its mistake.
How? Well, it varies by camera, so there isn’t a simple answer, other than to find out how to do this in the manual. Most of the SLRs, digital or film, usually have a wheel that you can adjust after getting an initial exposure reading (often by half-pressing the shutter button) to change exposure, and this is indicated in the viewfinder and/or in the LCD window. See a bar with a ‘plus’ at one end and a ‘minus’ at the other? That’s your exposure compensation indicator – simply move the pointer towards the plus end for over-exposing (bright scenes) or the other way for t’other. Other cameras may have you do this with the menu buttons on the back, and this option is usually represented with a “+/-” symbol of some kind. Hold this down and spin your wheel or push your rocker switch, and watch for the same change in the LCD indicated above.

If you’re using digital, you can afford to waste shots, so try several variations. This is called “bracketing,” where you adjust exposure from the camera’s recommendation and often go on either side of the guessed exposure, three to five separate images – one of them will usually get it right. By the way, tell your subjects you’re going to do this, lest they relax after the first one and the next few frames have weird faces in them. Also, be sure to wait for the flash to recharge if needed.
There is another technique that can work, too. Many cameras have the ability to lock exposure, meaning you get an initial meter reading and then retain this when you re-aim the camera. Sometimes this is linked to keeping the shutter release half-pressed, other times you may have to do this with an additional button often marked with “*” [asterisk.] To use this, you aim away from your bright or dark scene to something else that is average, and obtain and lock your meter reading there – the best example for this is capturing the sunset, where you can aim down at the ground without sky in the picture, lock that exposure, then tip the camera back up and snap that shot. Often you don’t have to point all the way down, simply get less of the sky in the image. Sunsets usually benefit from being darkened, since it makes the colors richer, but they still should be fairly bright. It takes practice, so experiment. But this technique is often the quickest, and can be done with less fiddling on some cameras.
Finally, always, always, always be aware that you just changed your camera settings for a special circumstance, and change them back when you have the shot. The large number of frames you shoot the next day will probably be better without the compensation. Coupled to this is the practice of always, always, always reviewing what the camera is set for the moment you take it out. It’s easy to get caught on this, so make it a constant habit. It’s better to remember to reset the camera to average settings before you put it away, so it’s ready to be whipped out when the UFO goes past or the skateboarder hits himself in the goolies. And if you get in the habit of both (checking when you put the camera away and when you take it out, I mean, not something weird with alien genitals,) you’re doubly ensured that you’re not taking images with exposure compensation in place when you don’t want it.
Another example can be seen here. Both the bird and the sky were very bright. While I wanted the bird to look white, I didn’t want to bleach the feather detail away into pure white, so I only compensated by about 2/3 stop over what the meter suggested. Note that the top of the bird’s head and the throat have lost detail, but only in small areas, while the underside of the bird has gone almost completely black – the hazard of using high-contrast slide film in bright light. If this had been a black bird and I didn’t compensate for the background sky, I would have lost all detail from the feathers. It takes experience to know what situations call for it, and how your camera will react (especially in different metering modes,) so practice!


