This probably should have been one of the earliest composition posts that I tackled, except that I think I always assumed it to be rather obvious. As I’ve examined numerous photos, including some of my own, I realize that its importance may need to be emphasized more, so let’s highlight point of focus.
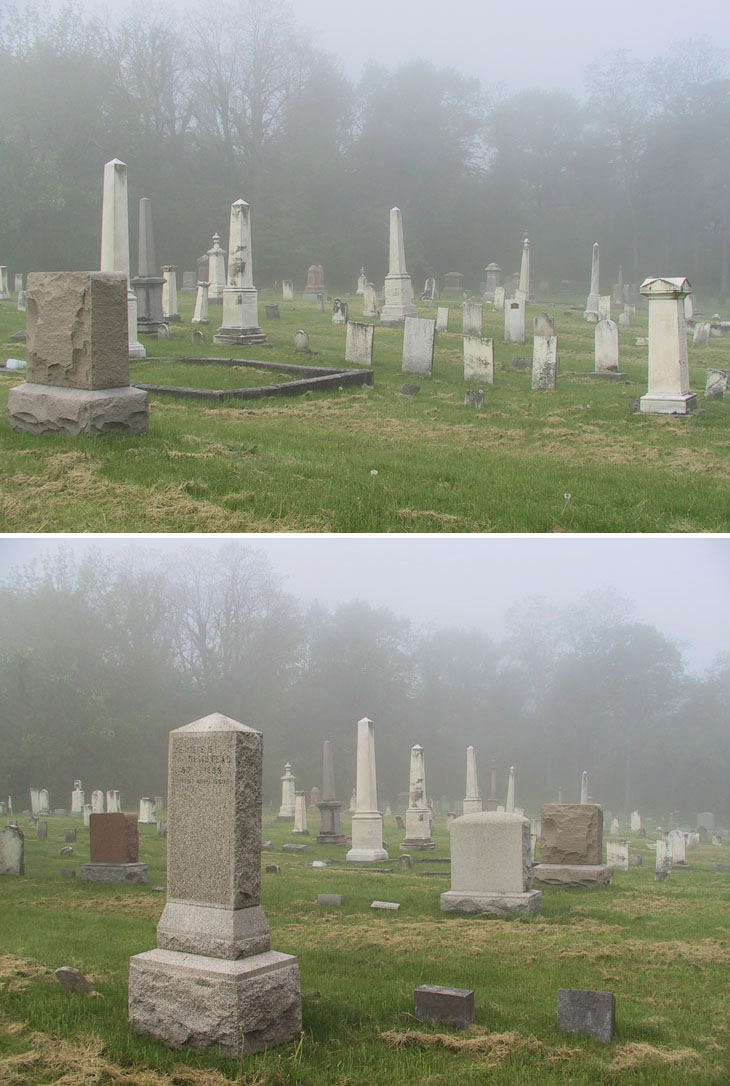
This doesn’t simply mean choosing what the camera locks its autofocus onto. What I mean instead is a point within the image that immediately draws the viewer’s attention, that serves as the primary subject, or at the very least, an anchor for the remainder of the frame. The most prominent way that this is thwarted is with landscapes, where an entire scene is presented for the viewer without anything that displays prominence. Sometimes this works, but more often such a scene becomes much stronger with a single distinction therein, something that breaks the pattern, stands out, or attracts attention – a lone tree, a stream twisting through the snowfield, a moose visible through the mist.
Another situation that benefits is where the scene is complicated, crowded, or repetitive; a crowded dance floor, dense cityscape, or even a field of grain. Here, something that breaks the pattern or departs from the complication, in size, contrast, or sharpness of focus, can give the viewer something reliable to settle on while the confusion or pattern still conveys the conditions. People generally expect photos to present an immediate impression, a particular reason why they should be looking; the more striking, the better their reaction. If they’re unsure what they should be focusing on, the image will lack impact. This is not to say that an image cannot have a hidden surprise, and these can work very well. But it should always be distinguishable from what may appear to be simply a bad photo, and even the hidden subject should still possess some qualities of a focus point.
Some methods are more obvious: something noticeably taller in the frame, or differently colored, higher in contrast, or framed by the other elements (including just empty space.) Very useful is the ability to use a contrasting background to enhance the subject, remembering that photographs tend to flatten out and cause a lack of depth. Imagine that your image is made up of paper cutouts for every element – the main subject, the surrounding details, the background. If the subject and the background are too similar in appearance, it can become difficult to differentiate them, something that often doesn’t occur to us because our inherent depth perception makes the difference obvious when we view the scene before taking the photo. Sometimes, only a slight change in position is necessary to put our subject against a background that presents some contrast, making a frame or halo that immediately demands attention. Portrait photographers often use a small light directly behind the model that illuminates the edges of their hair from behind, creating a subtle glowing aura that makes the model stand out even more distinctly.
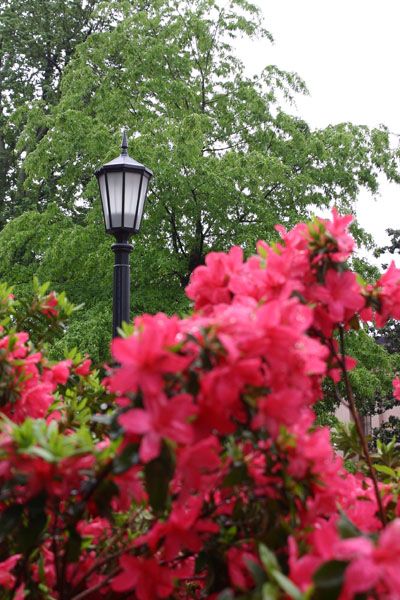
Another method is selective focus, especially useful for patterns. By picking just one element to focus upon and using a short depth-of-field (small f-number/large aperture,) the chosen element is sharp while everything else becomes softer, automatically drawing the eye towards the sharpest item in the image. This is most effective if the chosen subject is the only one that falls into that particular focus distance, so nothing else is as sharp.
It should be noted that it isn’t necessary that the chosen subject has a particular reason to be selected – just one flower out of an entire field works fine. The key is to give the viewer the unambiguous focal point; it doesn’t have to be different in any way. That said, it should be strong – don’t pick a bloom that is half-wilted, or a person with a peculiar expression (unless you want to convey discordance.)
Some factors works better than others, too. We respond very strongly to faces, and more so to eye contact. Smiles and laughter get our attention. An evolutionary trait with a strong effect is attentiveness, even if it’s not towards the camera. Someone that seems to be concentrating on something strongly causes us to become alert too, looking for the same potential danger. Even inanimate objects can provide a “face;” the bloom that gives us the most direct view is more attractive. The tallest mountain peak is a great anchor. The wave that is just beginning to curl stands apart from the rest. Some of these cannot seriously be called a subject, but they serve as a focal point anyway.
Where they fall in the frame is often important. While the Rule of Thirds is a bit suspect, it’s used often enough that viewers expect to see subjects there – these are good places to have the subtle focal points. Breaks in patterns, or a solitary subject where isolation is a key element, can be set much further away from the thirds points, of course using the remaining space to enhance that isolation. The center of the frame is often a bad place to put the focal point, because it is too direct – while it’s common for illustration (which means it’s seen fairly often here on the blog,) artistically it’s weak.
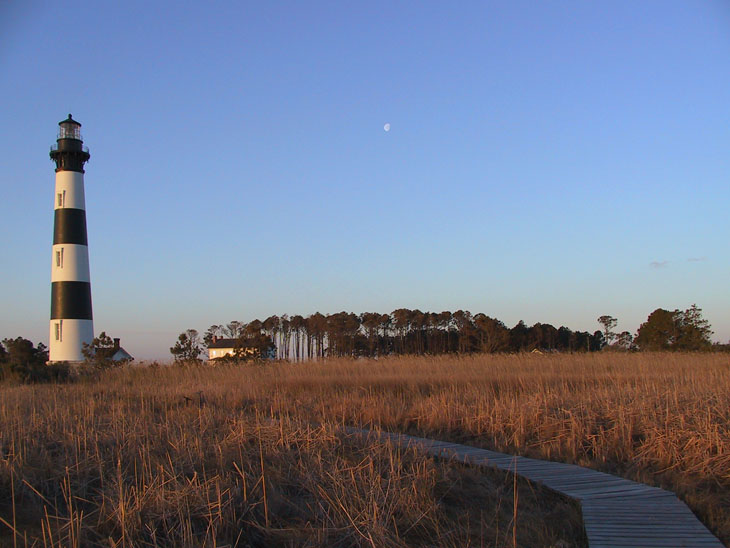
When other elements contribute to the focal point, this can become very dynamic. Lines (or a boardwalk) that lead across the frame, the attention of people or animals within the image, the dip in the treeline or the gap in the background coloration – these kind of things can be used to draw the viewer directly to the point of focus, including an exceptionally subtle one (more subtle than a lighthouse, even.) In some cases these elements create the point of focus, as we’re compelled to follow their guidance. They can also detract from a chosen point, as well; the wedding guest that is not watching the happy couple during the first dance weakens the effect, making us wonder what else is attracting their attention. A path that curves away from the sun, especially when it was leading toward it at first, gives a subconscious impression of rejection.
Light can also be used to produce a focal point – of course, this is used extensively by portrait photographers and especially film directors. While it can often be very hard to obtain just the light you might want in a natural setting, those lucky accidents can also be assisted by careful planning – the sun moves across the sky faster than you might think, meaning a choice sunbeam may be along with a little patience. This is especially true with light coming through leaves, but be warned, it disappears just as rapidly. Sunrise and sunset present the opportunity to plan these much better, since it’s easier to envision how the light will come through a break in the trees, rocks, or buildings, and easier to create an artificial break as well.
It’s not absolutely necessary to have a focal point in every image, and in many cases such a point will be obvious and require no real thinking. But it can help a lot to ask yourself, “What do I want people to pay attention to?” before selecting the vantage or framing, which may make the difference between a mediocre shot and a strong one.