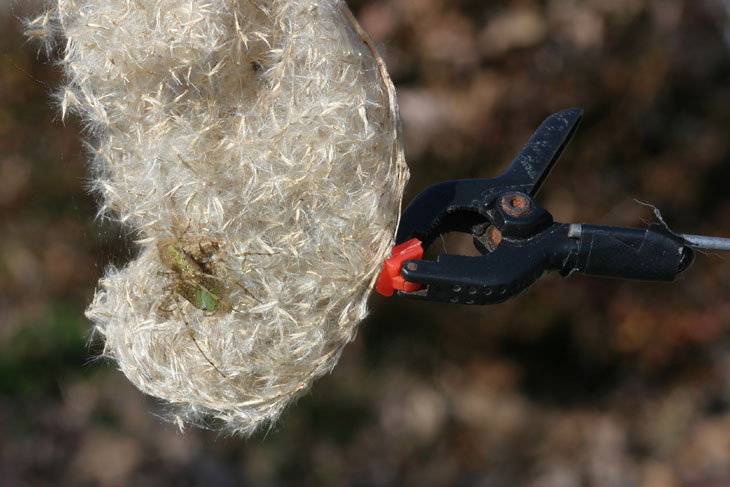
 I had to go back through my images to peg down this time frame, but ten weeks ago, a green lynx spider (Peucetia viridans) created an egg case on one of the flowering fronds of the pampas grass in the yard. I kept checking on progress, looking for spiderlings, but never saw anything, and eventually figured they’d either never hatched, or had escaped my notice and ballooned away. Only about a week ago, I found I was mistaken, because the frond was now displaying a few dozen minuscule hatchlings, still hanging out with momma. The mother is about 15mm in body length, so perhaps a little more than twice that in leg spread, while the younguns (one visible just above momma here) are less than 2.5mm in body length. The mother is perched, perhaps through force of habit, on the remains of the egg case.
The flowering stalks of pampas grass grow tall – in this case nearly three meters – and sway in the slightest breeze. In order to see what was going on, I had to draw the stalk down, but even tying it to a string on a ground anchor isn’t enough to immobilize it for the demands of macro work, most especially in gusty late fall weather. Enter… the homemade brace.

Mine is simply a light stand, a telescoping pole with tripod legs and a bracket at the top for strobes, with a bit of stiff wire and a plastic clamp taped to it. An old tripod will work too. The clamps are cheapo little spring-clamps obtainable from hardware and thrift stores (get lots – they’re very handy.) It is possible to purchase tailor-made devices from photo suppliers, but each that I’ve seen are made to attach to a tripod anyway. The key is to be stable enough not to allow any motion, which is why I only permitted a short length of wire between the clamp and stand. It wasn’t complete immobilization, but enough to permit the shots you’re going to see shortly.

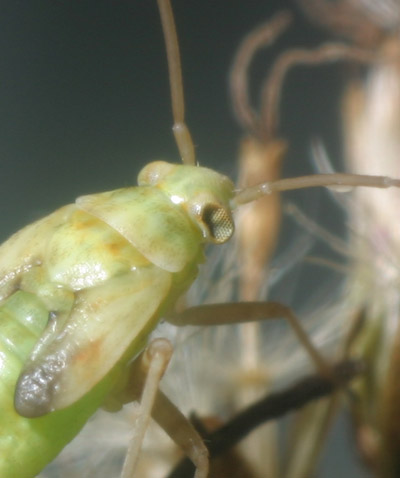
But I’m getting ahead of myself. Last night, I had obtained a few photos of broken-backed bugs (Taylorilygus apicalis – don’t look at me; I didn’t name ’em) on my private insect studio, otherwise known as the dog fennel plants. While the weather has gone mostly too cold for the ladybeetles, it apparently isn’t for the aphids, which have taken over, and interspersed among them are the same little bugs previously seen here. When examining the images after unloading, I found that my subject’s eyes were irregular, and I ended up going back outside, at night, and finding the same insect to get more detailed shots in controlled conditions. In this case, it was simply the prop plant.
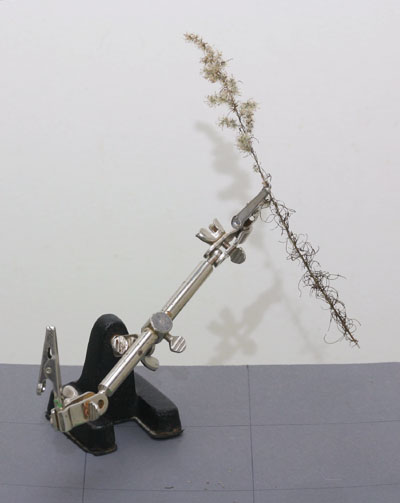
 I featured a variation of this in part four (which you already know because you’ve read everything on the blog, right?) – this is just one of those “extra hands” rigs usually used for soldering, with a single sprig of the fennel, upon which I loosed my insect subject. This meant that I could shoot indoors and even position the plant to my liking, and it allowed me to place a background close to the subject (one of my prints in the above case) so there wouldn’t be the typical darkness that comes from most macro work. The strobe is usually close to the subject, but the light drops off exponentially – at twice the distance it’s 1/4 as powerful, and so on, so the background won’t receive much light unless it’s close. With the rig, you can even put a lone leaf in the other clamp and position it behind your subject – that’s usually enough to fill the frame with a pleasant background.
A small tip: don’t try using something artificially green like a shirt or towel for the background; the color isn’t very close to foliage and will often look markedly unnatural. Most browns, however, you can get away with.
Once I had my detailed shots of the broken-backed bug (with a companion for comparison,) I released them onto the spiders’ pampas frond. They were 4mm in body length, larger but not significantly so over the spiderlings, and I wanted to see if the arachnids could, or would, tackle something like that. Perhaps that sounds odd, but I have seen spiders avoid certain insects. Not in this case, though.

It bears noting that there was some sibling squabbling going on – the party responsible for the capture wasn’t intentionally sharing the meal.
I want to include some small notes on technique; don’t get the impression that these are the only way to tackle such subjects, but they may help. Everything was taken with a strobe, in this case mounted on a bracket (from part five and part one) to offset the light to the side; this produces more ‘shaping’ and looks more natural than direct flash. It also allows for small apertures and fast shutter speeds, increasing depth-of-field and eliminating blur from motion, respectively. Because of this, I can shoot handheld, without having to lock the camera down onto a tripod – if I wanted to use natural light with the same aperture, even in brilliantly sunny conditions the shutter speed would likely go slow enough to produce blur, if the subject moves slightly. Remember that motion, in an image, is relative – at high magnifications, even very slight movement can whip a subject entirely out of focus, or blur it across the frame enough to make the image unusable. The ideal situation is one where both the camera and the subject are perfectly stationary, but this is hard to produce, so going with augmented light and brief shutter speeds (I routinely use 1/200 second, since that is the fastest dependable speed that will sync with the strobe) is typically a better technique. Moreover, shooting handheld is much more flexible that a tripod when it comes down to choosing framing and position, especially when the subject is free to move about themselves.
Some of this, however, applies far more to digital work than it does to film, and I often use different techniques between the two. It’s fairly easy to fire off a large number of frames digitally, fighting against subject movement, and hope to nail the very fine ideal focus range – especially when, after unloading the memory only ten meters away, I can return and reshoot if necessary. It’s another to discard most of a roll of slide film, days afterwards, and realize that it’s too late to try another method or angle. Even though I greatly favor the results, film is used more often for images that are under better control and dependable in their results.
And then, there’s the third technique which I’ve also mentioned before. At night, the wind has usually died down significantly, and with a drop in temperature the activity of arthropods has slackened too. Adding a simple bright flashlight to the ensemble, aimed right at the focus sweet spot of the macro rig, can allow you to chase subjects in much more favorable conditions. A slight added benefit is that many subjects that would have sought shelter from you looming over them are instead confused by the single thing that they can see, the bright light, and may remain in position much better. An added bonus is how many species are active only at night, permitting a wider range of subjects.
 Speaking of confusion, however, we return to the broken-backed bug. I have no idea what caused this deformity – it was similar but not identical for both eye clusters – but I can’t help wondering what kind of visual input this was providing to its little insect brain. This is the one that escaped, by the way – it was the healthy specimen with almost completely developed wings that fed the lynx babbies.
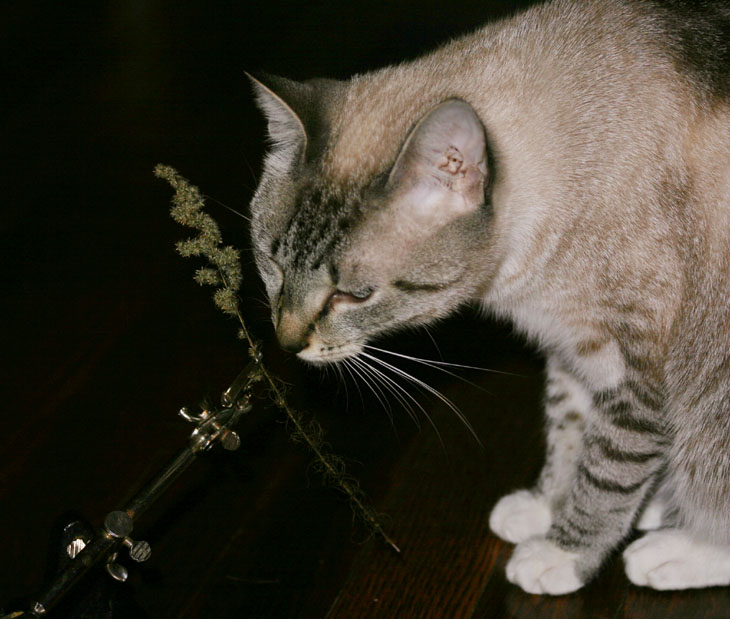
And finally, I leave you with a couple more images. Below, another view of the clamp, with the mother shown for scale and even a spiderling peeking in from the dark spot in the hollow at top (this is natural light.) And below that, Little Girl being her usual helpful self while I was experimenting with the best light levels for the rig. Granted, she provides some scale comparison too.


