


Or, The Ballad of an Equipment Experimenter.
 Yesterday while the Irascible Mr Bugg and I were out in the woods arguing over lens changes, I spotted a flash of pale wings in the sun and followed them. Turned out to be a variety of grasshopper (one of the big ones, that I tend to call a locust) that had spooked at our approach but landed on a nearby tree trunk, obligingly sidling around to get the sun behind itself. Okay, fine, I get the hint. I popped off a few frames with the Canon 100-300 L, since I already had it on the camera and I was working from a short distance off, then attached the Mamiya 80mm macro and crept closer. I eventually got close enough that the entire grasshopper, which measured all of 50mm in body length, couldn’t fit within the frame, and even had my own fingers the same distance away about to capture it, before it realized its terrible peril and flew off again.
I attempted to identify it once I was back home and had unloaded the memory card, but it turns out I had nowhere near enough photos to do this – there are a veritable assload of grasshoppers in the US, with very subtle differences between them (often enough seen only from directly over the back) and a lot of color variations among the same species that can make positive identification questionable even in the best of circumstances. These were not the best of circumstances, so the most I’m going to say is that I think this might be of the Subfamily Melanoplinae.
More interesting, to me at least, is some of the detail that could be seen when viewed more closely. The following image is full resolution from the original:
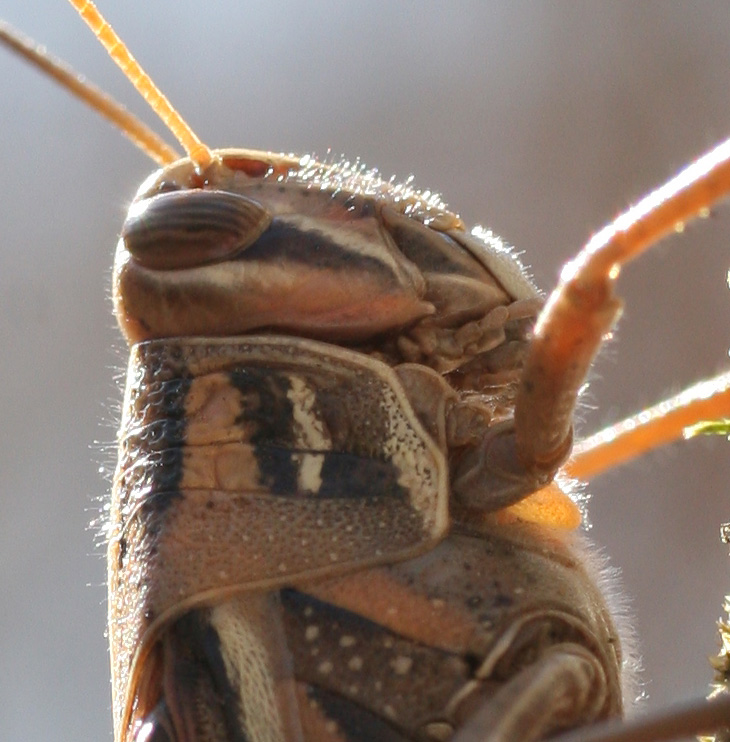
I’d be inclined to say this is a Mediterranean species, judging from the hairs on its back, face, and chest, but maybe that only applies to humans…
Stupid stereotypes aside, I’ll let you determine how fine those hairs really are, but it’s safe to say we’re talking in the realm of spiderweb diameter. I was shooting wide open at f4, so focus range was short, as you can tell from looking at other areas of the grasshopper where the focus starts to go fuzzy, but just being able to resolve details at this level is impressive to me. And I didn’t even have the extension tube attached.
So, a bit of background explanation. The Mamiya 80mm macro is a lens intended for the Mamiya M645 series of cameras, medium-format film bodies long discontinued now. Manual focus, manual aperture. I had it for my M645J body, but adapted it to the Canon when my old dedicated macro lens started acting up and I didn’t have the money to repair or replace it. That was years ago, and I’m still using the damn thing, because it’s sharper than anything else I’ve ever used. To fit it onto the Canon bodies, however, took a little playing around.
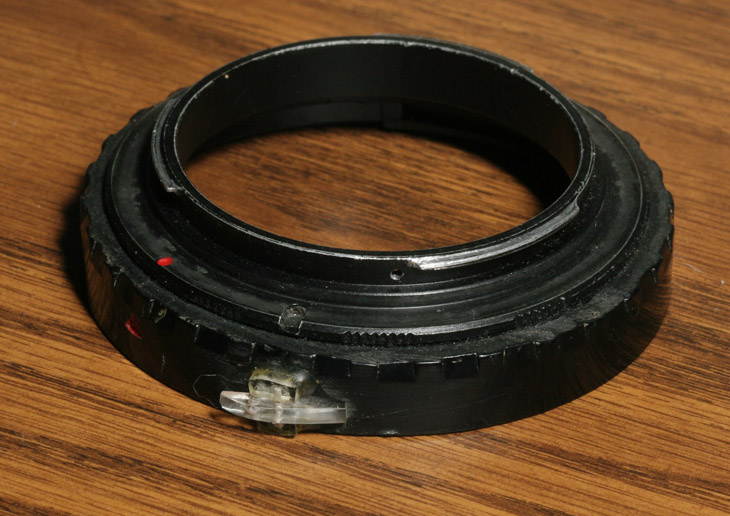
I used to be an avid model builder, and there’s a little bit of slang from those within that cult: “kit-bashing,” meaning scavenging parts from multiple model kits or old models, often not even related to the new one, to create additional parts or special details. That ability comes in handy when you like experimenting with camera equipment, because it can let you fit a lens that’s not even remotely similar to the body you want to use. In this case, I used a rear lens cap for the Mamiya M645 lenses (the largest diameter bit above) and drilled out most of the flat face, then epoxied in a reversing ring for Canon EOS bodies, itself only a few bucks online (a reversing ring is used to mount lenses backwards onto the body for extreme macro work, so it has an EOS mount on one side and filter threads for the front of the lens on the other – that’s the bit in the image with the red dot on it.) M645 rear lens caps don’t really lock on, however, they just snug down – they’re intended for dust protection, not actually holding the weight of the lens. So I had to create a locking tab.

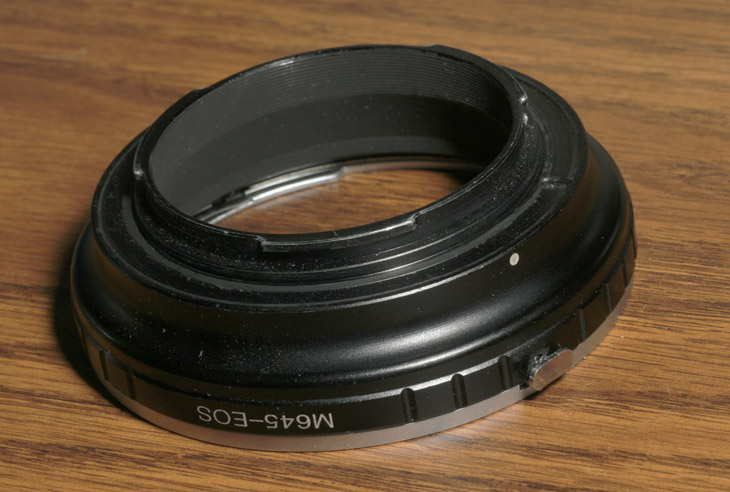
Since the Mamiya lens doesn’t actually interact with the Canon body in any way, it doesn’t matter too much how they line up, so I just got reasonably close. I shaped the key pieces out of clear hard acrylic, because that material holds up the best out of those able to be worked easily with hand tools. The tab was carefully shaped to engage in the lens and pivot out of the way, then drilled through the middle for a pivot pin. The spring was scavenged from those little pins that hold watchbands to watches (a great source of tiny springs) and the pivot pin was just a portion of a straight pin, held at each end by little blocks of acrylic, with a hole drilled halfway through each, then epoxied to the Mamiya lens cap – you’re seeing one of them end-on here. Simple!
I wasn’t expecting a lot of use from it before something failed, but believe it or not, I used it for three or four years before I finally bought a dedicated adapter for about 40 bucks.
My homemade one still works just fine, because I used it to get this photo, but I have to say I consider such things a temporary measure – one cracked plastic piece can send your lens crashing to the ground, and the properly-machined metal adapters are recommended by far. Sometimes, however, such a thing isn’t close at hand, or even available, so if you’re handy enough and obsessed enough, you make do. It’s been working out well enough for me, at least.