


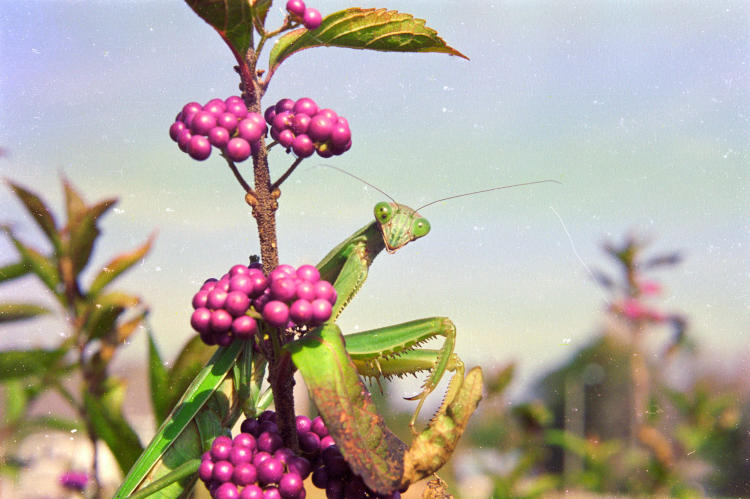
Our opening image today, a Chinese mantis (Tenodera sinensis,) comes from… I’m going to say 1990, a few months after having moved to NC from NY. I know it was taken with the Wittnauer Challenger (which produces rounded edges on the negative frames,) and was early, so no later than 1991. Long enough ago, anyway. This was most likely as close as I could get with the fixed 50mm lens of the Wittnauer, which didn’t even have threads for something like a close-up diopter though I’d never even heard of them back then anyway; you can at least see that the forelegs are going out of focus, being too close to the camera. But even at that point in my photographic knowledge I tried for a more dynamic photo than simply a dorsal shot.
We’ll do an interim stop at, um, probably 1997.
This time, it’s with an Olympus OM-10 and probably a close-up diopter, which I was having a lot of fun with at that time, starting to really get into macro work. The negative, however, has seen better days, and this leads to a little trivia. Back then you could find ads in magazines for really cheap print films, the most prevalent being Seattle Film Works, which used cut-down motion picture film. The problem with this was it had far more silver in it than the proper 35mm film stocks, and this stuff would come off in developing and gather in the processing tanks, often getting redeposited onto subsequent negatives developed later on before a chemical switch. That’s part of what you see here: this is Kodak Gold 400 film, but some of those white spots (that I purposefully didn’t touch out after scanning) are blobs of silver adhering to the emulsion. Some of the others really are dust (especially the stripes,) and some of it is from a degrading negative. This happened most often in the blue areas, and may be due to a) the yellow layer of emulsion (remember, negative, we’re inverting colors here) being weakest, and/or b) inadequate fixer bathing – see the bit above about not changing the chemicals often enough.
But I really liked this print, and from having worked at a photo lab for a while, I had a full palette of touchup dyes that I could paint over white spots like this from bad negatives – digital editing was not yet a thing so this had to be done by hand, with careful efforts at color-matching and not overlapping the edges. Skin tones could be a real bitch, but I got halfway decent at it.
Anyway, things still progressed.
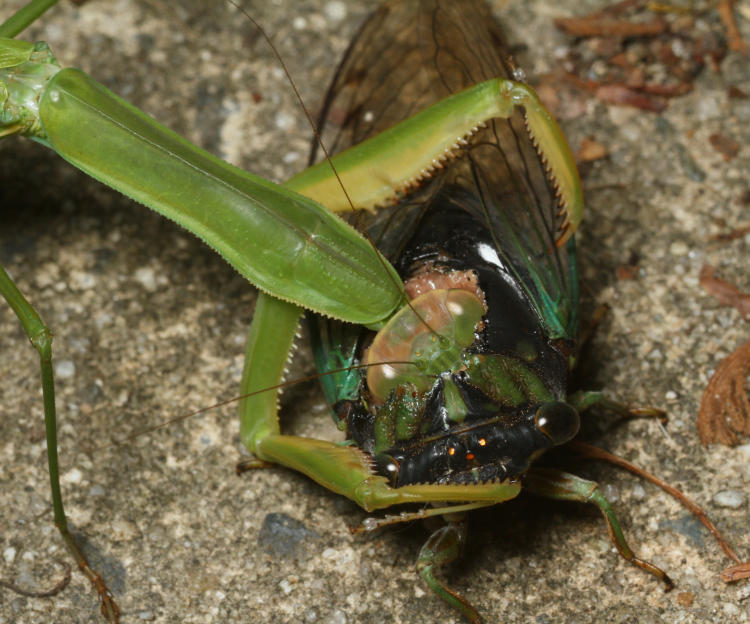
Chinese mantids are now the most numerous species on the blog and within my stock, from pursuing them as a subject so vigorously that I’ve tried establishing colonies of them right here at Walkabout Estates, with fairly good results; this has allowed me to get a variety of detail, behavioral, and artistic shots, so I’m just picking a representative pair for now. This image was from last year, after I heard the mantis capture the cicada (Neotibicen) and doing not just a selection of stills, but some gross video too. This was with the Canon 7D and the Mamiya 80mm macro.
We’ll jump back to 2015.
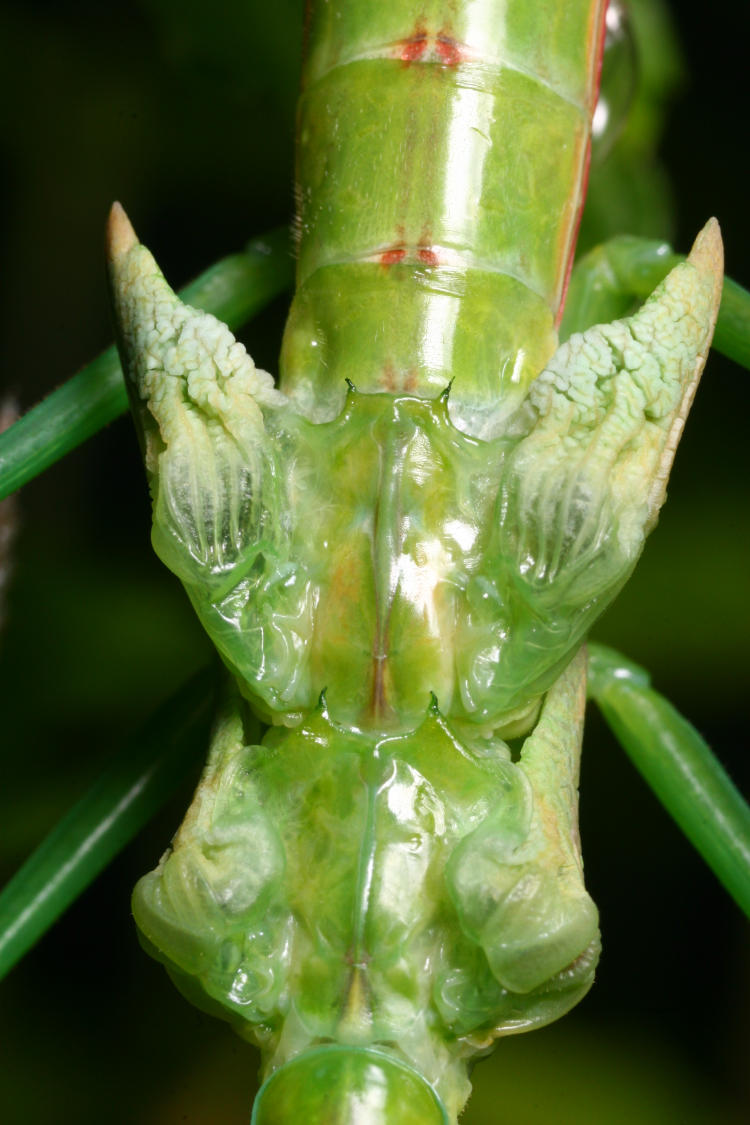
What you see here are the wings of a newly-molted mantis, entering the final instar or adult phase – I was lucky enough to find one right at the beginning of the molting process and do an entire series of shots. Within an hour, these wings would open up and stretch out many times this size, to form a ‘cape’ over the mantis’ abdomen. This time, I was using the Canon 30D with either the Mamiya macro and its extension tube, or the reversed Sigma 28-105 – I’m leaning towards the latter, but neither lens has any electronic connection with the body so no information carries over into the EXIF.
I have to note that this image had to be touched up too, only it was from dust on the sensor itself leaving black spots on the image – the 30D (like many earlier models) was rather prone to this, and the process for removing it was tricky and meticulous, so it didn’t get done as often as it should have. Fixing the image only takes seconds to do in GIMP however, as opposed to getting out the dyes and ultra-fine paintbrushes, as well as a small bit of white photo paper to lay alongside for careful color matching before applying the dyes themselves to the print. Maybe one of these days I’ll do a post on how much retouching efforts have changed in the digital world…