













This is just a quick rundown on shooting film, should you decide to give it a try. I admit that I haven’t shot film in years – and still have several film cameras in good condition, numerous rolls of film, and a complete darkroom packed away that may get set up before too long, since I have an ideal space for it now. If all you’ve shot is digital, the good news is, damn near everything translates to film pretty well, and I’ll cover those few things that don’t.
Equipment. Because of digital, film cameras in good condition can be had for a fraction of what they once did – like, less than $50 easily. The collectible cameras still demand higher prices, but just something more-than-capable? If you put the word out among enough people, you’ll be given one. As a general rule, anything from the era just before digital came into regular use, so the 90’s through the early 00’s, generally can be obtained for a song, and new enough not to have issues most times. The bigger challenge may be getting batteries, since some of them took specialty batteries common to film cameras that dropped out of regular availability.
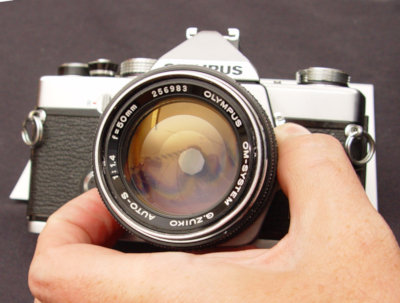 Knowing it’s in good shape? There’s no easy test (especially if there are no batteries handy,) but check the movement of the settings and the lens rings, look for excessive wear or evidence that it wasn’t stored well, like unclear glass or mildew residues, especially in the finer cracks of the body where people’s cleaning efforts often miss. If the camera is working, set for 1/2 second shutter speed, preferably with a lens attached and set to f16, and trip the shutter a few times. The double-click of the shutter opening and closing should be consistent and easy to time by ear, and you should see the aperture quickly close down and open again each time – these are the things that tend to stick if improperly stored.
Medium format equipment has dropped so drastically in price, given that it was always considered professional equipment, that now is the time to get into it if you’re interested, and it’s typically been stored and handled quite well. Typically, it is quality equipment, too – there were never any consumer or tourist lenses or bodies produced, so there’s almost no such thing as a bad buy.
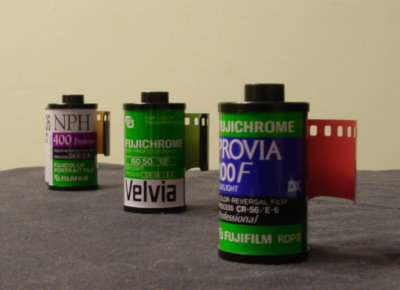 What film? Depends on what you want to do. The common print films are not only the easiest to find, you’re more likely to find places to develop it and make prints. The quality, however, tended towards the lower end, and the longevity, even with proper storage, was never that good. One thing to know is, film not only ages, it’s susceptible to heat, so the rolls someone finds in an old camera bag are not going to produce the same results as new. Should you find someone clearing out their stock that they maintained in a refrigerator or freezer, however, go for it. And you can still buy it new.
The specialty portrait films, such as Fuji NPS/NPH and the Kodak Portra line, make digital portraiture look lackluster – I remember flipping through the first prints I took on NPH and being blown away by the color rendition. I still can’t believe these were virtually abandoned for the unchanging color palette of CMOS sensors…
Slide film still produces the best colors overall, and the longevity is many times better than print film – though some of this might be due to the labs processing it, since chemical changes, adequate fixing times, and precise temperatures help significantly, something the commonly-available labs like one-hour places in the mall did not typically engage in – I know, I worked in one, moreover one that prided itself on producing ‘quality’ results and yet had the cheapest chemicals and the least-maintained equipment (they definitely felt that calling it ‘quality’ would work on most people, and couldn’t be bothered to learn what the word actually meant.)
However, if you’re considering doing your own developing (and you should, if you’re this far,) monochrome “B&W” print film is the way to go, at least at the start. It’s also easy to obtain and still provides a decent variety of types available. Ilford HP5+ is a great place to start.
What you give up from digital. The first is, not only can you not immediately chimp at the image in the preview LCD, you’re going to wait to see the results. If you’re experimenting, keep written notes, because there will be no EXIF info to refer to. Also, learning how to calculate flash power and guide numbers will have to serve in lieu of test shots to see if the lighting is correct.
You will be locked in to a single ISO for the entire roll. Also, changing rolls may have to happen more often than you think – I always used 36-exposure rolls (in 35mm format anyway) just to avoid having to do this more frequently. When shooting weddings or events, I often unloaded a roll before it was finished to have a fresh set of 36 exposures awaiting me if some particular action was anticipated, like the cake cutting or first dance kind of thing – there’s nothing more annoying than missing some prime image because you’re trying to slap a new roll into the camera.
You will be locked into a particular color-palette and contrast for the entire roll, too. When shooting slide film, I would occasionally unload a roll partway through because I now had need of a greater saturation than what I was using; the partial roll would be put into a film can and the frame noted on top, so I could reload it later, something the Canon EOS line at least permitted, perfectly accurately too – aligning frames the exact same way could otherwise be hit or miss, and if it weren’t for the IR frame counters on those cameras, I would wind a few frames past the known last to avoid overlap.
Exposure metering can be wildly different. If you have a relatively recent body, things might not be too different – the Canon EOS line had most of the same metering options as their current digitals. The older you go, the more likely you are to find only center-weighted metering, or none at all, and this takes a little forethought to use effectively.
Film cameras tended to aim for more specific users. If you use exposure-bracketing or compensation, second-curtain sync, flash exposure compensation, or other specialty options, you would likely have to look for the higher-end film bodies to have these – it was with the advent of digital that manufacturers began including these on nearly all bodies. Finding an inexpensive Pentax or Minolta typically means doing without.
Getting film digitized. So, yes, we operate in a largely digital world now, especially since you’re reading this on a screen, and having your images available that way is certainly compelling. However, basic film scanners that can do 35mm negatives or slides can be found for under $50 anymore, certainly not the case when I began (and the scanners I still use, purchased many years ago, are all much higher-end models.) Some developing labs will offer digital copies as an option, while you might have to find a specialty service if yours does not. Let’s put it this way: If you get hooked and start shooting film even semi-regularly, you’ll save money in the long run by investing in a scanner, and probably have a lot more control over the results too.
Be warned, though: Every film has a different base color cast, though monochrome is the least variable. Getting good results from scans of a negative/print film can be tricky and require a lot of fiddling, and I have yet to find a software that makes this easy.
I have also just photographed, digitally, a print laid flat to the camera. You still have to account for color casts, especially from the lighting used, but if you use an 18% grey card as a background and shoot a little wide, you have an easy white-balance reference. The resolution is more than enough for any web work, and usually to get another print made. I’ve also done this with a glass plate negative.
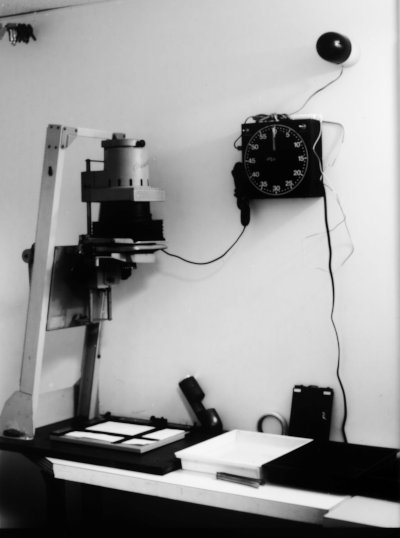
Printing is more involved, but not a lot. For this you need the same three chemicals (only aimed for prints instead,) print paper, print trays, an easel, a timer, a safelight, and most especially, an enlarger. These can be found for as little as $40-50, if you’re not outright given one by a previous enthusiast, but the average cost for a used enlarger seems to run roughly $150, with a lot of variation. If you’re really getting into it, a condenser enlarger is better, since it distributes the light source more evenly, but these tend to be more expensive (and larger.) However, all this can be set up in a bathroom (you’ll want running water,) even temporarily – counter space for the three trays of chemicals, and of course the enlarger, is the demand, but doors as light-tight as you can get them help a lot. But again, it’s not hard.
Color work is more demanding and requires more chemicals, plus an enlarger with a color head to account for the different color casts of print films – I admit that I never went this far, because monochrome was enough fun for home developing. But seriously, look this up if you have the faintest interest, because home developing is probably easier than you imagined.
So if shooting film intrigues you, or you want a greater breadth of photographic experience, don’t hesitate – it’s not that involved, and can be a lot of fun, with some additional challenges thrown in. Have at it!