


An amusing (or maybe pathetic – I keep getting them confused) side note before I begin: damn near every time that I mention captive animal photography on the blog, I make some kind of defensive comment about it as if people are routinely, derisively pointing out that real nature photographers wouldn’t shoot captives, and all of their images are of wild specimens deep in the jungle, or something. First off, nobody even comments either way, but in my recollection I think one person made such a remark, like over a decade ago back on a newsgroup, and that person was obviously trying to be an ass anyway.
Still, while there is a better sense of accomplishment from capturing images in the wild, there remains plenty of reasons to pursue captive specimens, among them:
Simple stock shots (that sell for a few dollars and wouldn’t make good business sense to spend a few thousand getting) Better portraits Captives behave better and provide more ‘relaxed’ images Details and traits that are near to completely impossible to capture from a distance Amusing and/or expressive shots Documenting facilities and attractions
Yes, of course it’s easier, but if we’re doing this to impress anyone with our prowess or globetrotteriness, we’re probably not too focused anyway. So have at it. And while you’re doing so, here are a few tips.
Nobody wants to see the walls, fences, other visitors, and so on in the background, nor reflections from the glass in the foreground. Eliminating these can be a challenge, though. We’ll start with glass.
 Wear a plain black shirt and/or pants – This won’t completely eliminate the reflections that you yourself will make, but it helps.
Shoot from the shadows, or a darker corner, etc – Helps to reduce the same.
Shoot close to the glass – For preference, with a rubber lenshood pressed directly against the glass to eliminate all reflections from your side.
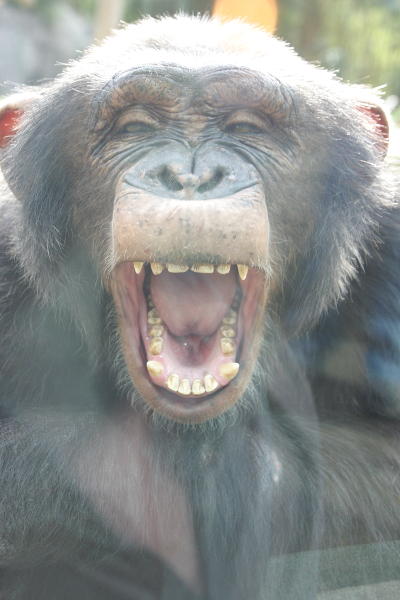
Pick the cleanest spot you can find – Again, this is often the corners, but can occur up higher too. A soft cloth can help with finger smudges on your side, but most times it’s the other side that’s the filthiest. I’ve tried pantomiming to get a chimp to clean their side, but it didn’t work.
Shoot straight on through the glass – Perpendicular to the surface, as much as possible. Glass bends all light that comes through at an angle – that’s what a lens does, after all – so angles always distort, to some degree, and they’re made much worse by the nature of camera lens, which capture light from a broader field than our eyes do. Just forget about curved glass. Seriously.
Get the flash off angle – To prevent it bouncing straight back into the lens, but also keeps it from bouncing off any back walls/glass. This usually means a separate strobe unit and an off-camera cord, and can often require someone else to hold and aim it.
Have a black blocking cloth – Only if you have an assistant (and this usually means you’re dedicated to getting some particular shots,) but a thin piece of black cloth can be held up to block stray reflections, or behind the back side of the aquarium. etc. Also useful when doing studio work.
And then there are fences.
Shoot where there isn’t any – Well, duh, but look around carefully – sometimes there’s a small gap or a higher vantage that can be exploited.
Shoot with a low depth-of-field – So, larger aperture. This explains how it works, but briefly, things can be blurred almost out of existence. And to help,
Shoot close to the fence – Like, right against it if you can, but definitely centered in the opening.

Longer focal lengths – This assists both of those efforts above.
If you have a choice between light and dark fences, choose dark. Very Sithy. Light exposes the image, so the lack thereof is easier to overwhelm with the other things in the frame. I wouldn’t recommend bringing a can of black spray paint though.
Then we have walls. First off, if you have the classic red brick walls with grey mortar, forget about it – you’ll never get them to disappear entirely.
Get them in shadow – Especially mottled shadow, which helps disguise any patterns.
Get them further off – Basic rule of depth-of-field: You will blur the background better if the focused subject is closer to the camera than it is to the background.
Again, longer focal length – Just helps reduce depth.
Find a spot where the wall is partially obscured – By plants or branches, other animals, etc. Small changes in position can make a huge difference.
So, on to some general pointers.
Framing becomes much more key with captives, and paying strict attention to the background – don’t remain too tightly focused on the subject. Be especially aware of situations where, for instance, other visitors in bright colors may appear in the shot. But you have a huge advantage in many cases, in that you can easily shift position to change your background, something impossible to do from a blind in the wild. When you can, pick a complementary background color or detail, or at the very least get something smoother and lower contrast.
Do the same thing with light. When you can, pick the angle that gives the best shadow rendition and shaping, and when using an external flash, think carefully of your subject, the details that you’re trying to show, where shadows might fall, and so on. This is where the otherwise horrible practice of “chimping” comes in handy, which is looking at the LCD afterward to see what you took. The LCD will tell you virtually nothing about an image, except how the flash worked for you. And even then it won’t tell you if shadow or highlight details were captured or lost. On-camera LCDs suck, really.
Patience is, naturally, a virtue. Captives will not always be photogenic, but if you’re really after a decent frame or three, this can mean waiting a while until the specimen does something interesting – I shouldn’t have to say this because it’s a standard part of nature photography anyway. Just be prepared to chill out, or occasionally return when the chances are better.
Many species, especially birds and mammals, are well aware of how many people are gawking at them, and the noisier the people, the worse it is – this often minimizes the behavior that you might see, or drives the animals further off. Avoid crowds (and especially crowded days,) and when possible, wait for people to move on. Generally, when the animals are behaving this way, it doesn’t take long for the crowds to get bored. Once it’s quiet, you may start to see much more interesting opportunities.
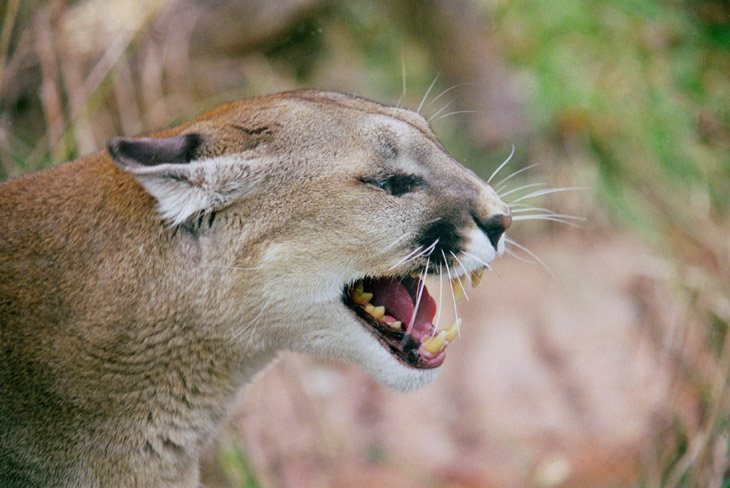
A few species seem to like the attention, however, and becoming familiar with them can help. Then you can stake out a prime shooting position before the passel of schoolkids comes by and provokes this kind of showoff behavior.
First thing in the morning is best. Most places where you can photograph captives, there’s only so early you can arrive, and it’s often after feeding time and the ‘first wakening’ behavior, but beating the crowds, the heat, and the midday naps works a whole lot better no matter what. Animals are usually more active and playful, more expressive and investigative, and less likely to shun the areas where you can shoot from. In zoos, for instance, get there at opening and make a beeline for the farthest exhibits where it takes more time for the crowds to arrive.
Also, pick good days. Spring is almost universally mating time for species, and so coats and plumage are often the most vibrant, the behavior more distinctive. Days that won’t get too hot are better, and a little chill in the air can make animals more active. Overall, slightly hazy conditions control sharp shadows and contrast better than brilliantly sunny days. And then, picking days that see the fewest visitors often helps; it varies a lot by locations, but Tuesdays and Thursdays often see the fewest school groups and families, with Saturdays being the worst of course.
Be considerate. I can’t count the number of times that I’ve seen photographers, especially as a group, ‘dressed the part’ and blocking others from the viewing areas, taking up a lot of space with tripods, and generally being snobby. If you’re in a zoo or whatever, get over yourself – it’s a public place and everyone else has just as much right to be there, regardless of how important you might think your pursuits are. No one cares, and no one’s impressed by your photo vest. If you’re any good at all, you’ll get the shots you’re after despite the other visitors, and without interfering with them – that’s part of the challenge. Or you can pay for an exclusive visit. I’m sure your sales will support that.
Yes, I’ve seen plenty of other visitors ruining shots and being obnoxious, and find it annoying. But a) that’s what comes with a public place, and b) why emulate them? We should be bigger than that.
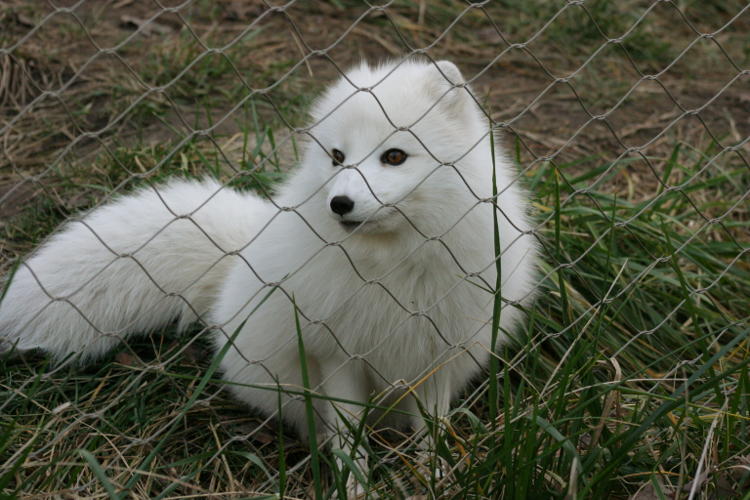
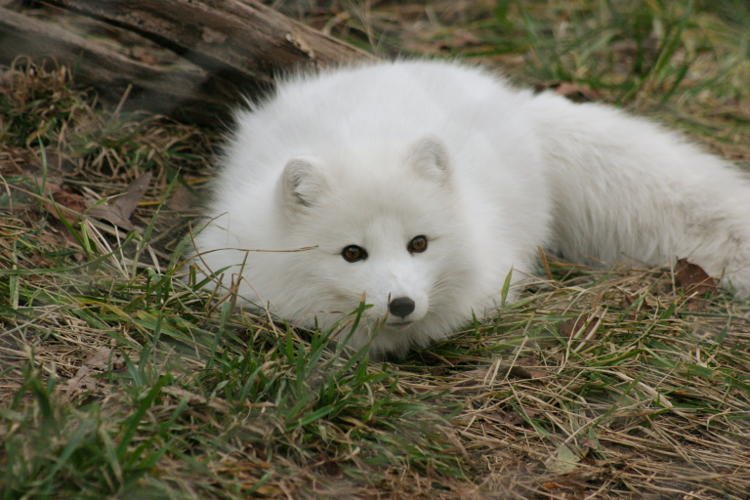
Familiarity with the species and exhibits may mean multiple visits, and let’s face it: not every day is going to be productive. We can accept that easily in ‘the wild,’ but have a harder time when it comes to places where we believe that shooting should be easy. The best shots rarely are, and are very often a mix of luck and perseverance. But knowing our subjects and conditions helps a lot too, and even a little bit of behavior. Pay attention – do some of the bird species perk up when particular calls can be heard? Do the otters not like eye contact? Do cooler days make the giraffes more active? Does the plumage or coat change? (Like the arctic fox above, which looks dirty brown in the summer months.) All this knowledge can give you an edge.

Some places simply aren’t designed with photographers in mind, and it will be impossible to eradicate all evidence of captive photos. Sad but true, and a little research ahead of time can save you a wasted trip. One place near me offers an expensive ‘photo tour’ which allows you to shoot through special photo ports in the fence on your side, but does nothing about the fences and walls in the background, and so isn’t worth the money in the slightest. Very clever positioning and angles may still net you some usable images, but a lot fewer than from places designed with more natural-looking enclosures.
However, nearly all such places run on donations and visitor income, so even a handful of useful images (or none at all) may still provide benefit to conservation or rescue efforts, and if we have the audience to draw greater attention to them, even our shots with fences in the background are useful to them. It doesn’t have to be all about us.
Captive Macro – I almost forgot this important aspect, but having a little more control over macro subjects can help a tremendous amount. Such efforts may run from a simple sprig of plant life in a clamp that can be positioned, up to a full aquarium or terrarium under a bank of lights with a custom background. But having an insect or smaller reptile (or even mammal) where it cannot escape, and/or may be positioned a little better than it might pose in the wild, can be a huge help, especially if there are particular details that you’re trying to illustrate. A simple tabletop setting of surface (plant, leaves, soil, etc,) a background – which might be just an appropriate photo print, and flexible lighting options is worlds better than trying to accomplish the same thing in situ.
With arthropods that have a tendency to fly off, for example, doing this within a bathroom, or in a small aquarium with good glass sides, can mean recapturing the specimen is a lot easier. Some insects will immediately land when the lights go off, and can be found by flashlight for recapture, but either way, a bathroom generally has much less space and fewer hiding places when something does escape.
I’ve harped on this countless times in the past, but an aquarium is hugely beneficial when it comes to small aquatic subjects, and is damn near the only way to shoot them. Even a cheapo plastic tank from a department store becomes perfectly useful when one side is replaced by a sheet of higher-quality glass, and the transparent sides allow both a choice of background (at such magnifications, the only thing needed is an appropriate color, because details will probably not show at all,) and a wide range of lighting angles.
Additional lights become much easier to manage, as well. A bright LED desk lamp can serve as a focusing and modeling light (to see how the shadows will fall,) while secondary strobes can be made from any flash unit that has a slave foot attached, and light strength can be managed with inexpensive fixed units by distance and positioning – a ten-degree or so turn will cut the light by a full stop. Plus you have the ability to use AC-powered light units – there are plenty of inexpensive AC slaves available. You will also have the options of light tents and wide diffusers without having to create your own portable units.
So with all that said, jump in, and good luck!