Let me be up front about this: when the weather turns nasty, it is rare that I’ll be out in it, any more than the next person, and I don’t make a habit out of many of the practices I’ll be talking about here. So don’t take this to be preachy or anything. But if you find yourself itching to get out and chase photos but blocked by weather that’s less than ideal, or worse, on a trip or vacation and faced with the dismal kind of conditions that you really didn’t want to see, this post is to point out that you’re not completely at a loss, and in fact, there are some interesting opportunities to be had.
There are three primary aspects of using weather itself as a factor or even a subject in your images: light quality, mood, and the elements themselves.
Light quality. Many people seem to think that bright sunny days are ideal for photography; many people are wrong. While such conditions can be useful for a handful of subjects, bright light increases contrast, producing dark shadows, and it’s not hard to have conditions that fall outside of the dynamic range that the camera can capture. When this happens, pale subjects like flowers, fur, feathers, snow, and even skin can get bleached out to pure featureless white, while dark subjects (largely the same list except for the snow, unless you get really crappy snow where you live) can drop off the other end of the scale and go pure black. Shadows across faces can become war paint in the image, people start squinting, and even deep, rich colors of flowers can get overexposed and washed out, losing any delicate aspect.
As the humidity increases, however, the light softens; hazy to light overcast conditions are quite useful for portraiture and garden shots, anything with a wider range of colors, and the deeper the humidity gets, the less contrast is produced, so it becomes easier to work with high-contrast subjects. Even white flowers and snow, which require contrast and shadows to show their textures and contours, can benefit from light overcast that prevents the highlights from going too bright. These conditions, however, will not produce much of anything from the sky, typically making it pale grey to pure white in images.
 Best rule to follow, but feel free to break as required for results: when the light is high-contrast (very bright with distinct shadows,) look for low-contrast subjects; this is a good time to find those textures, but not things with a lot of detail, especially not a lot of shadows (like foliage.) When the light is low-contrast (light to full overcast,) seek the subjects with high-contrast: lots of different colors, the finely-detailed things that throw a lot of shadows, the clash of textures and colors of the forest floor. Also note that, on bright days, you can find these conditions in shade, whether open shade like under a lone tree or on the shady side of a building, to deep shade like a thick forest canopy.
The other aspect of light quality is its color hue. Direct sunlight is, to our perception and purposes, white (it’s actually quite green, for a bit of trivia, but we don’t perceive it that way.) But for instance, near sunrise and sunset, humidity and thicker atmosphere filter out the blue and green registers, leaving light that becomes more yellow, orange, or red, depending on the exact conditions. These are colors we consider warm, inviting, pleasant, optimistic; this is a great time for portraiture and most scenics. Cloud cover, however, filters out the reds and yellows, producing more of a blue hue, and with greater cloud thickness much of the color is leached out. This is cold, which is also somber, moody, sometimes uninviting. This color cast personifies bad weather.
And, we are exceptionally attuned to recognizing these, even when we’re not at all conscious of them. So when they appear in images, we can get the feel of the weather from them, even if there is no direct example of the weather within. To use these, you need to know something about the white balance function. The setting for full sunlight is essentially for white light, and usually produces no alteration to what the camera captures. Settings for things like open shade, overcast, and of course the various artificial light sources are made to counteract the color cast that these all impart, and actively skew the color register of the image in the opposite direction. Auto White Balance samples the image itself, looking to see if any particular color seems dominant, and skews the image towards a neutral point – sometimes this works, sometimes this is badly fooled by images that don’t have a wide variety of colors. My point here is, if you want these moody colors from the natural light conditions to appear as they are, use the setting for full sunlight.
Side note: You can use other settings to skew the color register in a way that enhances mood, even when it’s not actually present. All it takes is knowing your RGB color wheel, what the conditions normally produce and what color is opposed to it. See this page for more details.
 And that brings us to mood. The color register of the image can do a lot to provoke a particular mood, but you can also do this with elements and setting. The first thing to recognize is how much our moods are affected by weather in the first place, so it’s not hard at all to compose something evocative. Perhaps, when the light is somber and dismal, you find the subject that matches this, like the abandoned house or overgrown woods. Or maybe you’d prefer the anachronism instead, heavy rain on the bright colors of the amusement park rides, icicles on the lifeguard’s chair – tell me these don’t have a story all their own. Some subjects can do well in any kind of weather, such as old cemeteries – this is the time you start noticing the things you might normally have passed by. Fog is such a wonderful thing to work with, not just for the mood itself, but because it can soften or mask distracting elements, heightening isolation, and fog at night is fantastically fun, especially with a well-chosen light source to shine through it.
It can help to think in terms of metaphor. Rain equates with tears of course, but also sweat, cleansing, the end of seasons, and even rebirth. Snow is a clean white blanket, but also silent, and often denotes the end of the year, and holidays; on any rustic bit of tackle it takes on a Currier & Ives vibe. And there’s the animal tracks it retains, often a story in themselves. Storm clouds themselves are virtually always ‘ominous,’ and speak of turmoil and change. Put any of these together with an interesting subject and they have a significant impact.
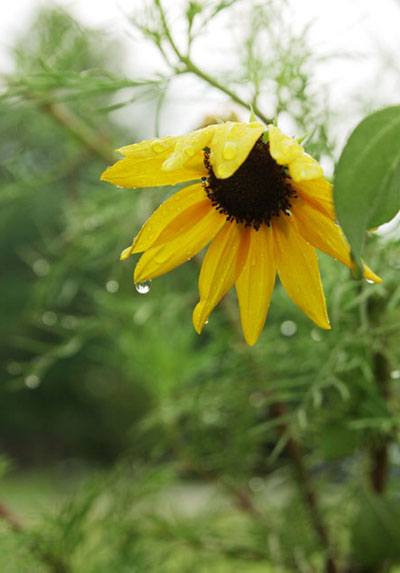
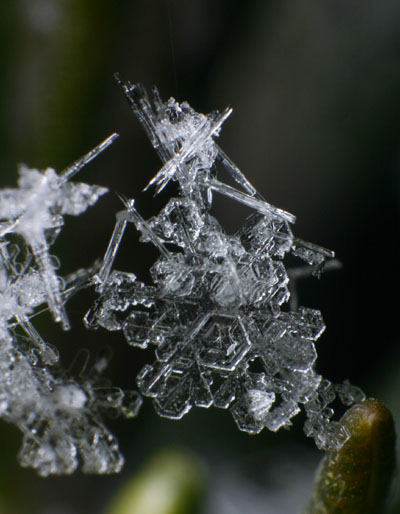
Elements. The weather elements themselves can often make great photographic subjects. Fog and mist will bring out every spiderweb in the vicinity. Frost, icicles, and hailstones can all have wonderful textures and appearances, especially with a little control over the lighting. Raindrops and dewdrops don’t need any promotion, but think about the wet surfaces of roads, or trees. Not only is the contrast increased, giving bright highlights and deep blacks in light conditions that usually don’t provide for them, they can reflect headlights, light spilling from the window of the house, or even a campfire for a touch of color. Snowflakes can be tricky – they melt upon touching a surface unless it’s had lots of time to cool down, and in the typical piles of accumulation they’re hard to make out individually, but this is where the tips of plants or spiderwebs come in, suspending them alone.
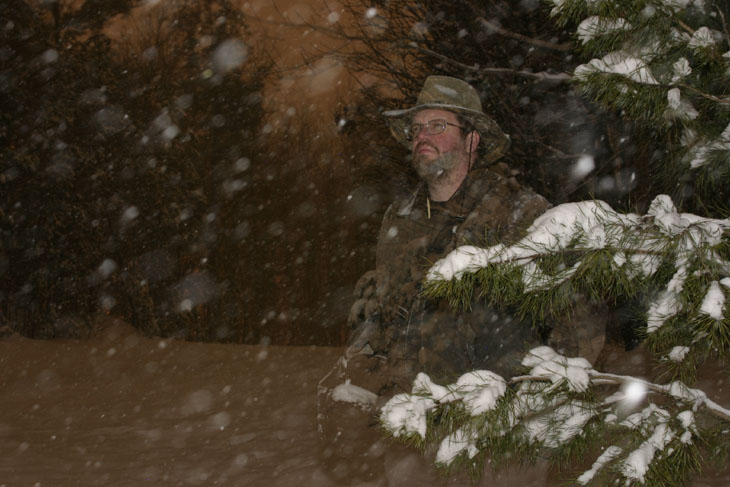
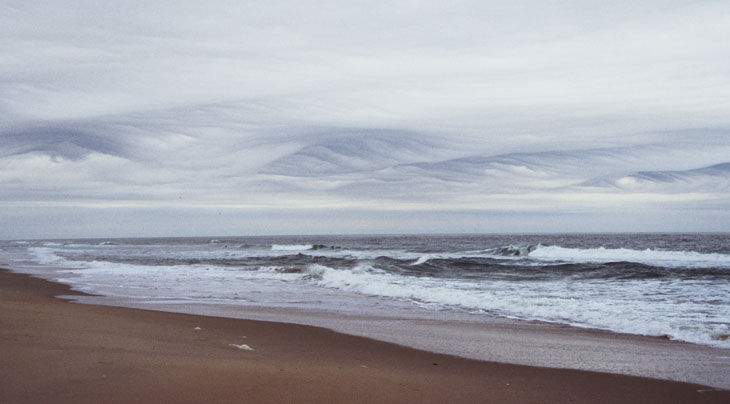
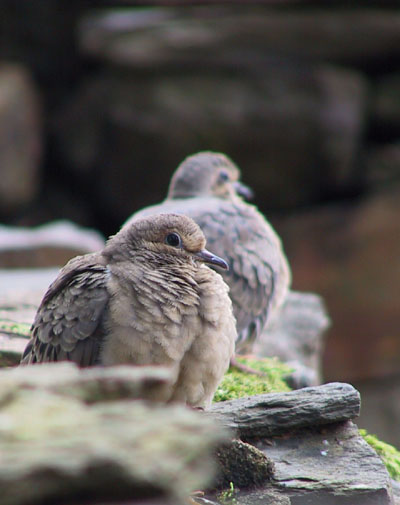
 One of the handier things about concentrating on the smaller, individual elements is that you don’t have to go far to use them, or find an appropriate, photogenic subject like an old house; they can be shot right out your back door. But there’s another type of element that is also useful, and that’s the kind that communicates what the weather is like. The fluffed bird that tells you it’s cold, the bent trees or white-capped waves that speak of the wind, the scarf or upturned collar, the diagonal streaks of rain. Since photography is a visual medium, finding the visual elements that convey to the viewer the non-visual aspects is always a plus – make them hear the wind, feel the chill, taste the rain. Give them everything you can to make them feel like they’re right inside it.
Speaking of inside it… well, there’s a limit, isn’t there? Especially when you’re brandishing your camera equipment. Don’t get so hung up on the shooting that you’re taking the chance of damaging your gear. Electronics can be very susceptible to the damp and humidity that usually defines ‘weather,’ so keep it all as dry as possible. Plastic bags or those weather covers help, but aren’t ever perfect – keep a towel handy at least. When you go indoors, put the equipment someplace to help dry it out entirely – blown air greatly increases the drying rate. If your camera bag has gotten even damp, take all of the equipment out and let the bag dry thoroughly for at least a day, since it can trap moisture and drive it into the camera otherwise (I speak from experience.) See also the cold weather tips here (and, for good measure, the hot weather tips) to help with things like condensation, dying batteries, and being prepared for the conditions yourself.
Better still is not to be out in the weather directly, but just before (tempting fate) or just afterward. These also have the benefit of producing the most interesting cloud activity, especially the sun breaking through a gap, and of course rainbows. Even when doing this, however, be prepared for a follow-up squall or temperature drop.
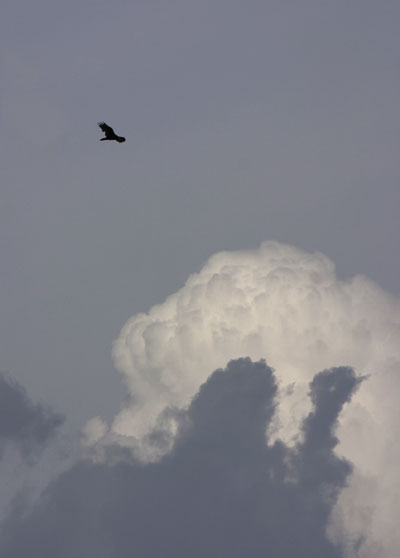 A note about getting cloud detail. Even in heavy overcast, the clouds will probably be a lot brighter than any terrestrial subject, so quite often you have to decide which one you’re going to get an exposure of, since you won’t get both in the same shot (unless you want to mess with HDR, which stands a good chance of looking fake.) For nice cloud detail, you will probably have to meter off of the clouds themselves, and this will likely render everything else dark, perhaps a silhouette against them, so picking a foreground subject that works well this way is good insurance. Bracket your shots however, or shoot a sequence where you meter off the clouds, the ground subject, and a few mixes in between. By the way, for a subject that’s not too big or too far away, a shot of fill-flash may help bring the light on it closer to the background sky, but this may take a lot of experiments to prevent it from looking fake.
A flash can also be used to bring out raindrops or snowflakes, especially during long exposures at night when they wouldn’t normally show up (the light being too low, and the rain or snow moving across the frame too fast to leave behind enough of an exposure.) Be warned, though, that if the flash is too close to the lens of the camera, you will likely produce out-of-focus ‘orbs’ – this is very true for fog and mist, so if you must use a light for those, try using a handheld flashlight off to the side, or getting the flash unit well away from the camera. Hand-triggering it through the ‘test’ button during exposure times of 1 second or more can work well. Also, this is a great time to experiment, because the conditions are different and you’re never quite sure what you might end up with.
Lightning photography is best done at night, when you can lock the shutter open and wait for the bolts to appear without worrying too much about over-exposing the frame. It’s tricky, and I’ve covered it before so I’ll link you to that post (and another, just for the story and images.) It’s best with some foreground subject, provided you can find one and get lined up with the storm appropriately, which is harder than you might imagine – I have yet to do this to my satisfaction. But in regards to that spoiled vacation thing, ocean views are great for seeing distant storms, either approaching or receding, and shooting out over a marina or harbor just adds a lot of atmosphere.
Also, because of that muted color from overcast skies, this isn’t a bad time to think about black & white photography, which can add some mood all its own. There’s no reason to switch the camera over to monochrome, since this is easy enough to do after the fact, but what does help is thinking in those terms, knowing you’re going to remove the color and so looking for the contrast instead. This page may help with both planning the shots and what to do with them afterward.
So if you’re stuck with the weather, treat it as a challenge, and see what you can come up with. Good luck, and have fun!