As I mentioned, I have more pics to put up and have been juggling time to try and get to them – not at all helped by the number of unforeseen circumstances that spring up on top of the routine things already taking up my time. So right now, I’m splitting up the posts by subject matter of the photos, and today is arthropod day.
My attempts to capture more Chinese mantis (Tenodera sinensis) behavior this year just weren’t panning out, from the squirrels that ate two of the three egg cases that I’d purchased to the rapid disappearance of most of the newborn from the remaining (though I did get some nice video,) there really wasn’t much opportunity, and I even saw none during visits to the botanical garden. I’d last seen the pair in the backyard just after the failed attempt to photograph one molting, then bupkiss. However, I recently rediscovered an adult in almost that same location, hanging out on the pokeweed, so this was likely one of those pair.

It spent a few days at least lurking there, possibly scarfing up the numerous caterpillars which were stripping leaves, then one appeared on the screen of a front window and hung out on the porch for a few hours; right size and shape, but beyond that I haven’t yet found a way to distinguish individuals apart so I can’t confirm that it was the same one.
Earlier I mentioned keeping plants in planters in the front yard because of the foul soil, and among them is a basil plant (man, we had such a batch growing in the old place! Homemade pesto and great sandwiches…) Early on, a spiny assassin bug (Sinea spinipes) moved in and staked out various spots near the flowers, and there it remains yet, now finally in adult form. I’ve only once seen it with prey, when I didn’t have time for shots (imagine that,) but it seems to be doing well.
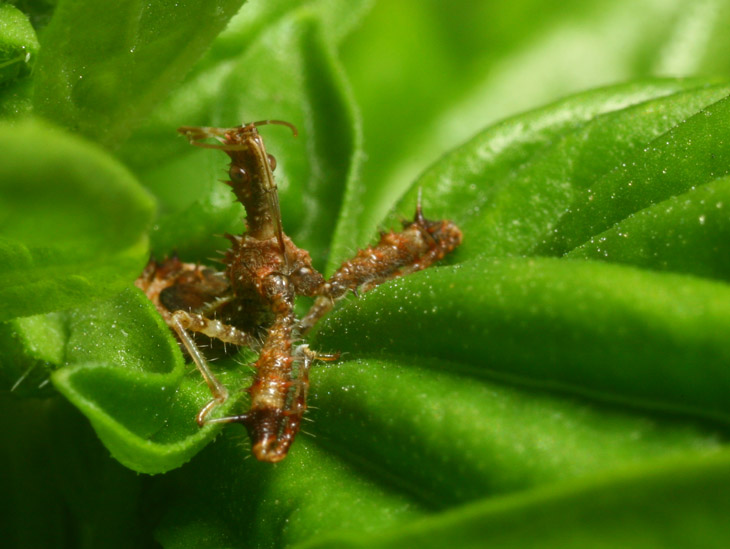
In case it’s confusing, the two large and nasty-looking forelegs are spread out in a broad V in front, with the head and thorax extending upwards from that as if it’s holding its nose in the air; you can see the proboscis, the prey-stabber/drainer, stretched under that. The abdomen is to the left, almost unseen among the leaves.
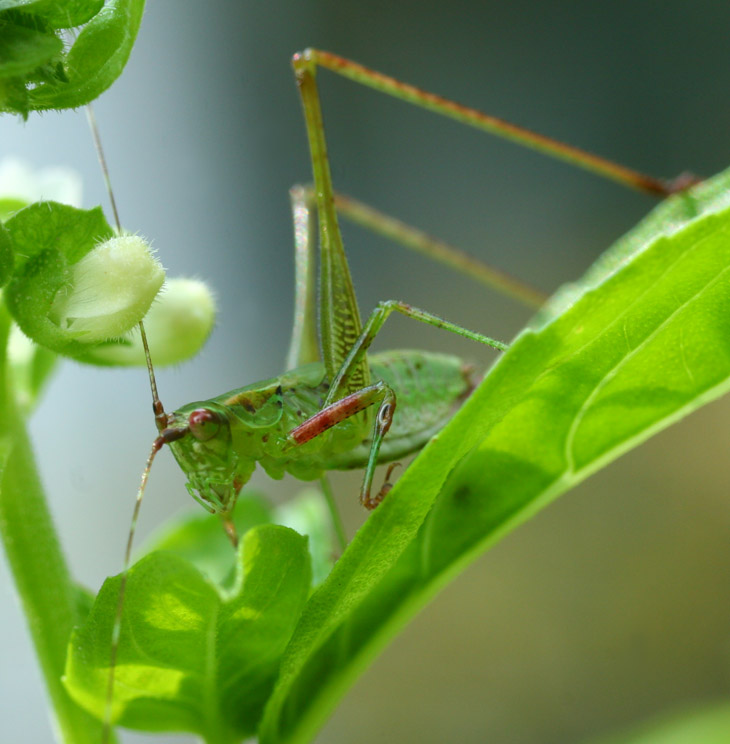
Unfortunately, the assassin measures less than 10mm in length, too small to handle the katydids that are abundant in the yard, so I have to chase them off myself when I find them on the basil, mint, or butterfly bushes. Which isn’t to say I won’t shoot a pic just for giggles.
The Girlfriend put together a few decorative plants to flank the front steps, and among them was some kind of sweet potato with broad, pale green leaves; we’re going to see them more in a later post. They attract a certain beetle that I’ve seen before but never photographed in detail, one that’s pretty cool actually: a golden tortoise beetle (Charidotella sexpunctata.)
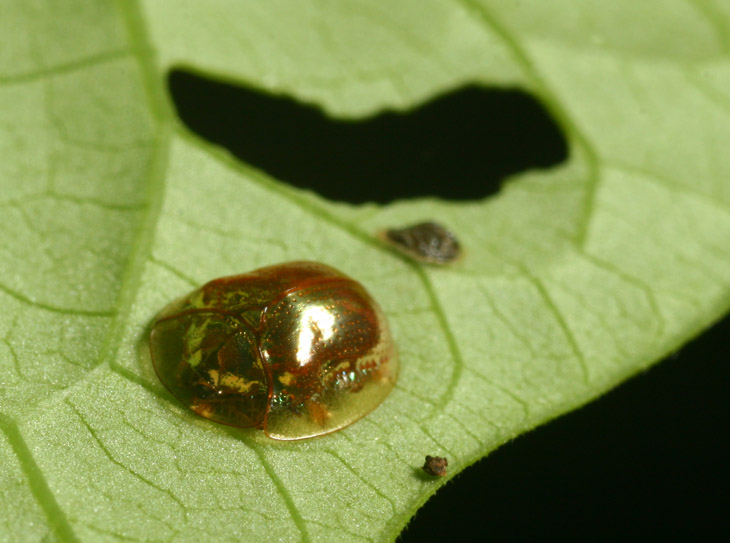
True to their name, they are a brilliant shiny gold hue with transparent margins – until they feel threatened. Then, they immediately change color to orange, often with spots, to mimic lady beetles, and will usually fly off quickly, so photographing them while gold is challenging. I got lucky in finding a couple hanging out on the underside of the potato leaves, and went in at night to get the shots. It meant lying on my back and getting bit by ants, but I’ve got a few images of them in gold phase now.
This is curious (no, not my trading off ant bites for photos, but the coloration of the beetles themselves.) I fully understand the change to lady beetle colors, since that species has a method of deterring predators and is known for that, so mimicking those colors may keep the tortoise beetles from being preyed on. But the shiny gold? The only thing I can think of that makes sense is appearing like a dewdrop, or possibly even a urine drop, and thus being ignored by predators. In fact, that reminds me of another shot that I didn’t have lined up but now gets into the post.
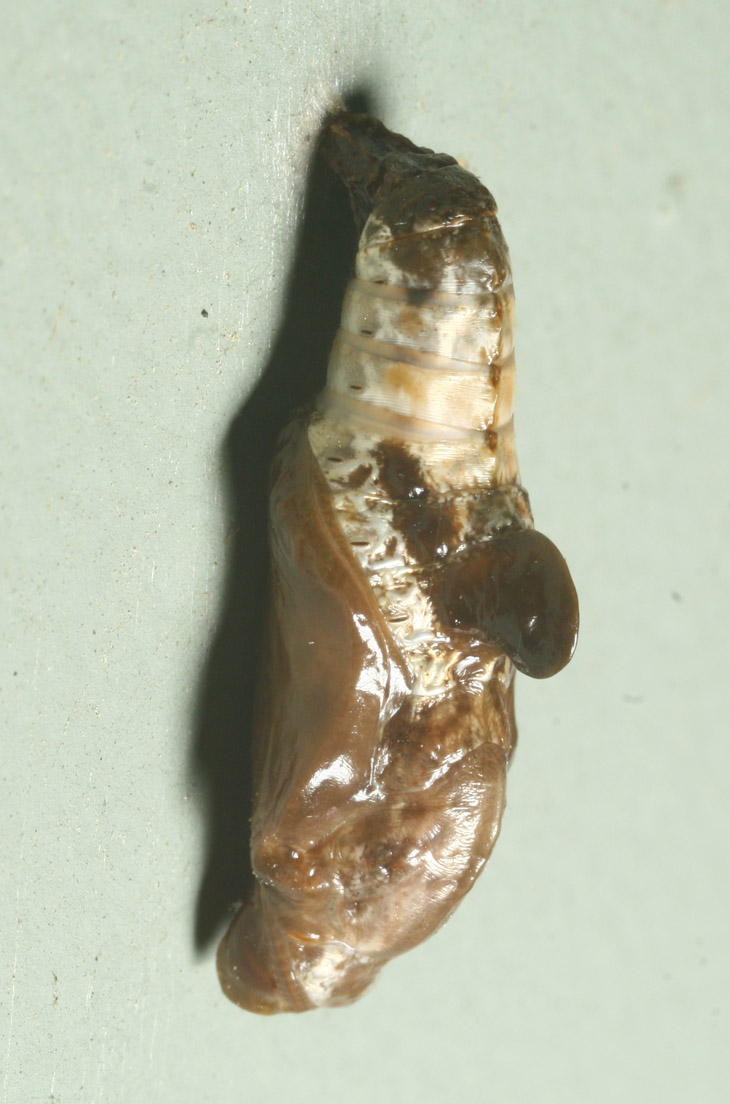
I found this on the side of the house, oh, about ten days ago, wanted to keep an eye on it but, yeah right, so it hatched out while I wasn’t looking. You can be excused if you thought it was simply bird shit, because that’s the idea – the caterpillar that made this chrysalis most likely looked almost the same, but the butterfly that resulted was much nicer looking. Look close and you can see the developing details, and know that the coloration is all from the pupa – the chrysalis case is transparent. Near as I can tell, this is the chrysalis of a red-spotted purple admiral (Limenitis arthemis astyanax,) which seems to be the subspecies that can be found in the area. The caterpillar/larval form also looks like bird shit, and thus escapes the attention of all but the creepiest birds – isn’t evolution cool? Somewhere in the distant past, a caterpillar randomly produced a gene variant that gave it a slight resemblance to feces, and because this caused the predators to avoid it slightly more often than the others without the variant, that gene gained a greater dominance in the population. Other variants enhanced the appearance and again gained more of a foothold; there easily could have been, and likely were, variants that made the larva look less like feces, but a failure to gross out birds just means you get eaten more often, so those variants would die out much faster. Eventually we find ourselves here, with a chrysalis that looks like a dab of bird shit, pasted in plain sight on the side of the house but ignored by everything except photographers with a highly questionable sense of curiosity. Don’t ask me what that says about human evolution (but I don’t have kids, so stop worrying.)
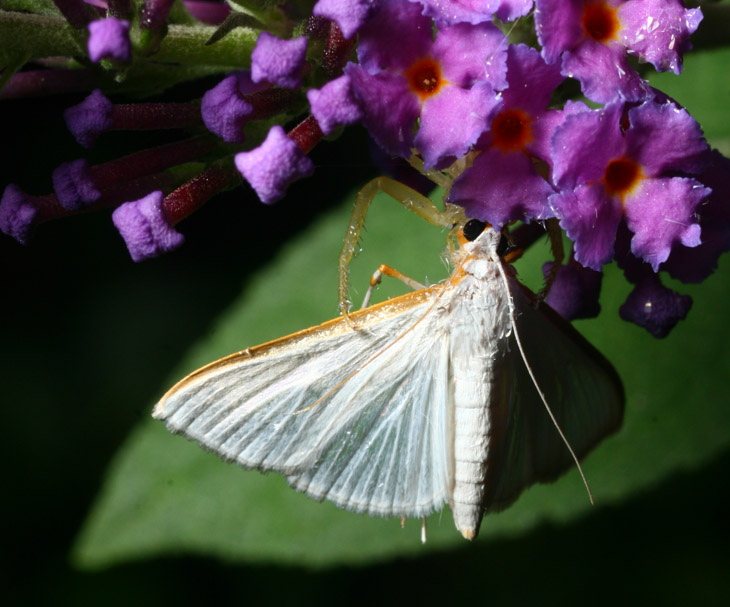
I said in an earlier post that the butterfly bushes (Buddleia davidii) were attracting other visitors, and here’s my favorite: the genus Hemaris, or clearwing moths. They go by a lot of different common names.

These hummingbird mimics have a distinct preference for certain flowers, and the butterfly bush is chief among them, at least as far as I’ve observed. There is also a species variant that looks more like a bumblebee or carpenter bee, but it’s not hard to tell any of them apart from what they’re mimicking at least: bees always land on the flowers while these moths remain hovering, and hummingbirds have a different flight pattern, faster and darting around a lot more, rarely visiting flowers in sequence, and often backing off from feeding to check for danger. However, telling the different Hemaris species apart can be more challenging. There are three species that appear like this in the area, H. gracilis, H. thysbe and H. diffinis; the last has dark legs and is out of the running for my photos here, but H. gracilis has reddish forelegs while H. thysbe has pale or white ones. I’ll let you tell me which one I’ve caught based on these photos, because it could be either.

By the way, the mimicry might be even better than we suspect; one of these was working around the butterfly bush while a real hummingbird (I think) was drinking from the adjacent feeder. Hummingbirds are notoriously territorial, and it took off after the moth momentarily, though whether it was actually fooled into thinking it was an intruding hummingbird, or whether it was simply protecting its food from any species, I can’t say for sure. I can’t say much for sure, can I? Really, I just hedge my bets in writing in case I have to run for office and someone is looking to use my past against me…
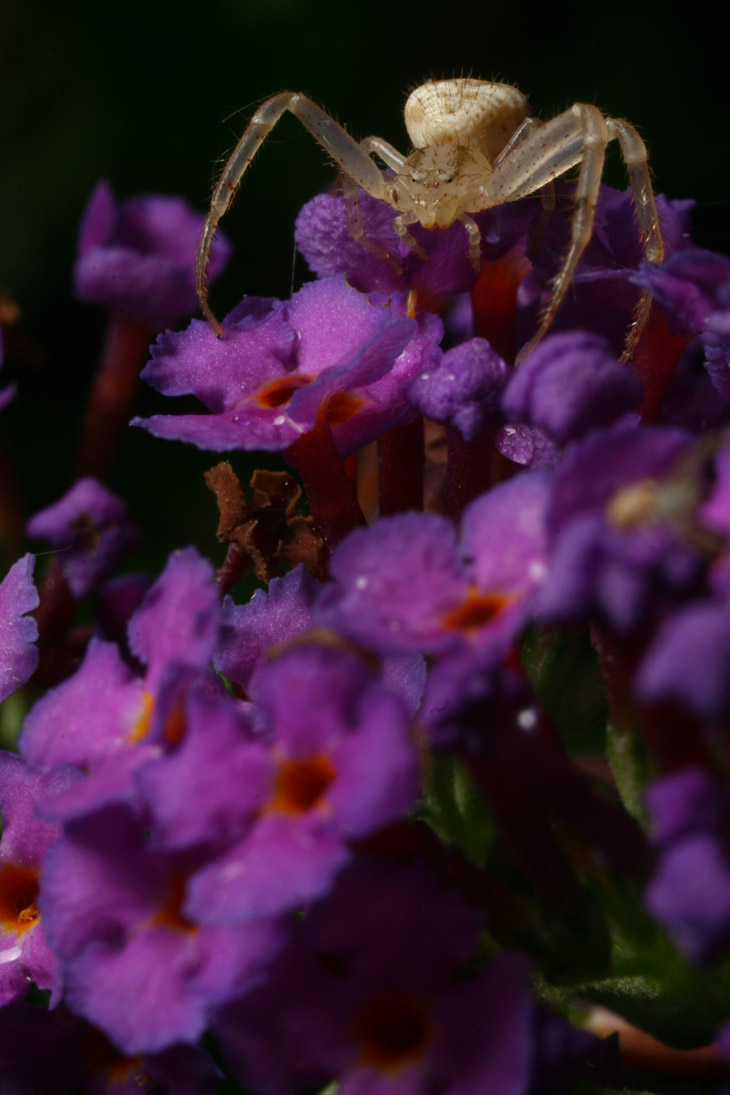
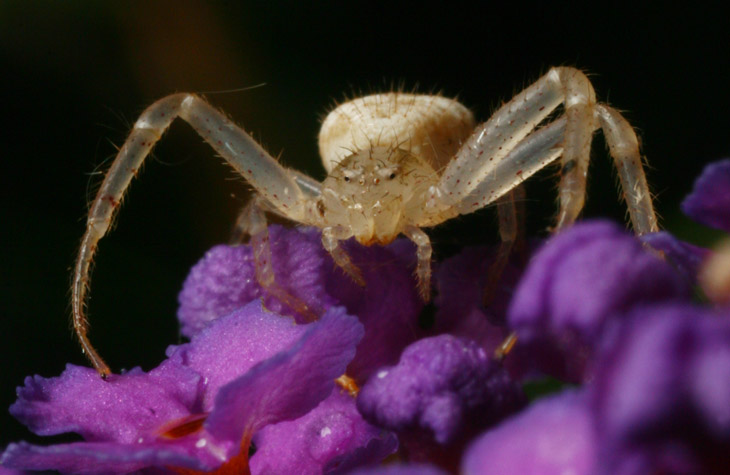
A recent trip to Mason Farm Biological Reserve netted a handful of arthropod species as well. The Immodest Mr Bugg made the mistake of saying that a particular plant that we stopped to look at didn’t have anything on it, which I took as a challenge, since virtually all plants have some kind of arthropod on them – you just have to look closely. True enough, within thirty seconds I found this little guy, which I’m pretty sure is an Acacesia hamata – you can see another image of the species here.
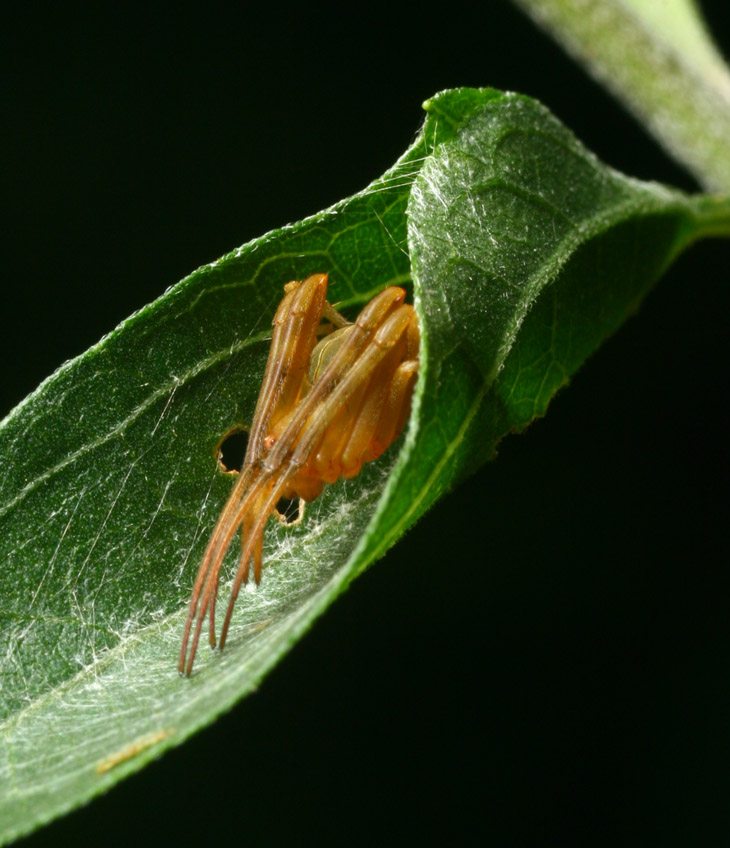
While looking through the viewfinder, I wasn’t sure if I could capture a particular detail, but upon unloading I found that I did: you can see the reddish eyes peeking out right alongside the ‘knees.’ Or ‘ankles.’ Some joint, anyway.
By the way, it’s a background goal of mine to capture a species in the act of stitching together leaf edges like this for their shelter, since there are quite a few that do this. Probably a tricky challenge, so don’t be looking for the shots later this week.
The preference of certain arthropods for specific plants was fairly evident on this trip, but none more so than the jagged ambush bugs (genus Phymata.) There were numerous wildflower species to be found, but the white clusters of what is probably boneset (genus Eupatorium) were the only place I found this diminutive predator, and I found several of them.
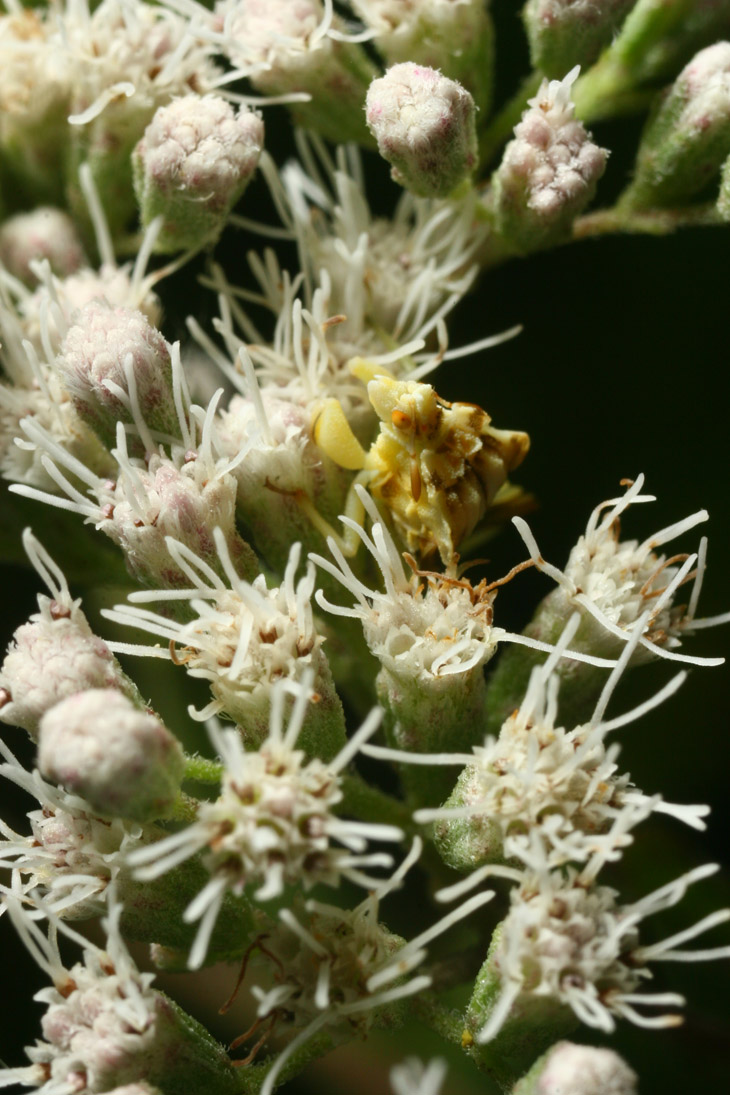
Aside from the ability to hide among the clusters easily, there is also the likelihood that the flowers attract the right size pollinator for ambush bugs to capture. Or it could just be a cultural thing of ambush bugs – who am I to say?

Jagged ambush bugs have great details, but they’re tiny little things so capturing this detail is challenging – my best results came with some elaborate preparations, so it wasn’t happening on this trip.
Okay, you know what? There’s a post coming up on doing research for these posts (for which I will probably have to do research,) but long story short: these things can take up way too much time. On a Maryland meadow beauty flower (Rhexia mariana) sat a just-barely-visible Hemapteran which I am not going to identify right now because the flower took long enough. The blossom was perhaps 20mm across, so you know how subtle the bug was.
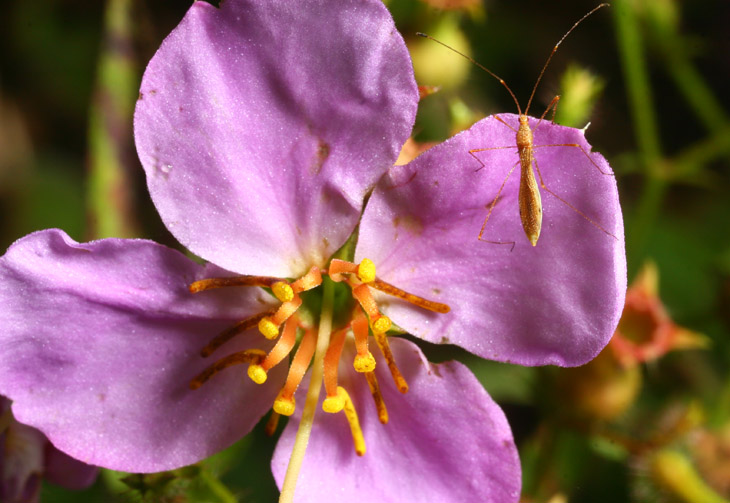
I had brought the macro rig along, and was taking it a bit more seriously on this outing than on many that I have with students, but there was also only so far that I was going to go, and elaborate positioning or doing lots of variations wasn’t in there – most of the shots were of the ‘lean in and snag a couple of frames’ variety. This makes it easy to miss the crucial focus, but again, this was a student outing and not a ‘working’ session. So as we take a look at this inset of the same frame, you know I was pleased – and that the nights have finally been getting low enough in temperature to hit the dew point.

And finally, we close with a fartsy shot as the rising sun backlit a partridge pea plant (Chamaecrista fasciculata,) the most numerous wildflower in the Reserve by far. While I needed to shade the camera with my outstretched hat to keep the sun’s glare off the lens and thus out of the photo, the light brought out the tiny orb weaver’s web quite nicely – it’s not 5cm across, but it’s a nice accent to the plant.


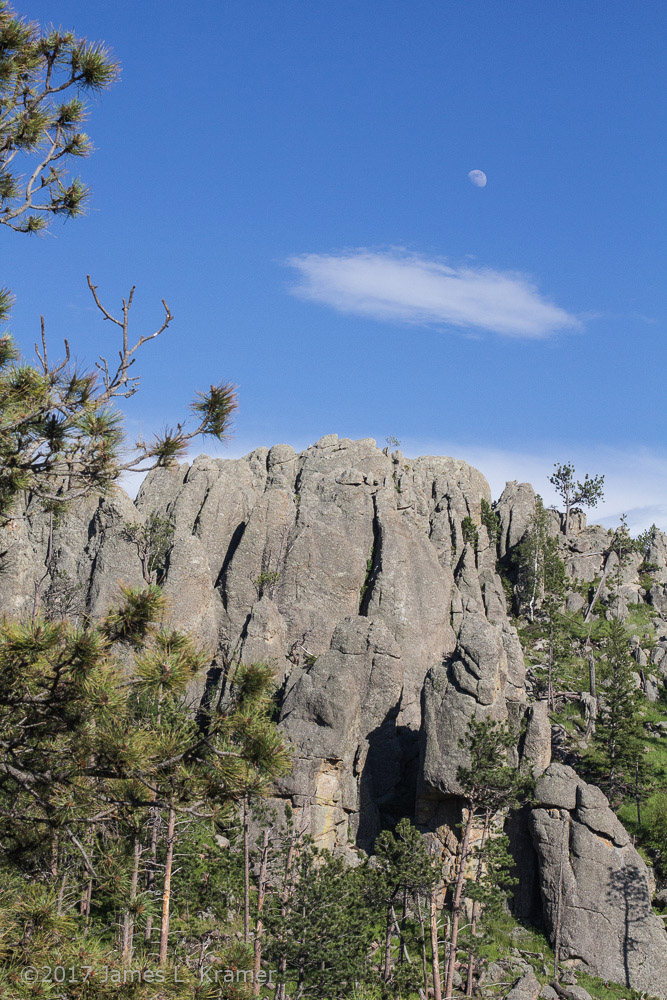
 If it helps, here’s an inset of that same shadow, brightened considerably – proof not only of the lack of caves, but that the scene managed not to exceed the range of the camera, even when it got damn close. It can be easy to lose detail within shadows in such light conditions, and for brighter areas to bleach out to pure white as well. Which is why I always say that, with high-contrast light (bright with distinct shadows,) look for low-contrast subjects – in other words, not brilliant flowers, and not zebras. And not people, on the whole – the shadows makes faces almost into caricatures. Plus there’s the squinting.