Infinity is this curious concept, wide open for misinterpretation, but even in its refined sense, it often suffers from one of the biggest problems of philosophy: we believe that since we’ve put a lot of effort into it, it must be important.
To explain the most misunderstood aspect of it, I’m going to steal brazenly from an article in Science ’82, a now-defunct magazine that I cannot refer back to and may have even mistitled (since the title relied on the year of the issue’s publication.) The article included a simple illustration: a cloud of dots disappearing over the horizon labeled, “Infinite number of dots.” Next to it, a long box disappearing over the horizon labeled, “Box the dots came in.” And next to that, a semi-truck also disappearing labeled, “Truck the box came in.” This is a graphic illustration (okay, it’s a text description of a graphic illustration) of Georg Cantor’s Set Theory.
Isn’t that simple? Infinite does not mean, “everything,” it simply means “without end.” It can be constrained in other manners, such as height and width, yet still be infinite depth. And because of this, the box and the truck both have infinite volume even though one can fit inside the other.
Another example is to think of a line. It passes in front of you, but extends to infinity in both directions. Fine. Now imagine removing a one-centimeter segment from the line, right in front of you. What you have done is create two lines, both infinite. The one-centimeter gap between the latter two lines is not, despite our instincts with finite lengths, “infinity minus one centimeter.” Initially, I had said here that, “You cannot subtract from infinity,” but as Set Theory and the non-illustration above implies, yes, you can. Just reduce the height of the box. Will it still hold all the dots? Sure, just put the overflow down at the other end…
Now, let’s have some fun. I propose a number: 0.[infinite number of zeros]1, or if that’s confusing, perhaps we’ll use the ~ symbol to fill in for an unending string, rendered 0.000~1. Is this even possible? How can you put a 1 on the end of a string of zeros that never reaches an end? It’s a nonsense number!
But not quite. It’s what you’d add to 0.999~ to get the sum of 1. Wasn’t that easy?
Since, of course, you cannot add a number onto the end when there’s no end, this is supposed to be the mathematical ‘proof’ that 0.999~ is equal to 1. It is also expressed by the idea that 1 divided by 3 produces 0.333~, multiplied times 3 again gives 0.999~. I simply find it mathematical proof that mathematics is an abstract, and trying to make it define logic is stupid. The issue is not with 0.999~ actually equaling 1, making an infinite series actually end, it’s with trying to use a Base 10 numbering system to represent certain discrete concepts, like division by 3. If we use other numbering systems, like Base 3 or Base 9, we have no issues with it at all, though it may introduce other interesting examples of infinite fractions.
As another example of the flaw, we can refer to a basic logic/math puzzle, where one travels half the distance to a goal, then half the remaining distance, and so on – the goal is never reached because one never travels the entire distance to it. However, if you travel 90% of the distance, then 90% of that, and so on, you’re supposed to reach the goal, according to the 0.999~=1 crowd. Yeah, right.
Want a fun mind bender? Take those lines we messed with above, with the centimeter gap in between. Those lines do have an end, but just one each. So we place the 1 on that end, and extend the infinite line of zeros backwards towards the decimal point: 0.~0001 instead of 0.000~1. I’m willing to bet someone would call that cheating in some way, but it’s the same as taking a piece of super elastic just a meter long and grasping both ends close together, leaving a half-loop of elastic drooping between. Now, take that loop, which represents all the zeros between the decimal and the 1 on either end, and stretch it away from you infinitely.
We haven’t pissed off the mathematicians enough yet, because we haven’t gotten to the real heart of the matter, which is that all of it is just word games. Regardless of how specific you want to make a number, or properties you want to apply to a concept, we reach a very real limit in attempting to use this in any application at all, for instance to measure the smallest object or distance. Even if we ignore the difficulties with clumsy rulers made of a real substance, eventually we reach the sub-atomic level where everything becomes a haze of energy anyway, without distinct boundaries and hard enough to simply pin down a position. At this level, it has become clear that ‘solid’ (and perhaps even ‘matter’) is a term we can only use within a specific set of circumstances – coincidentally, the one we inhabit every day.
Infinity is, in fact, a meaningless abstract. We have no actual examples of it, anywhere, and no real use for it. It’s easy to say that numbers are infinite – we can keep counting forever. But, we actually can’t. Ignoring for the moment that we’re going to die before reaching 11,352,960,000, or that the sun is going to fry the planet at some point in the future, there’s also the very simple fact that we start repeating once we pass a mere ten digits. It’s not infinite; it’s just a pattern. The pattern even gets so unwieldy and boring that we start using shortcuts, like 3×10¹⁸.
From time to time, someone says, “It’s an infinite universe; anything is possible.” I’ve even said such things myself (probably elsewhere in this blog.) But it’s not necessarily true. Any of the infinite lines, above, will never cross themselves, even in a curved universe – though in such a case they may form a circle. And if the universe really does run by the laws of physics we know, neither infinity nor eternity will allow certain things to happen, such as heat transferring from a colder (less active) to a hotter (more active) atom, increasing their difference in reverse entropy.
Here’s another example that often sparks confusion and debate. Quantum mechanics tells us subatomic particles can occasionally play silly games and thumb their noses at standard physics, jumping to a position far from their original location, even through other objects. And if one can do it, then there’s a tiny chance that every particle of the billions upon billions in your bobblehead of Quentin Tarantino [I know that’s redundant] will all leap in exactly the same direction at the same time and teleport instantly from your desk into Madonna’s hope chest. The chances of this are, of course, somewhat small, but in an infinite universe, there is an infinite number of chances for reiteration, right? So not only is it guaranteed to happen, it already has, someplace. That’s how the reasoning goes, anyway.
But this ignores numerous factors. For one, the probabilities that we determine for quantum foolishness are based only on our observations, which even if wholly accurate, does not mean such events are typical, or unrestricted by other factors we have not yet discovered. As the universe expands, energy becomes more dissipated, so probabilities on what it is capable of doing constantly change. And then there’s the possibility that any given event is a singular thing, never to repeat again – it’s impossible to calculate a probability for that, and even impossible for us to know that it was singular.
And, how do we know that the universe is infinite? We don’t. We simply haven’t found any edges or constraints, but have found lots of space, a truly staggering amount really (by law, I am obligated to include the word “vast” here.) In every direction we point our telescopes, we find much the same conditions, indicating no border or limitation – we do not, for instance, see stars no further than 100 million light years if we look off in that direction (no, not there; there,) which might indicate the edge of the expanding matter from the Big Bang. But since the universe has been expanding, according to our best estimates, for 13.8 billion years, this is enough time to develop quite a waistline.
What might we expect an ‘edge’ to be like? Well, it could be one of three things. It could reflect back any energy that reaches it, like a mirror. It could absorb and collect any energy that reaches it, like a wall. Or it could simply absorb such energy and vanish it, like, um… we don’t know of anything that can do that, actually. The first would mean that the energy from the earliest stars would bounce back once it reached the edge, probably provoking more star formation at the outer rim and certainly reflecting a lot of light. The second would mean much the same, since the ‘matter’ thereof would gain so much energy it glowed, if not actually producing a collapsing force in itself – an explosion turned inside-out. The third is, really, identical to empty space anyway, so the point is academic. No matter what, however, any potential edge is so far away from us that there’s no chance we could possibly reach it, nor even that any effect that it had could reach us. It could even be made of pepperoni pizza, but if it’s expanding faster than light there’s no way we could even see it.
And that is really what defines infinity for us puny humans: so big we can’t fathom it and have no use for it. It’s fun to speculate about how it works and whether it can actually exist, but there’s really nothing more to it than semantics.


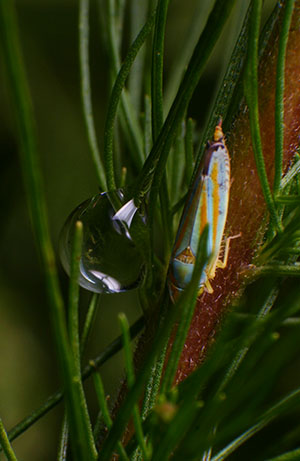 Do you get the impression that their exoskeleton is good at repelling water? It’s actually incredibly good – they coat themselves with an internally-produced substance called
 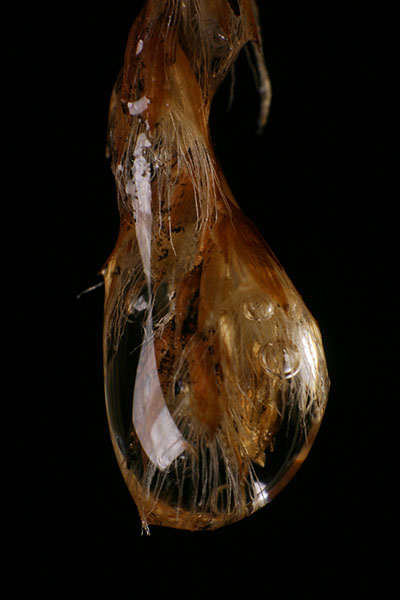 I hadn’t originally intended to include most of that above – it came from suddenly recalling Ed Yong’s article while thinking about those water drops. What was intended was to include this other image from the same photography session, a lone raindrop hanging from the tip of the dog fennel flowers (
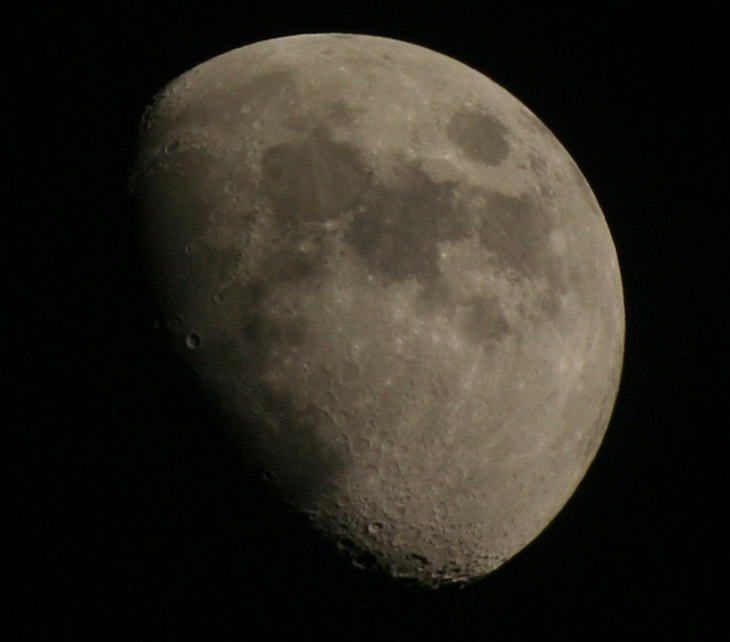
 I also did lots of other night experiments, but none of them turned out quite the way I wanted; getting the light balanced for night exposures can be tricky, and the LCD on the camera is only partially useful in that regard – it doesn’t give a very good idea of exposure levels, especially not subtleties. During this I was trying to figure out why some of the images seemed to be coming up blurred, almost in a fog, while others were sharp without changing focus at all, until I realized my breath was sometimes fogging up the LCD ;-)
 A tripod would have been no real help with this one – it wasn’t the movement of the camera that was the biggest problem, but the gentle bobbing of the saturated plants in the breeze, so the “take lots of frames” technique was the only thing I could count on. In the foreground are the remains of the
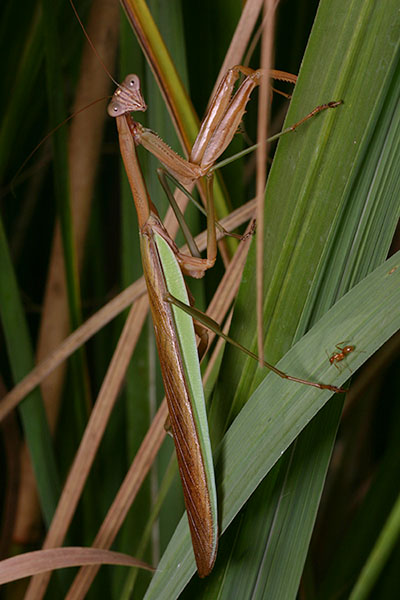 Then she reappeared with a much more trim figure, and I knew I had missed it. In the days leading up to this, she had been found newly molted on one of the front patches of pampas grass (there are three, of two different species,) then spotted on the butterfly bush, a tomato plant, the rosemary bush (where she likely ate one of the

 Sometimes, the surface is as fine as a spider web, which are the best conditions to watch for because a frost-covered orb web is a great photo subject, as you might imagine. I have yet to find all those conditions in place myself – orb webs are often long gone by the time the frost conditions roll in – and to the best of my knowledge Jim hasn’t found them either.
 Which should make the conditions of this next image very obvious – I’m guessing that Jim was working just as the sun broke through, because there’s still frost visible and I imagine it didn’t last long. Either that or it was freakin’ cold. As indicated in the previous post, these are higher contrast conditions – note the bright highlights and distinctive shadows, giving some enhancement to the shape of this seed pod. It also made the bare branches in the background stand out a bit sharper, slightly distracting – much more and it would be working against the image too strongly. Ideally, this is where you try to find a dark background, like a patch of shade, to position behind the seed pod, using that contrast to really make it stand out, but such things can be hard to accomplish. Here’s a sneaky little trick, if you’re prepared: put the camera on a tripod, using a remote shutter release if necessary, and use your own shadow to provide the darker background.

 First and foremost, and something I teach my students right off the bat, is that photographs by nature have increased contrast over what we see through our eyes. They have a narrow dynamic range, a term that straddles the border between explanatory and pompous. We all know, for instance, that dogs can hear higher pitches than we can, and perhaps you know that we only see a narrow spectrum of light, unable to discern infra-red and ultra-violet ourselves, much less gamma rays or microwaves. Well, the camera’s much worse than we are, partially because of sensitivity, but mostly because of the limitations of the medium. You can aim right at the sun and get a shot (not recommended actually,) but printed on paper or glowing from a monitor, it will never make anyone look away in tears – it will simply be white. The image has to dump a lot of brightness levels just to work.