Let’s face it: We all have to deal with stagnation every once in a while (some of us more than others) – chasing the same subjects, using the same approach, locked into a particular style. Now, don’t get me wrong: Having a distinct style (one that’s appealing, mind you) and being known for producing certain results can be a huge benefit, and it’s how most of the well-known photographers have become well-known. Yet there’s also such a thing as being in a rut, or in simply not having anything compelling to photograph. Thus this week’s topic in how to develop something new to do.
I’ll start with, don’t think you always have to be productive. Just maintaining this here blogarama puts a certain obligation on me, admittedly self-imposed, to always have content, which has it’s benefits and detriments. There’s no actual necessity, nothing relies on it, and pushing too hard can lead to producing substandard stuff just to be producing something. Yet, it’s an exercise in being able to produce more-or-less on demand, and keeps me motivated to examine things, both photographically and educationally. I’ll leave it up to you to determine if any part of this is working functionally…
Sometimes, all you need to do is have patience and wait for inspiration to hit, because it usually comes along. Yet it’s not a dependable thing, and can easily come in fits and surges, so depending on it, especially if you have some reason to do something now, isn’t the best of practices. If you’re simply not getting any inspiration at all, perhaps it’s time to switch up a little. But other than that, try not to sweat it.
Meanwhile, here are a few ideas to potentially awaken some creativity or motivation or remind you of potential projects.
Weekly challenges. These can be hit-or-miss, in many ways. I’ve participated in a few, usually encouraging myself to participate in every one, and this can very easily lead to substandard work. I’m inclined to say, if you do something like this, see if it sparks new ideas or techniques or whatever, but don’t force it. If you’re not inspired by the challenge, let it go that week.

Photo A Day. The idea being, take at least one photo a day, maybe limited to one, maybe not, but make it count – aim for print-quality, best-you-can-accomplish kind of stuff. I’ve never had this work well. It sounds good, but it’s definitely forcing things to happen, and while this works occasionally, in my experience, it fails more often than it succeeds. And when you notice this, it’s discouraging.
Study what others are doing. Much better. While seeing what kind of bar is set can occasionally (often) be daunting, especially if you’re looking at the best sources you can locate, the fact that someone else produced something you find compelling is proof enough that it’s possible and within reach. Don’t just admire work, though; study it, break it down to its components, figure out the lighting or the technique or the timing, whatever, to gain an understanding of how you might want to do something of a similar nature.
Recognize, too, that what you’re seeing is perhaps their best work, and it might be a solitary piece among a lot of rejects. No one can do excellent work constantly, no one keeps everything they produce.
If you find yourself starting to get discouraged, thinking your work is never going to be up to standards or competitive, just cruise around social media or ‘average’ sources for a while, and compare your work to that. You’ll feel better quickly.
Change/expand your style. If you typically shoot single-flash, close-background work, or natural light, or have a fixed studio setup, or a fixed macro setup – whatever – try something new. Add a reflector or fill-flash, a secondary light someplace, switch to backlighting, try shooting from a blind or a fixed location, stake out a potential subject, get higher, get lower, do more candid work. What can be considered the opposite of what you were doing? Try that,
Recreate a favorite from someone else. Yes, a crass copy – the goal here is not to try and pass this off as your own style, but to challenge yourself to replicate the conditions, lighting, expression, and so on. This can be a lot of fun. but also a great lesson towards figuring out how the image worked in the first place, or how to balance the lighting in the same way, or how to achieve the angle that was used. Along the way, you will almost certainly learn something, and might well be inspired to tackle something new but related.
Also, if it’s a portrait, you can up the ante by making your copy a self-portrait. No one needs to see it…

Revisit/recreate a past photo of your own. Maybe it’s one that you always liked, but realize you can do better now; conversely, you might have always thought you could do better – now’s the time.
By the way, recreating a landscape shot is perhaps one of the hardest things you might do. Just being in the right location might require some effort, but to also get the weather conditions and lighting and foliage quality and all that? This is one you might take months or years to reproduce effectively.
Begin a photo story. This can be anything you want, whether it’s a life cycle or a dramatic occurrence or something completely fictional. While such things are most often used for traveling to a new location, change it up a bit. Realizing that you now have to illustrate something in particular can open up a whole new approach, or simply make you realize that more photos of a different nature are needed.
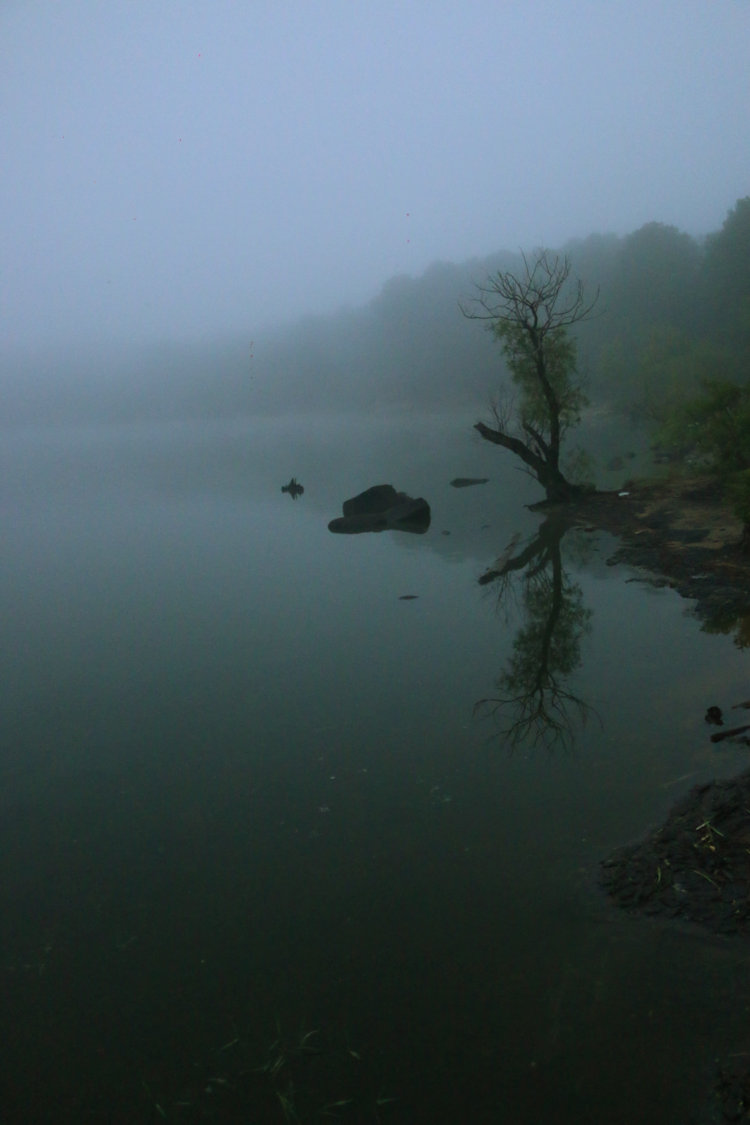
Go someplace new. It doesn’t have to be far, it doesn’t have to be ideal – and in fact, I often recommend against the places that are popular, for numerous reasons, among them being too crowded, too developed, or done to death. Just get out and explore whatever environment suits you – or for a real challenge, one that does not.
By the way, never go someplace with the expectation that you will find great subjects or remarkable vistas or whatever. No place has guarantees, every place has bad conditions at times. Plus, if it’s too easy, anyone can do it. However, if you get someplace that isn’t meeting with your hopes, well, there’s your new challenge: find something anyway.

Branch out. Try a different genre than you have before – portraiture, photojournalism, boudoir, product photography, high-contrast, abstract, chiaroscuro, special effects, film, developing, advanced editing, time-lapse, pinhole, infra-red… it’s easy to find something else, so determine what it actually takes to accomplish it. Chances are it’s more than you imagined. Which is a warning in itself: Don’t accept a paying gig in a genre you haven’t tackled before – this can easily turn out badly when you discover that you’re really not prepared, no matter how experienced you are in other fields. That said, it’s easier now than ever to find instruction, guidance, videos, and advice on other fields, what with the webbernets. Back when I was shooting film, it required finding books, magazine articles, or mentors. And we had to carry our own cameras (well, okay, still do…)
Maintain a list of projects and subject goals. Mine’s rather haphazard, better than half of them being only in my head, but it’s lengthy. Any time that things get slow, or you enter the off-season, or the weather keeps you indoors, dig out the project list and see what’s available.
Some of these might require a specific time of year – this is the time to put a reminder in your calendar that pops up with enough advance warning to prepare for when it occurs. If preparation is required, put in reminders for that too (“Look for hip-waders.”)

Dig out some old equipment to use, or purchase some. This can be a fun pastime, or lead to a whole other pursuit. granted, in photography this likely means you’ll be trying to find the right film, and the place to get it developed (unless what you’ve dug out is darkroom equipment,) but it’s often worth the effort. Plus, you may now have the opportunity to try some techniques or media that don’t translate well to digital, like multiple exposures or portrait films – I still can’t believe we ditched portrait films…
Modify your equipment for those esoteric needs. I don’t want to tell you how often I do this, and it’s liable to be a Tip Jar post of its own, perhaps more than one. But having a piece perfected and ready to go when the subject that needs it pops up is a major boon. Specialized lighting, backdrops, additions to the camera bag, specialty clothing – whatever. Not everything is available for purchase, or (like me, very often) you may be unwilling to pay the exorbitant price that’s asked, so now it’s up to you to create it yourself.
There are undoubtedly more, but I’m up against a deadline here (actually, already past it,) and so I’ll count on 1,500 words to at least give you a start ;-) In fact, I was largely done with the the post, laying in the illustrative photos, and added another 100 words with another topic. Anyway, good luck with it!


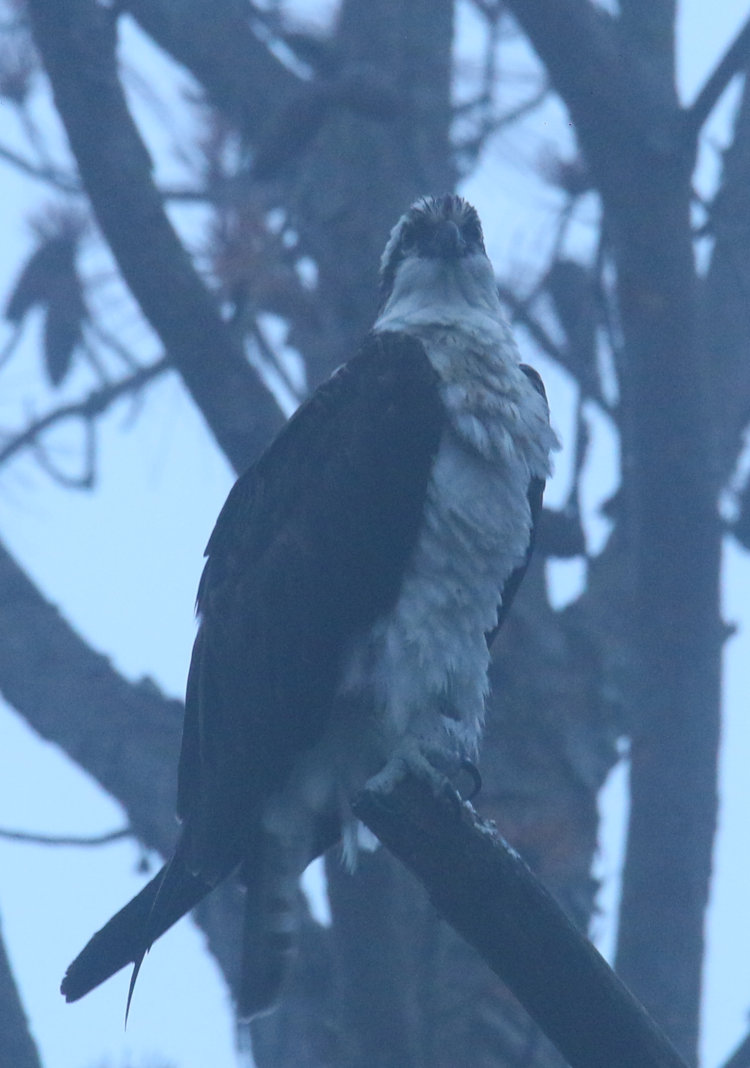
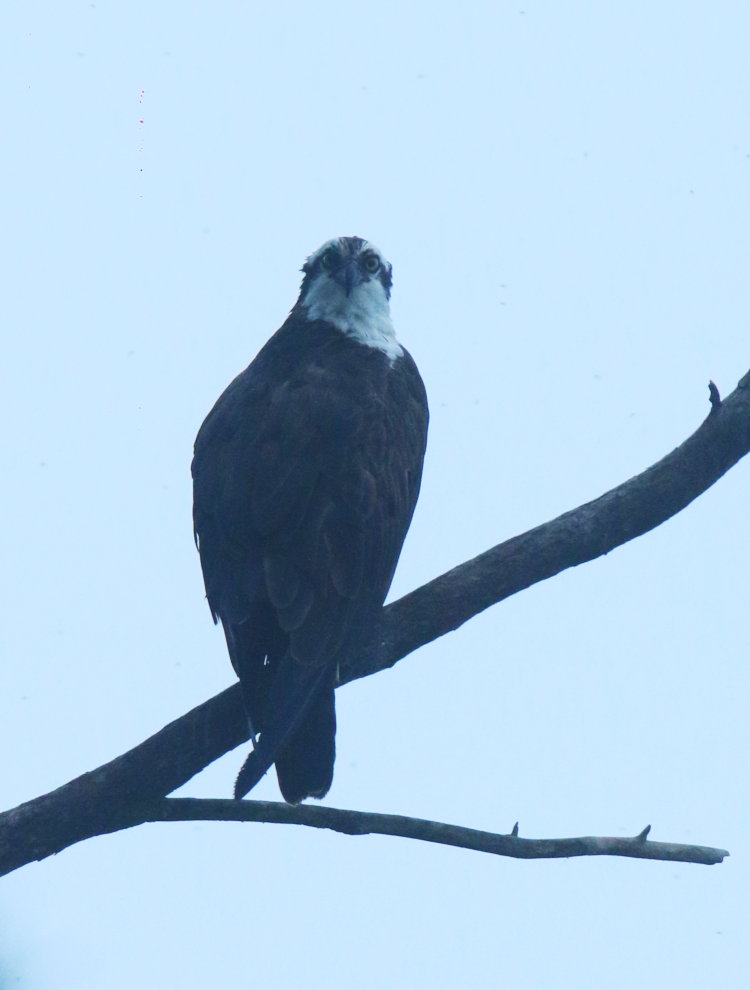
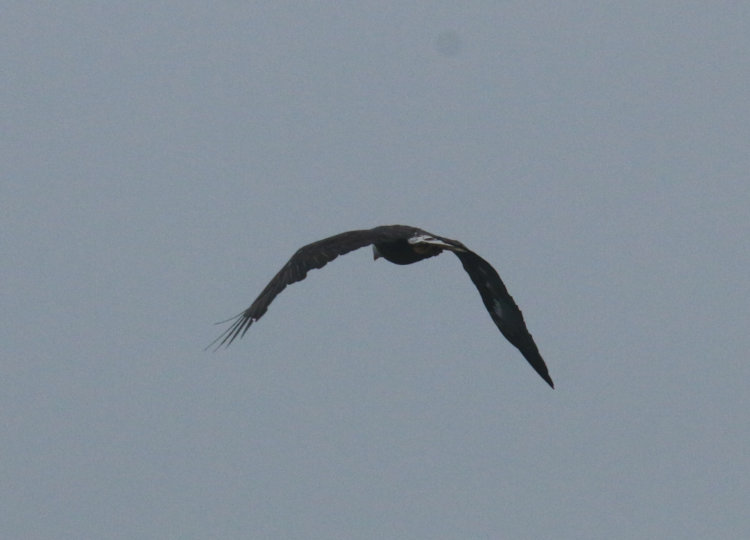
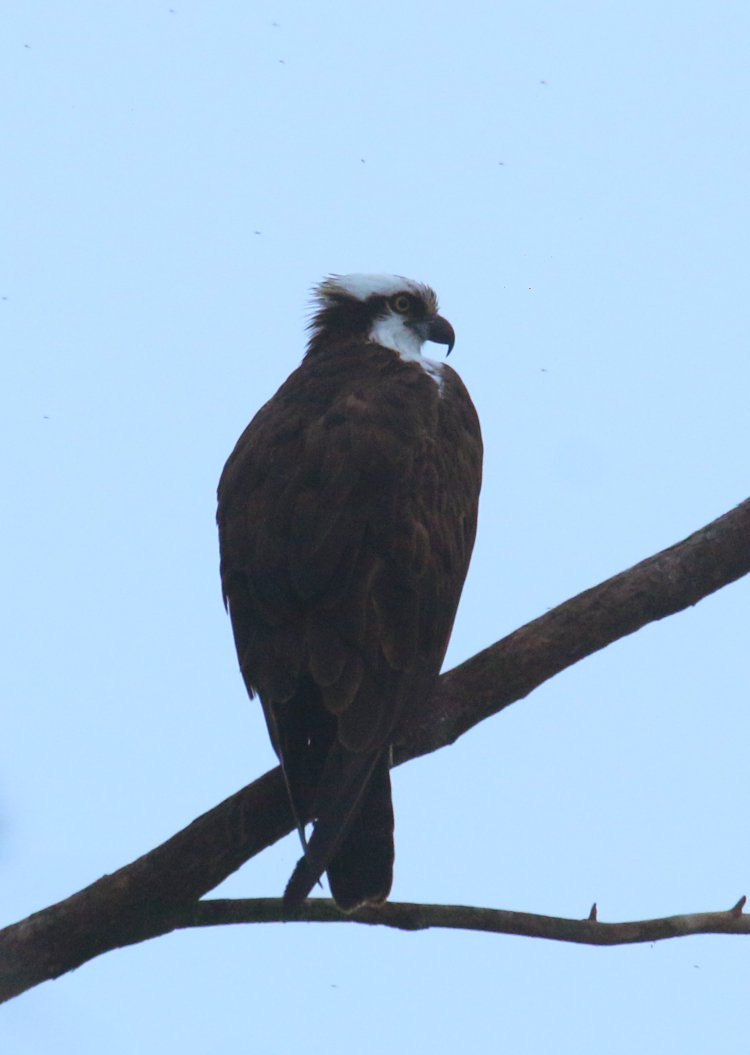
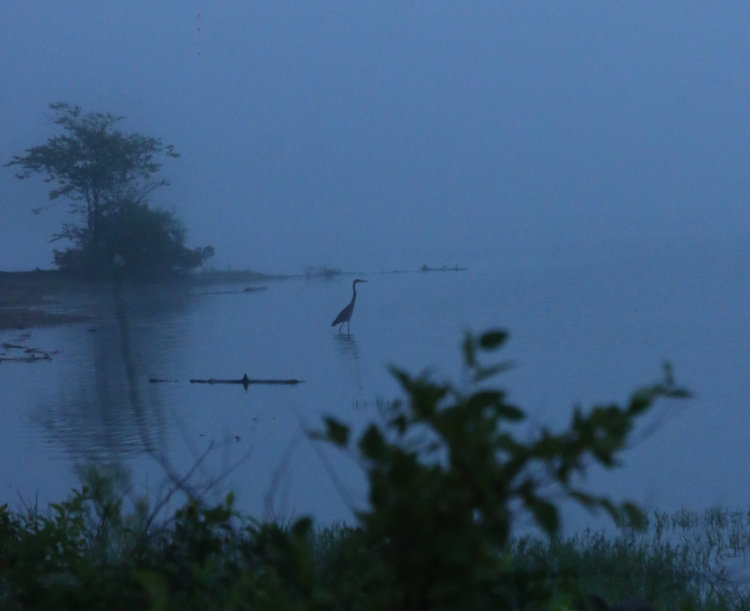
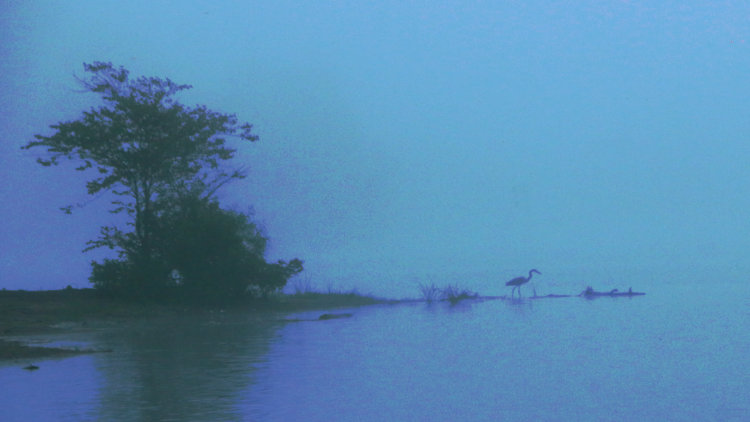
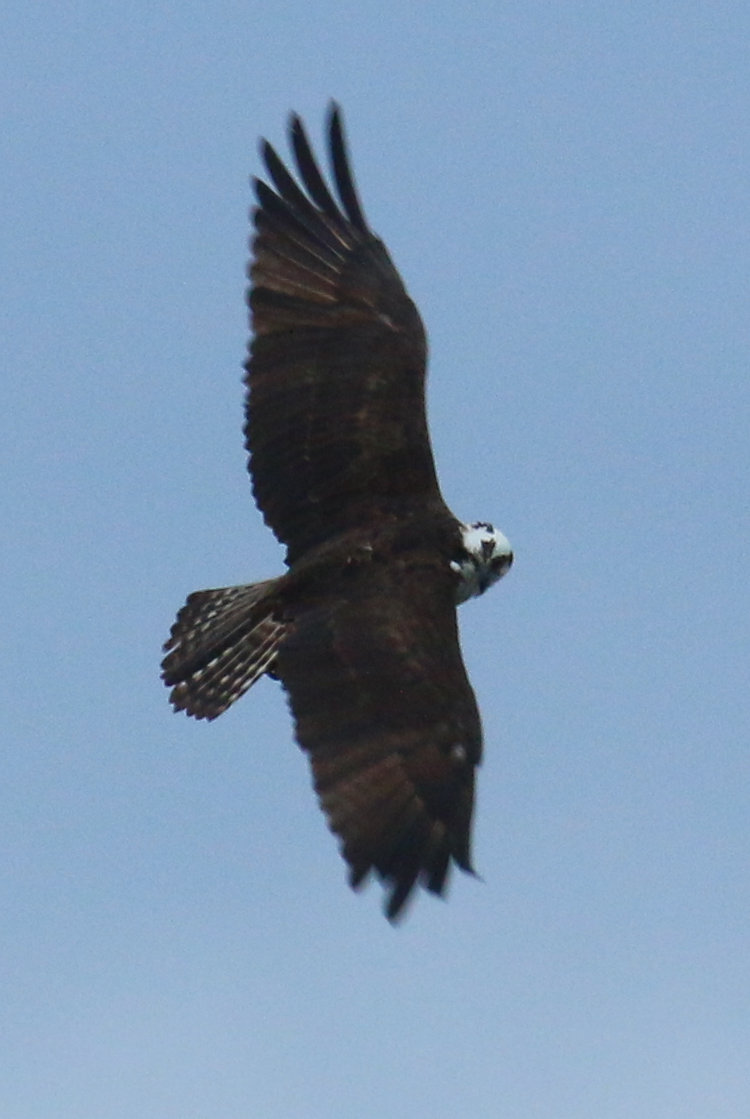
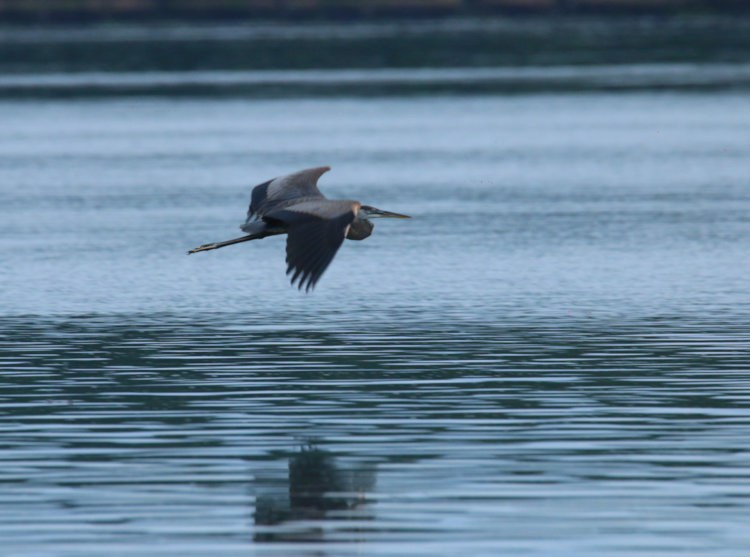
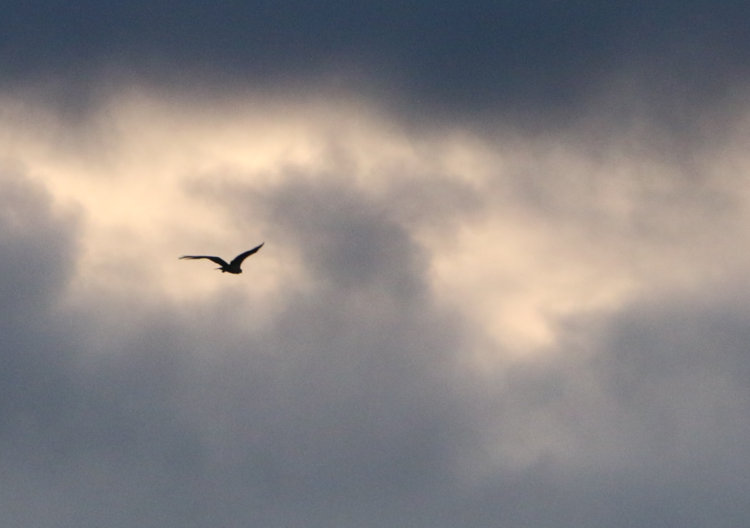
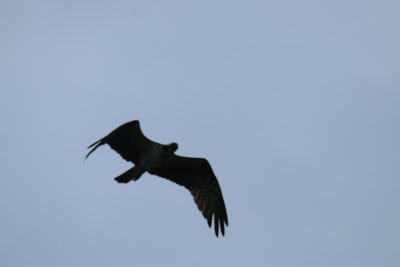 You might think you wouldn’t need exposure compensation when the sky is right around that 18% grey middle tone that meters are calibrated for, but the key factor is, the sky is significantly brighter than the subjects against it, especially without direct light on them to brighten them up a bit, so without compensation, the frames were looking like this. And yes, the sky looks exactly the same hue as above – the overcast is never perfectly uniform, so the frame at left was actually brighter than the frame above, since the frame above has been lightened by 2/3 of a stop; the difference is plainly visible in the osprey. This is exactly why exposure compensation is usually linked by default to the dial that sits under your thumb, so this can be adjusted on the fly as you might switch from aiming into the sky to aiming against dark foliage – you just have to remember to keep adjusting this compensation, better than I did for this frame.
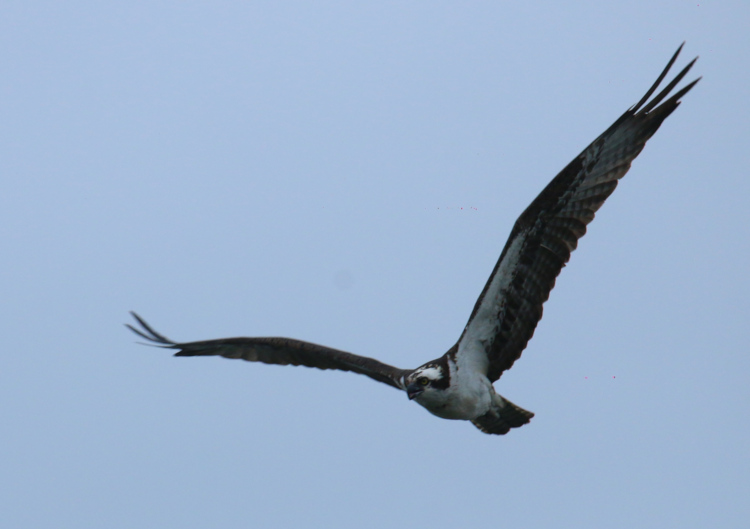
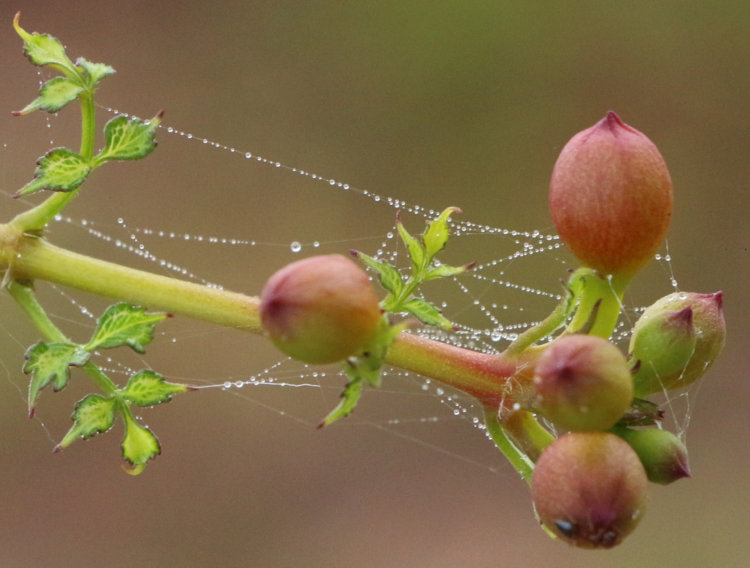
 Dipshit (I’m talking to myself – that’s what the italics mean. In this case, anyway.) This is not the last day of July, so you got the abstracts early, probably before they were ripe, and I apologize. I have no excuse, and should know by now to double-check my senile old brain, since this isn’t the first time it’s happened – it’s
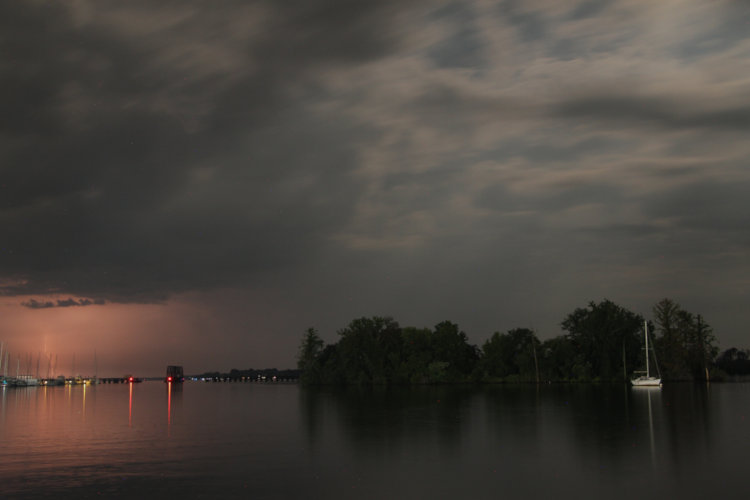
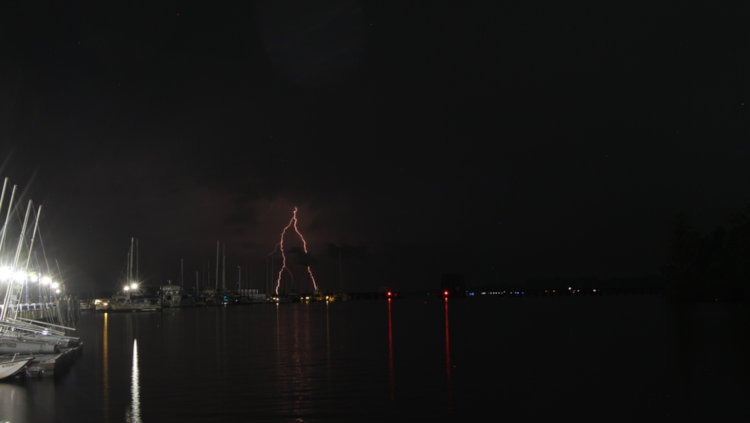
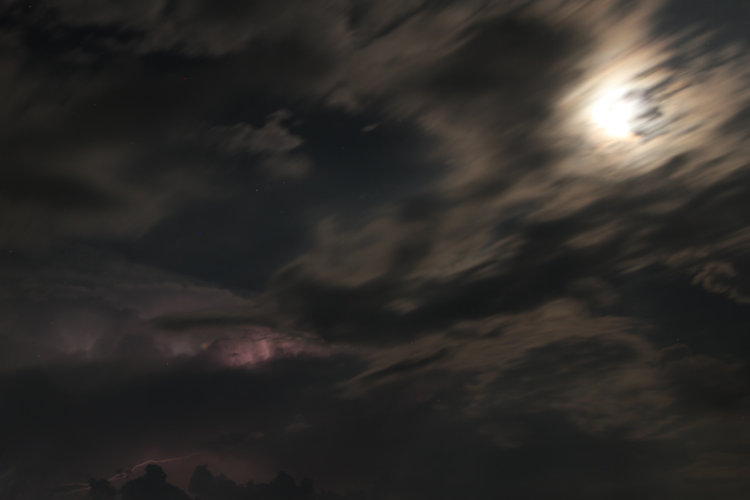
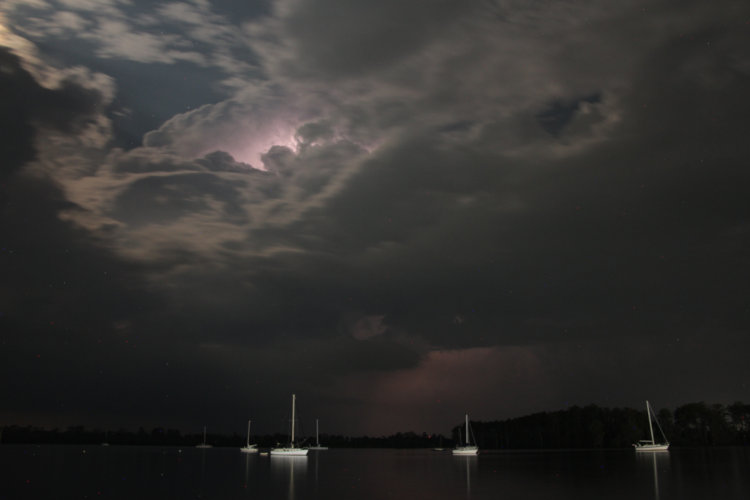
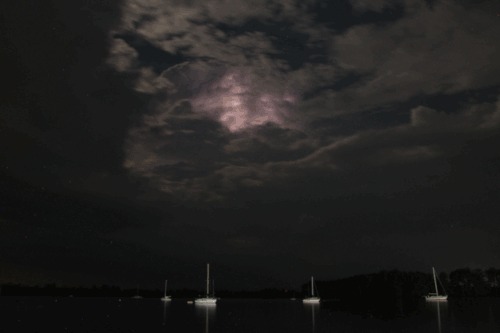
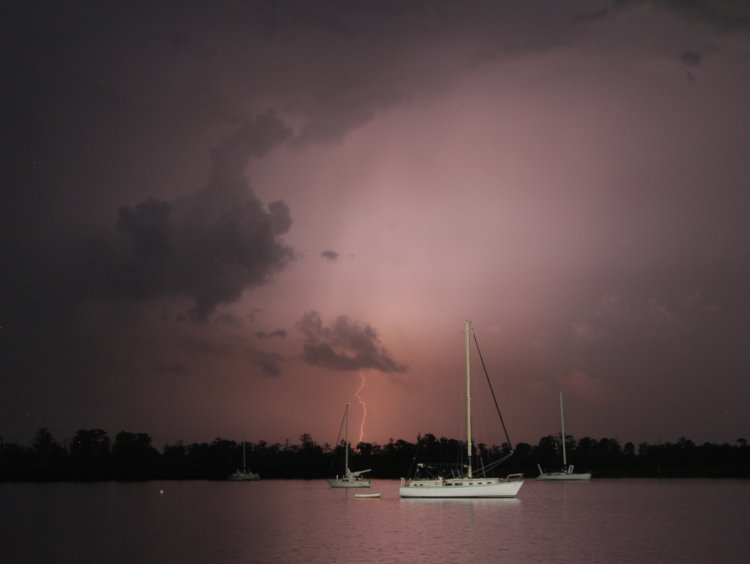
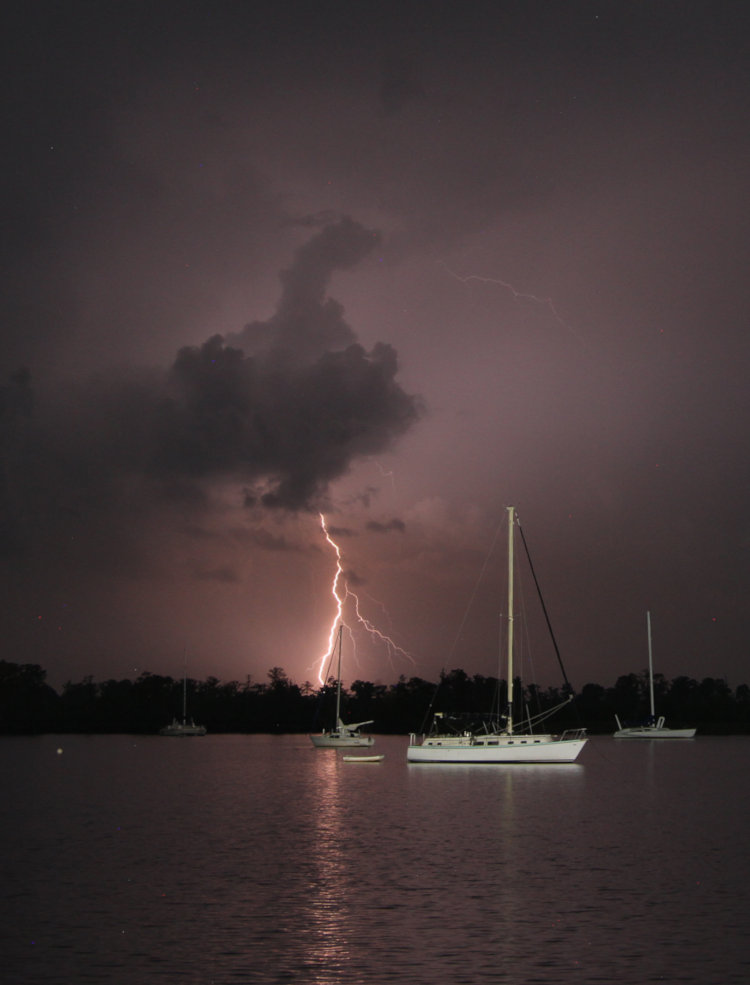
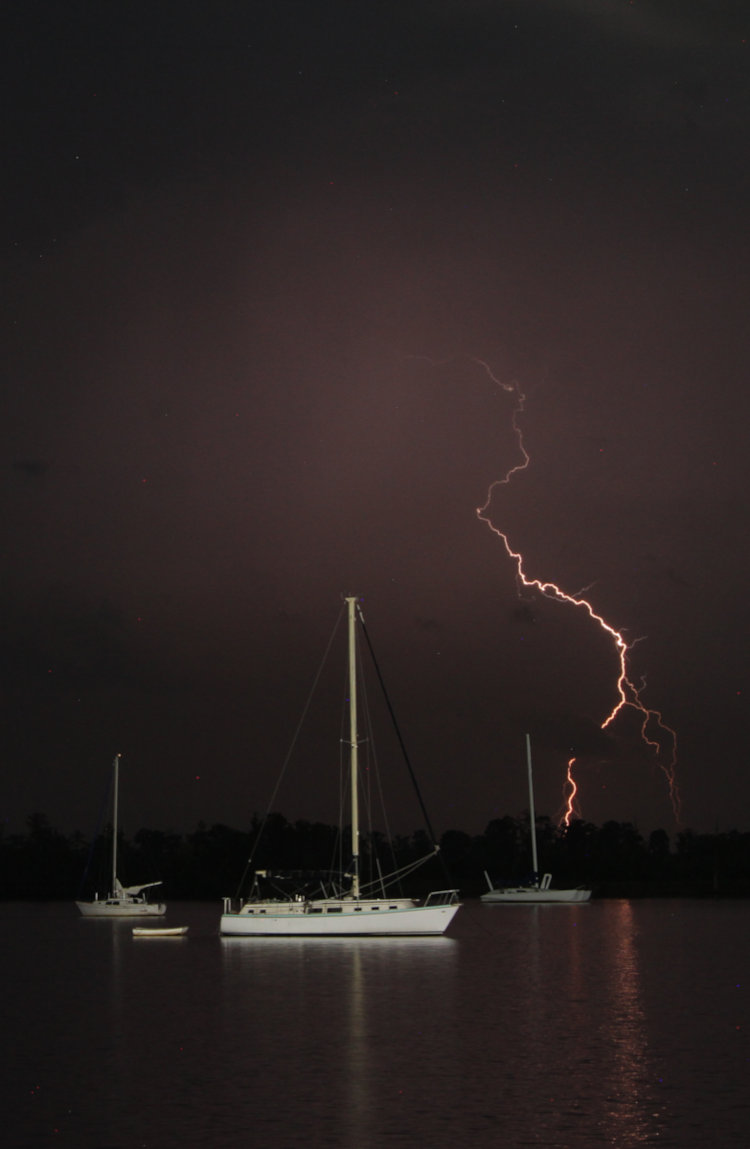
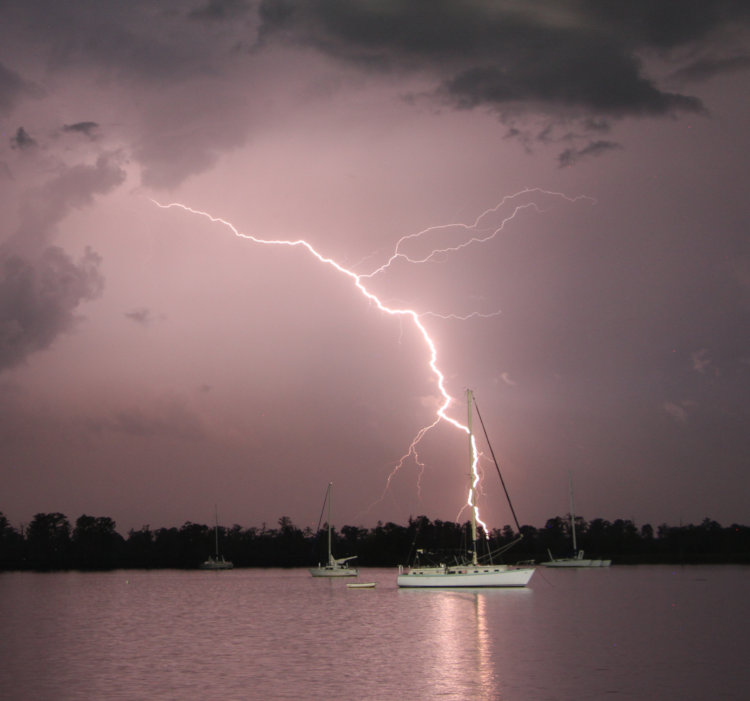
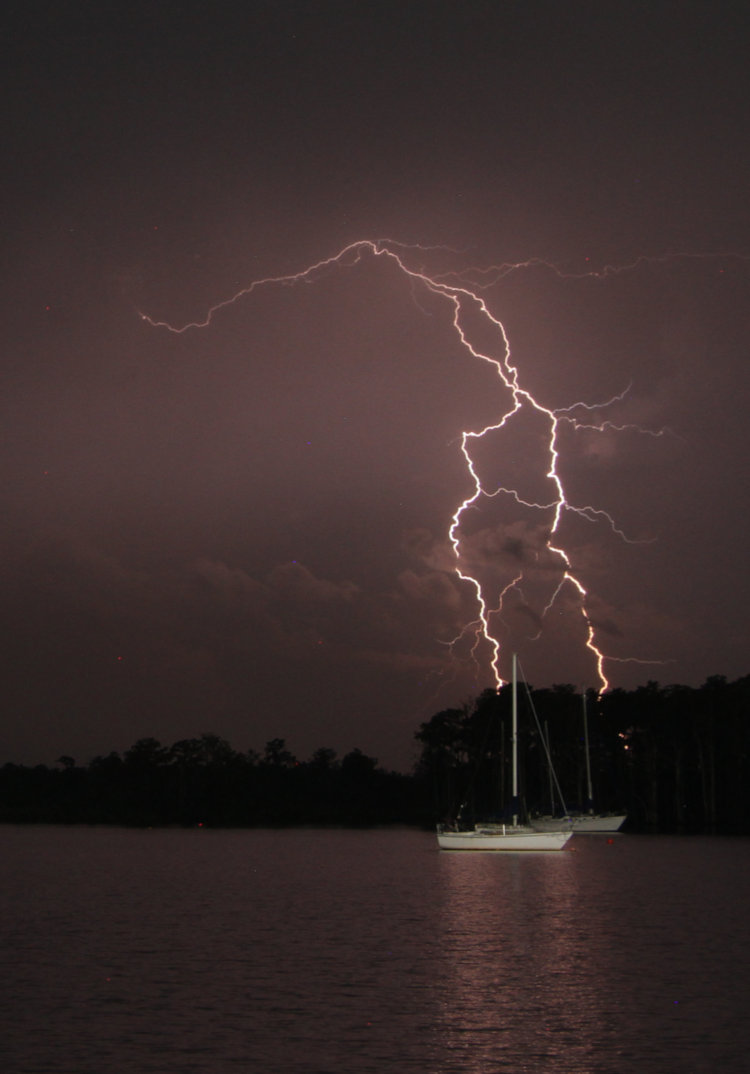
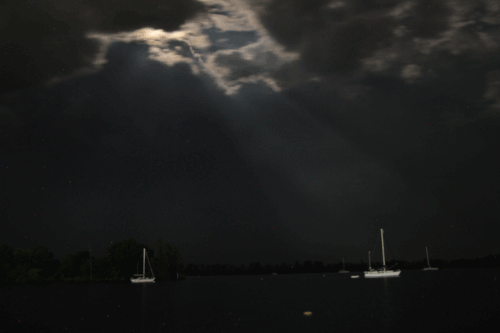
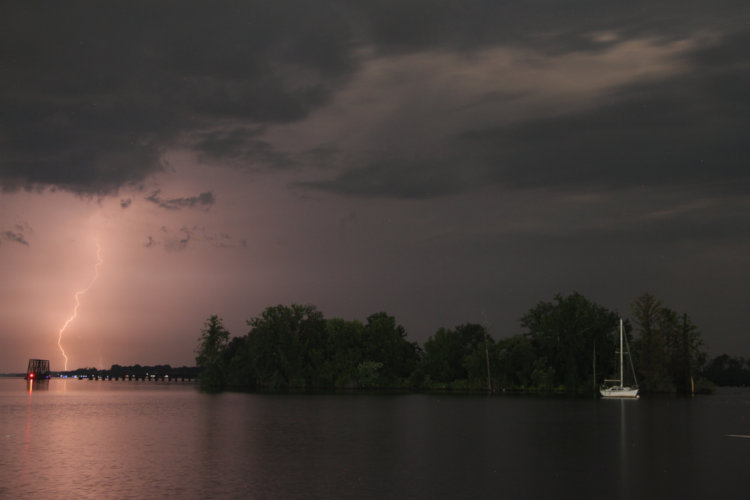
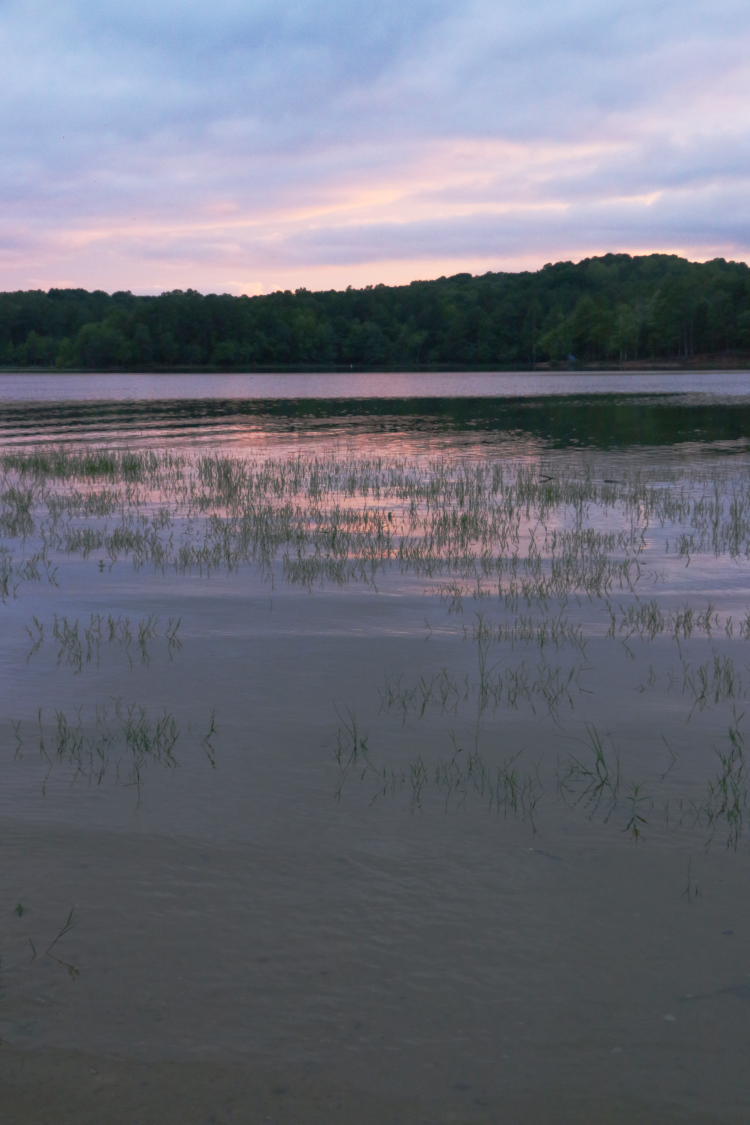
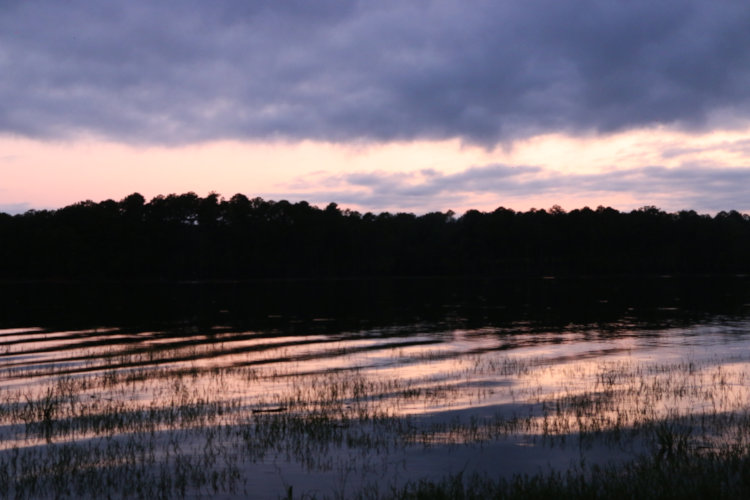
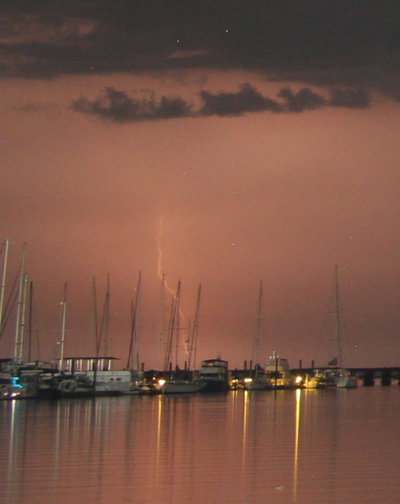 Last night we got a fierce set of thunderstorms, the kind that come with tornado warnings, which blipped our power here twice, preventing me from accomplishing too much on the computer. Soon after they’d passed, we could still see plenty of flashes lighting up the eastern sky, and I realized that the moon was also coming out while these were going on. That’s an opportunity I can’t let pass, so I drove down to the waterfront to see what was happening. That sunset pic up top there isn’t, since this was near 1 AM – you’re seeing a distant lightning strike instead, with supplementary light from the moon and the waterfront lights during an 11-second exposure. That’s a closeup of the strike to the right, many kilometers distant and almost obscured by the rain. It’s an ‘okay’ shot, but I would have been disappointed if this was all I had to show for the excursion. Luckily, it isn’t.