You know, poetic license is all well and good, but you’d think photographers could be more specific and descriptive. The periods where the sun is low on the horizon are usually called the “golden hours,” but the colors are often not just gold, and spend more time in the various orange hues than yellow or gold. We could have the amber minutes, and the saffron, the apricot and the pumpkin…
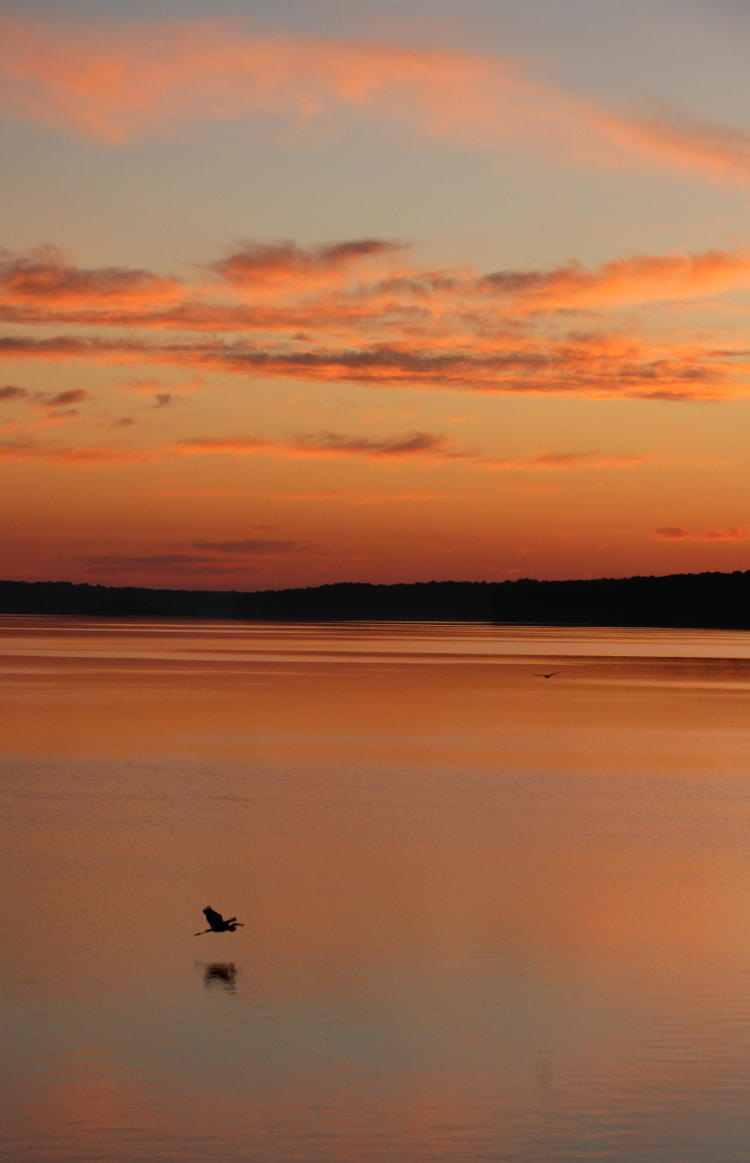
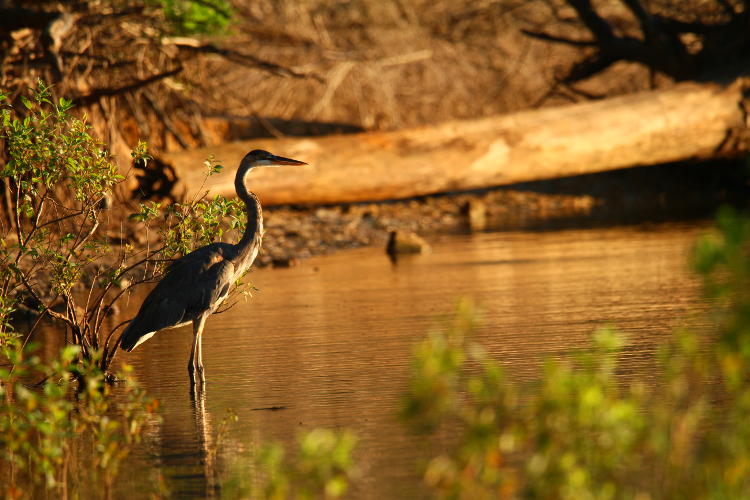
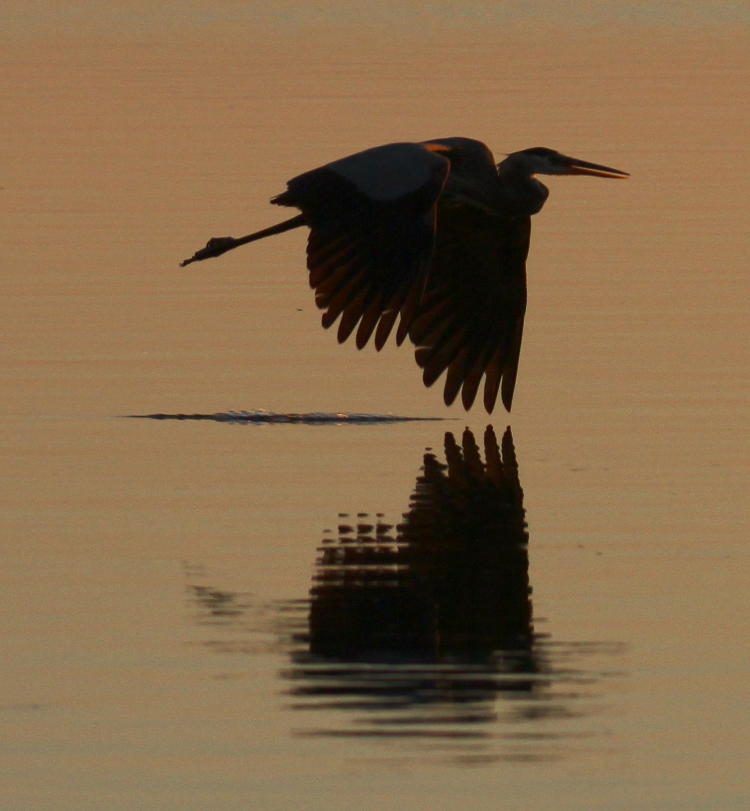
Anyway, the Obsessive Mr Bugg and I caught sunrise at Jordan Lake and chased birds, and for once, the sunrise colors were pretty deep and vivid, remaining that way for a decent period too; the upper sky was largely cloudless, but the horizon had enough humidity to last a while. And a handful of great blue herons (Ardea herodias) were being semi-cooperative.
Our entry point was fairly distant from their fishing locale, save for one that was almost beneath us down the embankment – that was the one that flew off soon after our arrival, seen in the first shot above. We begun slowly working towards the ones we could see, keeping our eyes open for ospreys and eagles at the same time, but they were remaining resolutely scarce. No biggie – the herons kept us occupied for a while.
And just so you know, the white balance was set for Sunlight, which means no corrections, which is the way to keep these lovely hues.

One heron took up a position closer to us and was enjoying the abundant activity of the small fish along the waterline (which we could see where we were as well.) This one deserves a closer look, so let’s crop and enlarge.

Hey, when I can make out the pupils on the fish, I’m pleased.
By the way, in case you’re unfamiliar with great blues, they stand a little over a meter tall in their average stance, but can easily stretch up almost to two, and their wingspan often exceeds that; they’re not small birds. The fish seen here probably measures about 10cm in length.
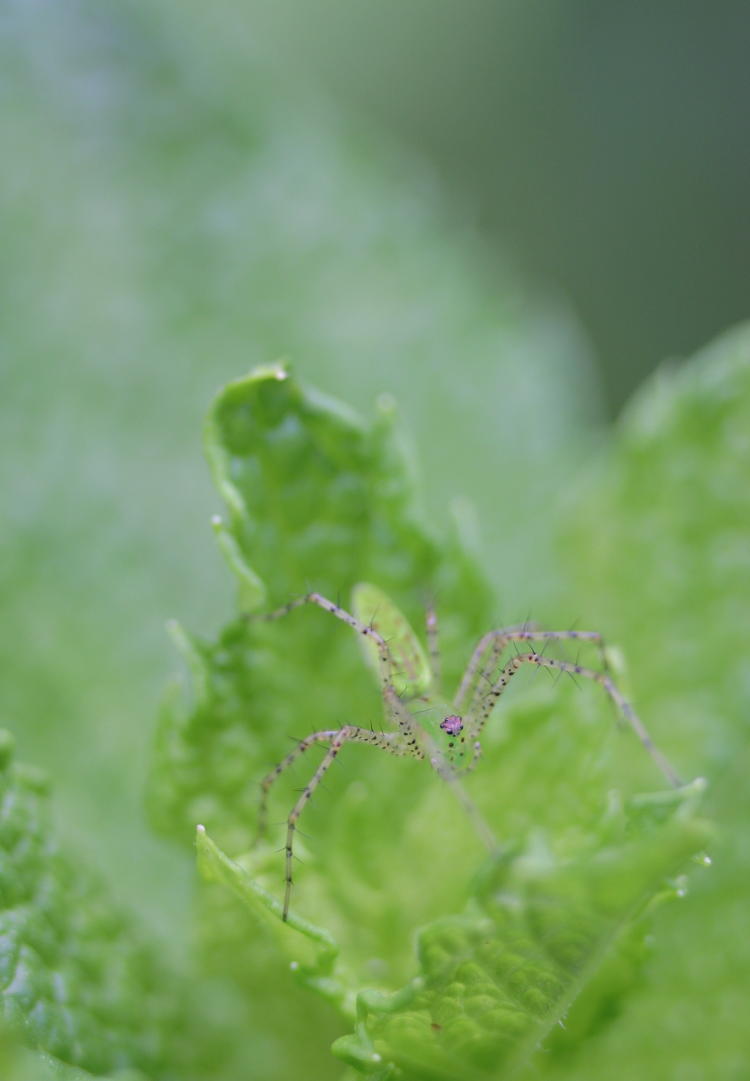
We’ll do this more-or-less in order, so in between we have a long-jawed orbweaver (genus Tetragnatha) hanging out in some low-hanging branches over the water, as they do. I shifted to put the bright sky behind it, which brought out some nice detail even in silhouette. Overall length is probably 4-5cm – pretty big for spiders, but exceptionally shy.

The heron closest to us started to get antsy at our approach, and eventually flew off for further downshore where the other two were foraging. Normally, I see things like this all the time and nobody seems concerned, but this time, one of that pair farther off seemed offended at this approach, and took flight to convince the intruder not to hang around. This happened twice while we watched, and it was fun to see the chase take place.
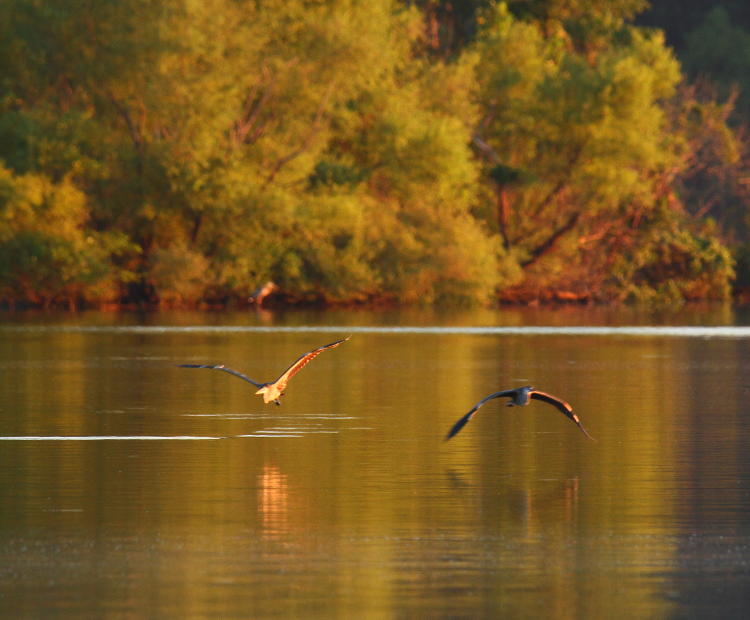
Unfortunately, the light wasn’t all that bright yet, and the lower contrast made the herons hard targets, so between shutter speed, subject movement, and focus tracking issues, too few of the many shots that I fired off actually came out; this one is only acceptable at this size and no larger. And this is as far as they got off of the water, knowing that climbing would take more energy and slow themselves down, not something you want to happen if you’re fleeing or chasing. If you look at the water behind the one on the left, you can see several patches of disturbed water, evidence that the heron as actually tapping the water with its wingtips as it flapped.
However, when they got out to where more light was reflecting from the water, the exposure meter could set for that and get a better shutter speed, though at the cost of silhouetting the birds, but at least these started coming out sharp.

There’s a little detail that I especially liked with this frame, and it’s how the eye on the lower heron has caught the sunlight. But it was also nice that the upper heron dropped low enough not to be against the darker trees on the horizon. And the reflection is a good element.
The chaser returned to its fishing spot after a pursuit of a couple hundred meters, and we worked slowly along the curve of the shoreline, approaching both (the other had stayed in place during all the hoohah.) Over time, we could put together some nice portraits.
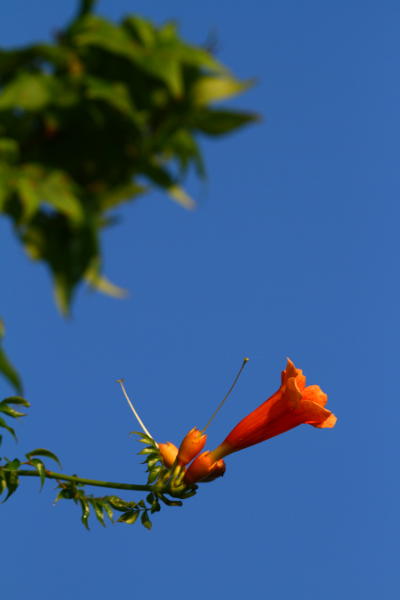 And while we approached, over a period of several minutes, we kept our eyes out for other items of interest, like this trumpet flower against a deep blue sky opposite the sun, still catching a little yellow light. It might be hard to believe these were shot within the same time frame, but it all depended on which direction one faced, in this case much closer to vertical with the sun at our backs. It was imperative, of course, to set the flower against this deep sky for maximum color contrast, so I had to pick a particular blossom and shift position until I got a nice clear opening behind it. Such opportunities can just happen, but it’s better to recognize when you can make it happen as well. The same may be said for the heron above, where the head stands out against the bright log distinctly, which is far better than setting it against the clutter than can be seen to the left and above it. A couple of steps, maybe a little crouching or stretching, is often all it takes.
It took a little more to line up the next shot, but not a lot. We had to wade out into more open water, attracting more attention to ourselves, so this was done slowly and casually, which the herons really do respond to. Staring is always a bad move, because that’s predatory behavior.

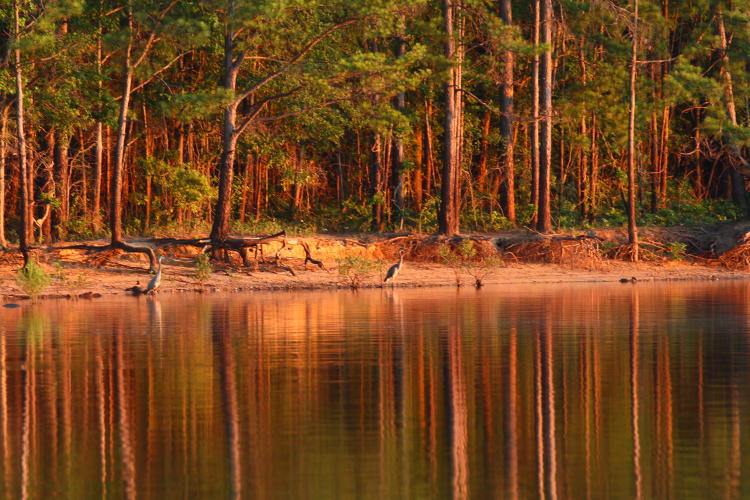
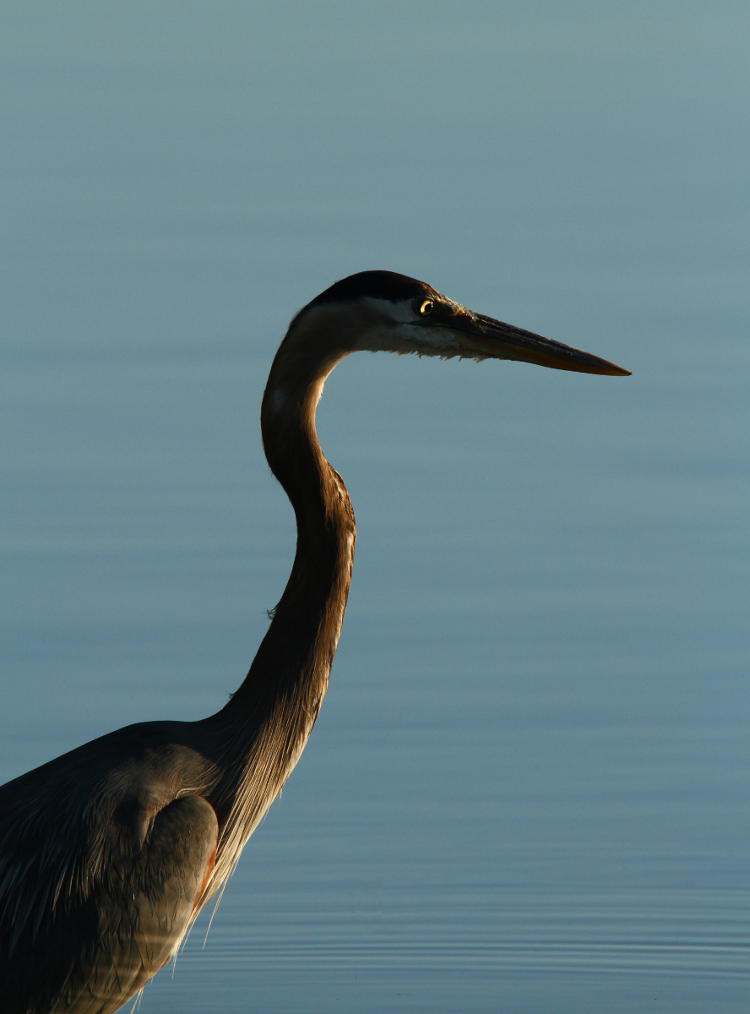
You can see now that the light is finally getting closer to the standard daylight white hue, putting some of the proper color on the herons now. So you know, this was shot better than half an hour after the pair with the tree reflections (the second image in the post,) and almost an hour after the first image in the post, which was pre-sunrise. That’s actually a good length of time to retain these colors so, yay.
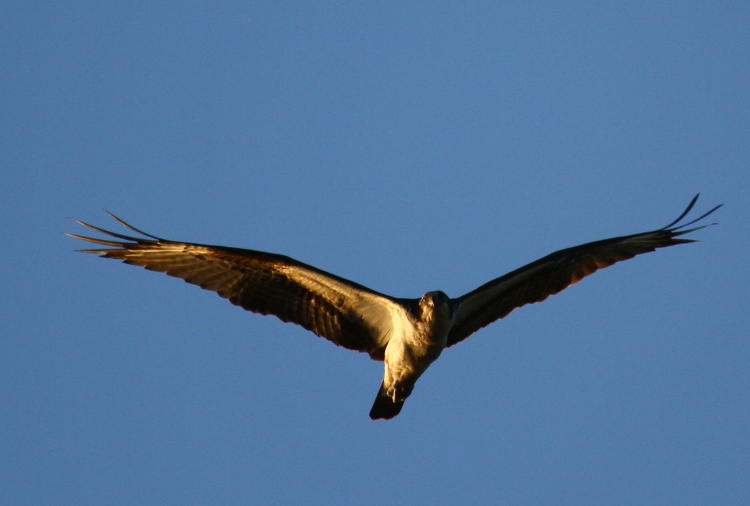
And in there somewhere, we were treated to a flyover by an osprey (Pandion haliaetus,) who decided not to do any diving for fish while we watched.
The difference in shooting position should be clear from the shadows, though again, I’m glad I caught some light on the eye – you realize, of course, that there are other frames that did not catch this detail, which is why I selected this one. But the extensive shadows and the angles thereof tell us we’re aimed more toward the sun, and notice how the sky has lost a lot of the color it had with the trumpet flower – this has nothing to do with changing conditions, just the way the light scatters with angle.
And back to the herons.
The light’s not just hitting the eye here, but also telling us that, despite our closing approach, the heron was still intent on fishing, not terribly spooked by these two stalkers. I suppose that ice pick attached to the front of its face might have had something to do with this nonchalance.
I want to draw attention to another detail that I liked, which is the striped reflection from the water on the wings of the bird, not quite mirroring the ripples in the water itself. No, I did not notice this at the time.
Eventually, we had drawn too close and both herons opted to seek other hunting grounds; we would have let them be but we suspected there might be some more subjects further along the shore, and the land at that point was actually a narrow band between the lake and a flood pond, a strange bit of geography created many years back when a rail line crossed this branch of the lake right there. This meant it was impossible to avoid spooking them, but the lake sees so much activity from bathers, fisherfolk, and boaters that there are almost no ‘safe’ areas anyway. Much worse, far too many of these people seem incredibly incapable of picking up their own fucking trash, and portions of the lakeshore along our hike were embarrassingly filthy, even with numerous posted signs reminding people to clean up after themselves. It’s pathetic.
Our further investigations turned up almost no more photo subjects, and after a while we turned back to check out other areas. In the distance, a lone osprey was calling occasionally but disinclined to take wing, and no eagles showed at all. But getting close to the parking area, Buggato spotted a black vulture (Coragyps atratus) sunning itself on a low branch, soon joined by another, and again, a little careful positioning put the blue sky to good use.
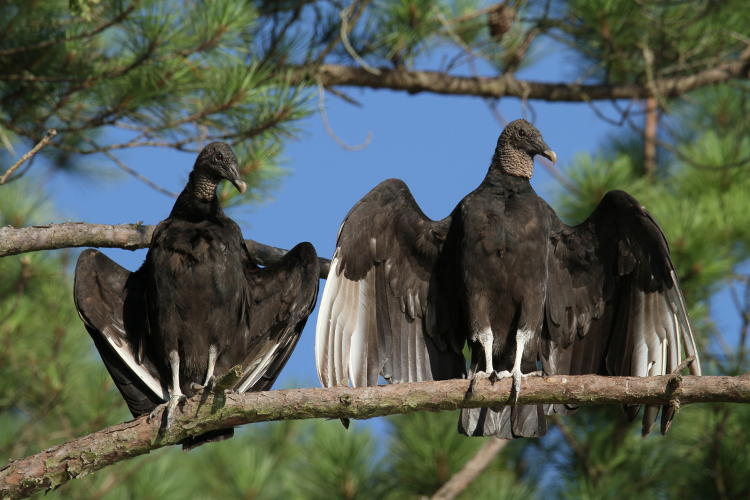
We never imagine such things, so it was slightly surprising to see the two nuzzling for a moment as they drew together. It just doesn’t seem like behavior carrion eaters would engage in, but there’s no reason why they shouldn’t.
I’ll close the post with my favorite image from the day (after opening with my second favorite – strong bookends, you know,) though we’re well out of chronological order with this one; too bad. As one of the herons cruised past, its wingtips were again touching the water on the downstroke, and I caught a newly-made wake just after it happened, purely by happenstance.
If asked, however, I’ll invent some story about staking out the birds for days trying to time just the right moment with the sunrise, because properly fartsy images always come with hardship. I can admit it here because nobody’s read this far anyway.


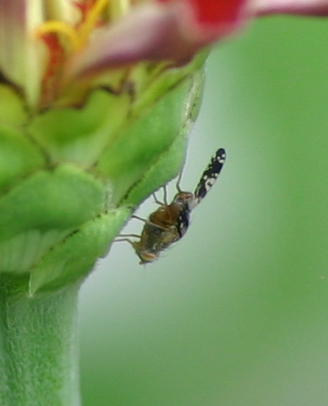 But what’s this? Unseen at the time, some tiny insect is lurking underneath the same blossom, conveniently highlighted by a spot of bright background that gives it a small halo – either that or it’s divine in some way. Ya never know. Shown at right at full resolution, it’s obviously tiny when scaled against the swallowtail, and since I never spotted it at the time, I never tried to go in closer to get better detail shots. It looks supremely funky, but I’m betting it was simply cleaning its wings in that moment and so they were pitched out at odd angles, and it’s only a variety of fruit fly that uses patterns on its wings to camouflage itself against predators. There remains the possibility that it was having body work done and it’s spotted with primer before the finish coat is applied – it may be embarrassing and unsightly, but fruit flies gotta make a living too.

 For those of you following at home, I am still working on the site migration, mostly because of WordPress, and PHP 7.2.29. PHP is a programming language, which WordPress runs on, and when it upgraded into version 7, it changed an awful lot of commands, which kicked out numerous scripts and options that were written before that time; this has been a source of much work and frustration on my part for the past several days. I’m still trying to get the blog looking the way I like, but some changes are inevitable – and as far as I’m concerned, not changes for the better, though I’m going to try and make it look that way. There will be a post that announces the changeover, that will only be posted within the new host, so when you see it, you’ll know you’re on the new site. Though I imagine it’ll be obvious anyway…
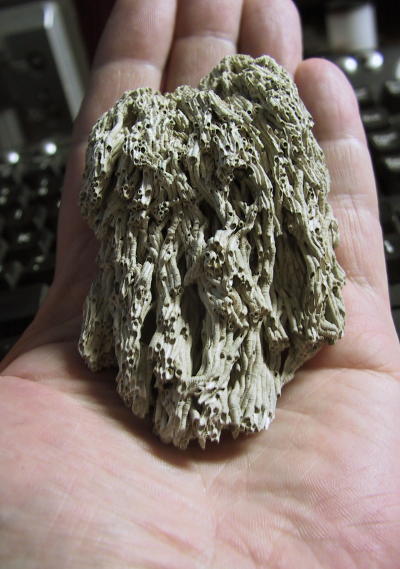
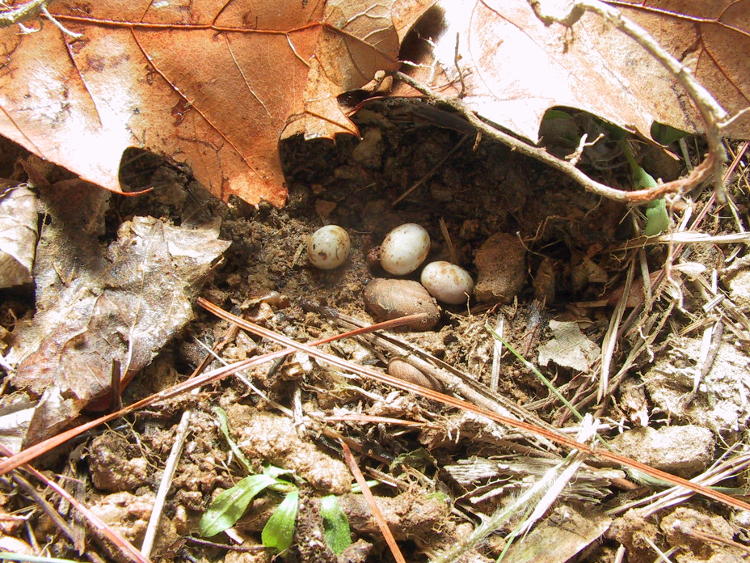
 Two years later in 2009, I was doing some detail shots of a bit of fossil coral that I’d found in a tailings pit, which makes it, um, old. It’s actually hard to pin down, because it was found in sedimentary limestone, meaning former ocean bottom, that underlies the ‘topsoil’ of eastern North Carolina – that all eroded off of the Blue Ridge Mountains, themselves formed when North America was grinding against Africa, pre-dinosaurs. So how old the sea bottom underneath is, no one can say easily, and silly me, I never had this decay-dated (and not Carbon13, because it’s way too old for that to work.) Anyway, I show it here because I find it absolutely fascinating that I was doing detailed photos of old sea-stuff on the same date two years apart. I know, right?

 In the interim, I have to post a meme found online, which exemplifies my thoughts about blogging better than I could ever express in writing. Much as I hate using sports references, this one works well.

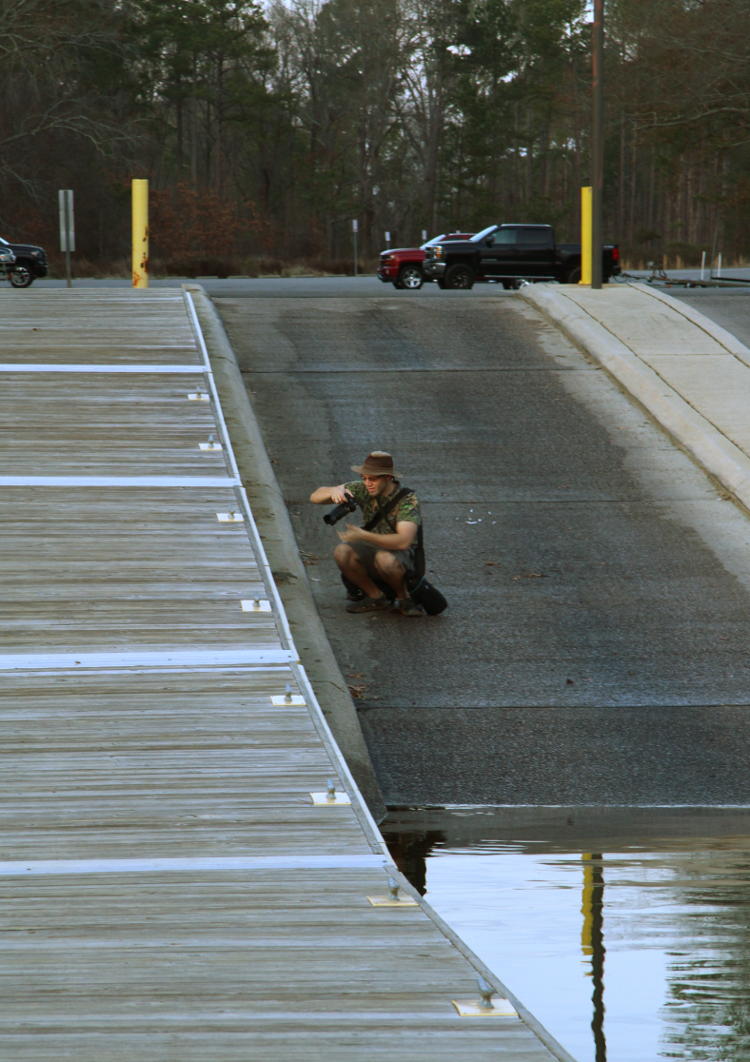
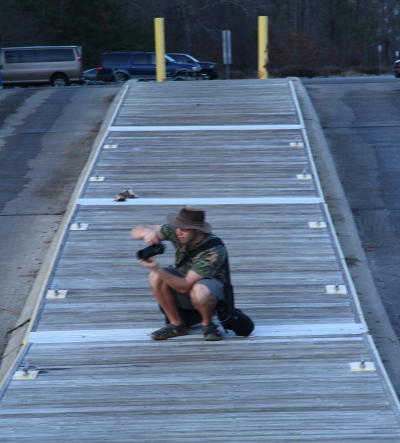 That was certainly a special outing, because he was in rare form that day. To the right is another from, literally, not five minutes later.
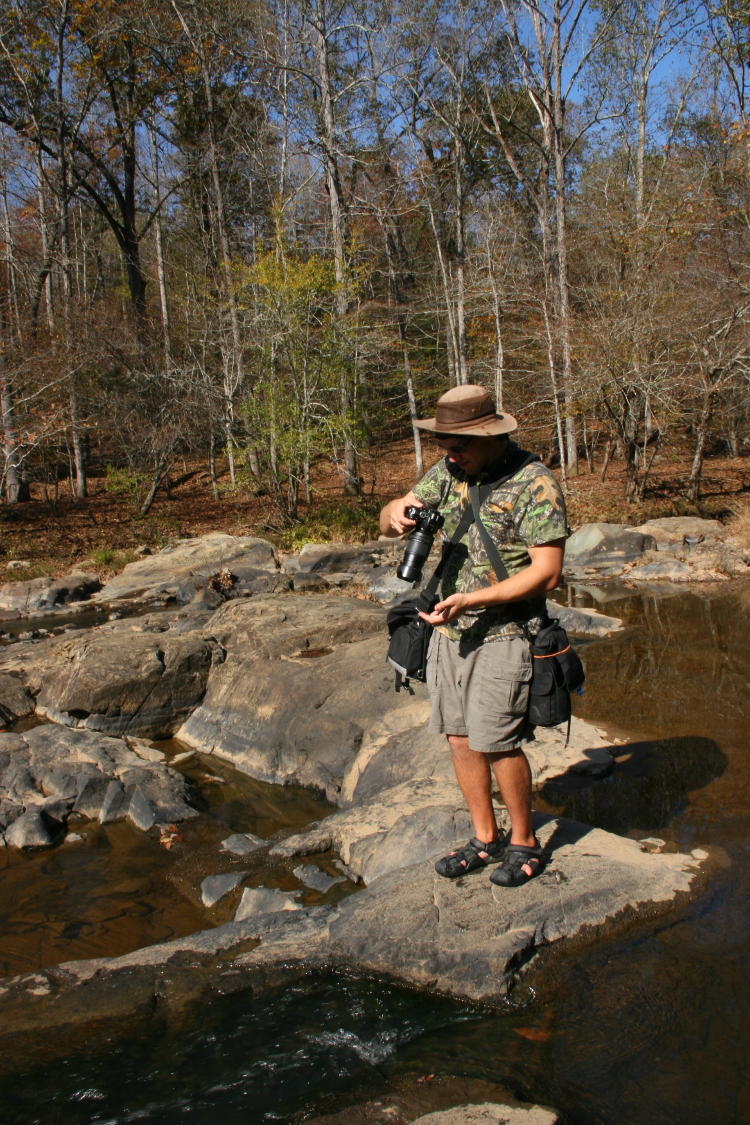
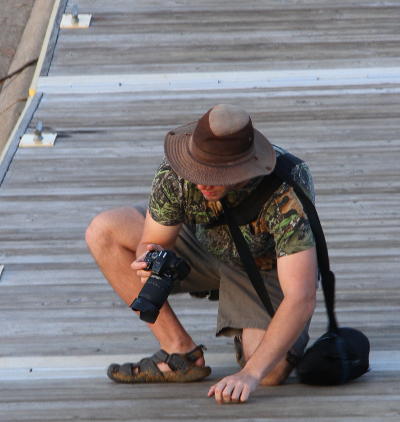 Yeeeaaahhhh, maybe he was just getting up from his prone shooting position and happened to glance in the same general direction of his camera, and is not actually looking at the LCD. We’ll give him the benefit of the doubt for this one. That’s okay – we have more.
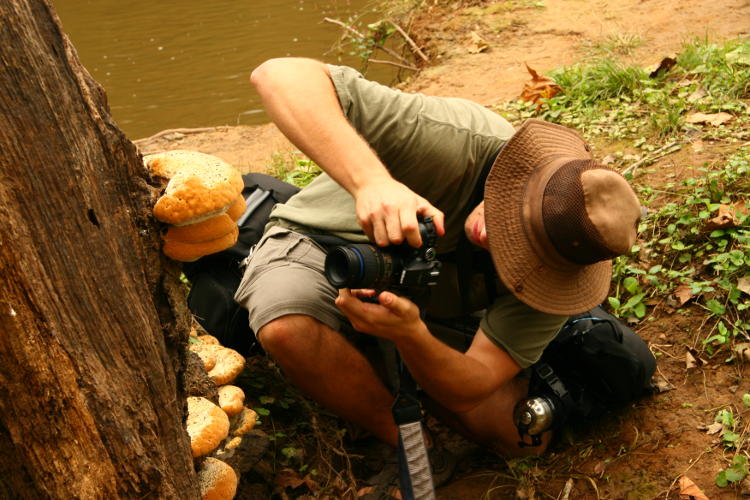
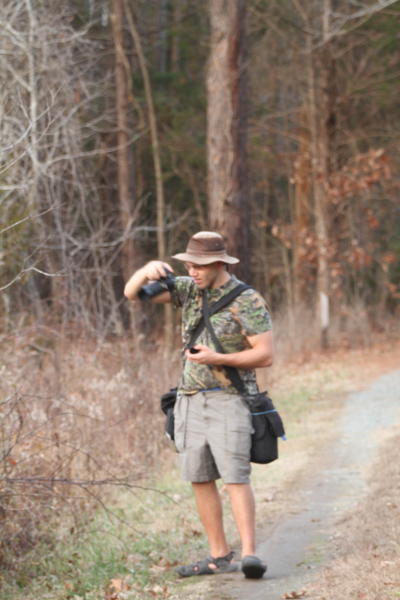 One more? Okay, one from a foggy morning out at Mason Farm Biological Reserve.
 A close look at the full resolution of that now-ancient camera shows the reason: we’re just seeing an oddly-shaped bough, the supporting branch having disappeared at the lower resolution used for blog display. Damn. I thought I’d discovered some new physics.

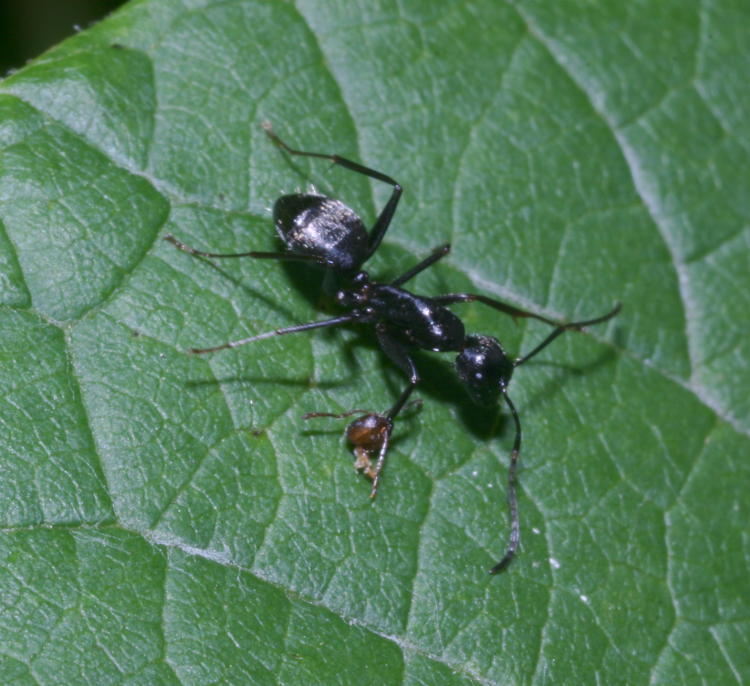
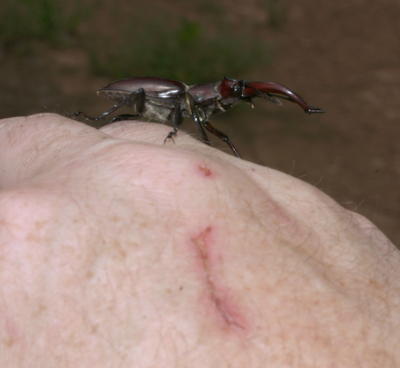 I took a lot of photos, including a couple of attempts at scale, and one of them told me a little more; that’s my right hand in the shot, which means that I’d fired this off with my left. This had to be fun, since the shutter release and grip are on the right of the camera. Meanwhile, that big ugly wound on my hand is not courtesy of the stag beetle, which did no damage whatsoever, but our washing machine instead, when the lid slammed down just as I was reaching inside. I still have that scar…